Showing posts with label digital photography tips and techniques. Show all posts

Monday, July 12, 2010

Instructor's Tip: Graduated Neutral Density Filters - Part 1

I hope you enjoy this week's "Instructor's Tip" by one of my favorite instructors, award winning nature photographer Russ Burden. I personally have a ton of trouble exposing to maintain white details especially when shooting things such as skiers on snowcapped mountains. To learn more about how Russ captured the above image, join him on one of his photo tours. Visit Russ Burden Photography to get more information.


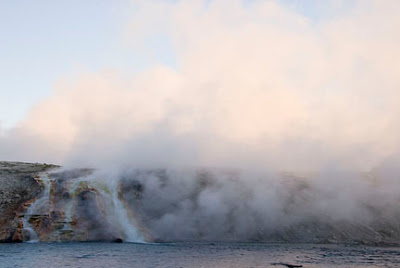
WITHOUT GRADUATED ND
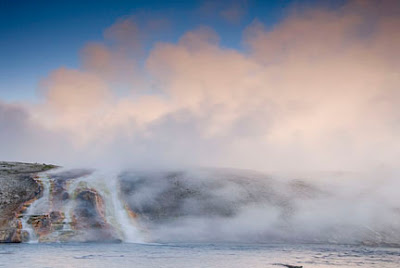

WITH GRADUATED ND

Graduated Neutral Density Filters - Part 1
I recently gave a show at a local camera club and at the end, one photographer asked, “Why do you use filters if you’re shooting digitally?” This brings me to the point of this article. Why is there a mindset that if you’re a digital shooter, you don’t need filters? I want to capture the RAW information with as much perfection as possible. I don’t want Photoshop to become a “rescuer.” I want it to be an “optimizer.” Additionally, I see myself as a photographer, not a mouse wrangler so the less time I spend perfecting the image after the fact, the better.

I know there are multiple approaches to mimic the effect of a graduated neutral density filter using Photoshop, but all take time. The bottom line is it takes a lot more time than the ten seconds it takes me to slide a graduated neutral density filter in front of my lens. Also, I’m firmly of the belief that if the image is worthy of taking up flash card space, it should be captured properly from the get go. This is especially true if you’re still shooting film. I know that the slide or negative can be scanned and corrected, but all these extra steps mean you’re adding unwarranted time to your work flow.

As a photo tour leader to some of the most magnificent locations in the US, much of the instructional work I do with my participants deals with scenics. With this in mind, there are two essential filters that I place on my list of required items for the tour. A graduated neutral density is one along with a polarizer. I recommend the grad filters to tame the contrast when shooting reflections and also to tame contrast at sunrise and sunset. By placing the dark part of the filter over the light part of the image area, the contrast range is tamed producing a more evenly lit photograph. Depending on the situation, it may call for a one, two, or three stop difference. Thankfully, these filters are made in each of these strengths. Additionally, there are soft and hard edge options. If the transition point between the light and dark area is abrupt, it calls for the hard edge variety. Conversely, if there’s a smooth gradation, the soft edge is more beneficial.

Check out Burden's "How To Tips" featured on Outdoor Photographer's website. The seven that are dated February 4th are his. Just underneath the articles, be sure to click on page 1 to see an additional 9.

Don't forget to check Take Great Pictures for Burden's most recent tips. On the home page, click on the "Photo Tips And Techniques" button in the left hand column. Additionally, check out his "Digital Tip of the Month" found by clicking on the Digital Photography button.

To learn more about this subject, join Burden on one of his photo tours.

Monday, June 7, 2010

Instructor's Tip: Window Light Portraits

I hope you enjoy this week's "Instructor's Tip" by one of my favorite instructors, award winning nature photographer Russ Burden. I personally have a ton of trouble exposing to maintain white details especially when shooting things such as skiers on snowcapped mountains. To learn more about how Russ captured the above image, join him on one of his photo tours. Visit Russ Burden Photography to get more information.

Photo by Russ Burden

WINDOW LIGHT PORTRAITS
Window light is often used in portraiture. Its advantages are the convenience, ease with which to work and low cost. Its disadvantages are the reliance upon the weather, light levels are usually low and backgrounds may be cluttered with furniture or wall hangings. Working around the disadvantages, the advantages far outweigh them based on the beauty of images that can be made.

The light emitted from a north facing window is very delicate in nature. Not receiving direct sun, it’s soft and easy to work with. Effectively, the light is similar to that from a studio soft box. How close the subject is placed to the window impacts the overall quality. The closer the model is, the greater the contrast between the highlights and shadows.

If north facing windows are not available, any window can yield similar results by diffusing the direct sunlight with a white sheet or shower liner. Lace curtains work well and can be incorporated into the composition for effect. If the window is included in the image, make sure what’s outside is in harmony with the mood of the image. Additionally, realize that much of the exterior portion will be overexposed. The size of the window will have a direct impact on the quality of the light. The bigger the window, the broader the light. This translates to a less contrasty image.

The attached photo is an atypical window light shot to get you to think outside the box. I used direct morning light filtered through slotted blinds. It’s a set up I did for a stock shoot. I encourage you to experiment with different subjects photographed in different window light conditions so you’ll better learn how to read and utilize all types of light.

Check out Burden's "How To Tips" featured on Outdoor Photographer's website. The seven that are dated February 4th are his. Just underneath the articles, be sure to click on page 1 to see an additional 9.

Don't forget to check Take Great Pictures for Burden's most recent tips. On the home page, click on the "Photo Tips And Techniques" button in the left hand column. Additionally, check out his "Digital Tip of the Month" found by clicking on the Digital Photography button.

To learn more about this subject, join Burden on one of his photo tours.

Monday, May 10, 2010

Instructor's Tip: Preserve White Detail

I hope you enjoy this week's "Instructor's Tip" by one of my favorite instructors, award winning nature photographer Russ Burden. I personally have a ton of trouble exposing to maintain white details especially when shooting things such as skiers on snowcapped mountains. To learn more about how Russ captured the above image, join him on one of his photo tours. Visit Russ Burden Photography to get more information.

Photo by Russ Burden

Preserve White Detail
Photographers need to be concerned when white is a key part of an image. If detail is blown out in white areas, it can’t be recovered. This makes getting the proper exposure critical. When white is prominent, bias the overall exposure on this tone. Check both the blinking highlights and the histogram. You’ll need to adjust your exposure based on how much white is influencing the exposure and also how much sun is playing upon the white subject. The more intense the white, the more you’ll need to compensate.

When properly exposed, images where the main subject contains a lot of white can be very dramatic as the subject becomes more pronounced due to its light value. In that the viewer will always be attracted to the brightest part of the image, there will be no doubt as to what the photographer intended the viewer to gaze upon. If the white subject can be offset against a dark background, it increases the contrast and emphasizes the subject that much more. Look for ways to work with the contrast or use color to your advantage. The fewer colors the better as there will be less secondary information to confuse the person looking at the image.

Check out Burden's "How To Tips" featured on Outdoor Photographer's website. The seven that are dated February 4th are his. Just underneath the articles, be sure to click on page 1 to see an additional 9.

Don't forget to check Take Great Pictures for Burden's most recent tips. On the home page, click on the "Photo Tips And Techniques" button in the left hand column. Additionally, check out his "Digital Tip of the Month" found by clicking on the Digital Photography button.

To learn more about this subject, join Burden on one of his photo tours.

Monday, April 12, 2010

Instructor's Tip: Dramatic Coastal Shots

I hope you enjoy this week's "Instructor's Tip" by one of my favorite instructors, award winning nature photographer Russ Burden. To learn more about how Russ captured the above image, join him on one of his photo tours. Visit Russ Burden Photography to get more information.

Photo by Russ Burden


Two quick things:
1) There won’t be a Photo Tip of the Week next week as Russ will be in Monument Valley and The Slot Canyons of Arizona leading my photo tour. He'd love to have each of you join him on one so he can share his knowledge and enthusiasm with you.
2) Great News - if you’ve been following his weekly tips on Take Great Pictures, you noticed they weren’t being updated these past few months. Well that’s all changed and they’re back along with a new "Photoshop Tip of the Month." See below for all the details.

Dramatic Coastal Shots
Having lived on the east coast for many years, I developed a strong love for the ocean. While I was living there, I made many photo excursions to capture coastal light at both sunrise and sunset. Since moving to the Denver area, I now get my once a year ocean fix when I run my photo tour to Oregon and northern California in late May (one opening left - hint hint). The sunrises and sunsets of the landscape are gorgeous, but coastal photography goes far beyond capturing a fantastic seascape. The subject matter in any coastal area is endless. As a nature photographer I try to incorporate natural subjects into my images, but I’ve also shot my fair share of lobster traps, fishing villages, old salts working their boats, and many other subjects found in these areas.

As with most subject matter in photography, getting out early and staying out late to capture the sweet light of sunrise and sunset is key to getting the best images. The colors are richer, the tones are warmer, and the sidelight emphasizes the textures and patterns that grace these areas. Don’t overlook getting to each location at dawn and staying till dusk to capture the subtle colors at these times. If Mother Nature doesn’t provide you with a light show in the sky, try using colored filters to add some punch. Another filter you’ll find quite useful is a graduated neutral density to tame the contrast of the rising or setting sun if you include darker foreground areas in your composition.

Tides are important to coastal shots. Low tide means tide pools teeming with life and provide lots of subject matter. Low tide also means having rocks revealed that can be used as strong foregrounds. High tide may bring more dramatic wave action crashing on rocks or simply make for better subjects unto themselves. You’ll also want to be aware of the tide times for the sake of safety as you don’t want to get caught in an area from where you can’t escape if the tide comes in while you’re wrapped up in your photography.

Please help spread the word about my Nature Photo Tours so I’ll be able to continue sending The Tip Of The Week year after year. As I’ve re-designated 2010 to be The Year of the Photo Tour, I’d love to have you join me so I can share with you first hand all the great free tips I’ve sent out over the years. I look forward to seeing you on a tour.

Take a class with Russ or a fellow Digital Photo Academy instructor in your area, check out the Digital Photo Academy. I took Russ' intermediate and advanced courses last year, and he continues to be a strong source of knowledge and encouragement as I progress in my photography.

Check out Burden's "How To Tips" featured on Outdoor Photographer's website. The seven that are dated February 4th are his. Just underneath the articles, be sure to click on page 1 to see an additional 9.

Don't forget to check Take Great Pictures for Burden's most recent tips. On the home page, click on the "Photo Tips And Techniques" button in the left hand column. Additionally, check out his "Digital Tip of the Month" found by clicking on the Digital Photography button.

To learn more about this subject, join Burden on one of his photo tours.
Monday, April 5, 2010

Instructor's Tip: Patterns

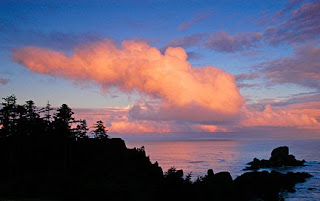
I hope you enjoy this week's "Instructor's Tip" by one of my favorite instructors, award winning nature photographer Russ Burden. To learn more about how Russ captured the above image, join him on one of his photo tours. Visit Russ Burden Photography to get more information.


Photo by Russ Burden

PATTERNS
All too often, photographers develop a sense of tunnel vision determined by the destination to where they’re bound. Depending upon the location, the overall big picture gets locked into the mind and no thinking outside the box occurs. For example, a trip to an exotic foreign locale is planned. Visions of the sweeping countryside, people and their culture, big cities and the main tourist attractions become the focal points. With the preconceived notion and desire to come home with these images, ways of looking at other potential subjects are passed over.

Take for example a trip to Paris. High on any photographer’s list would be a great shot of the Eiffel Tower. Even amongst all the other structures of the Paris skyline, the Tower beckons to be photographed. Photographing it in its entirety is fine but often nets a cliched image. By isolating sections, juxtaposing other buildings against it or finding dramatic pieces within, different and maybe even better images can be made.

Interesting patterns are everywhere. From the sides of a building to the bark of a tree, patterns can be extracted from a multitude of subjects. Whenever like colors, shapes, lines or textures are repeated in specific intervals, the potential to make successful pattern photographs is there.

When searching out patterns, try to look for a composition where a single element breaks it up yet doesn’t interfere with its integrity. This creates a focal point for the eye while it simultaneously makes a stronger image. Try placing this element in an area one third in from the left, right, top or bottom of the frame. It will add intrigue and interest to the photograph.

Take a class with Russ or a fellow Digital Photo Academy instructor in your area, check out the Digital Photo Academy. I took Russ' intermediate and advanced courses last year, and he continues to be a strong source of knowledge and encouragement as I progress in my photography.

Check out Burden's "How To Tips" featured on Outdoor Photographer's website. The seven that are dated February 4th are his. Just underneath the articles, be sure to click on page 1 to see an additional 9.

Don't forget to check Take Great Pictures for Burden's most recent tips. On the home page, click on the "Photo Tips And Techniques" button in the left hand column. Additionally, check out his "Digital Tip of the Month" found by clicking on the Digital Photography button.

To learn more about this subject, join Burden on one of his photo tours.

Monday, March 29, 2010

Instructor's Tip: Depth of Field Basics, Part 2

I hope you enjoy this week's "Instructor's Tip" by one of my favorite instructors, award winning nature photographer Russ Burden. To learn more about how Russ captured the above image, join him on one of his photo tours. Visit Russ Burden Photography to get more information.

Photo by Russ Burden

Depth Of Field Basics - Part 2
Controlling the Depth of Field: With regards to focal length, the wider the angle of the lens, the more inherent depth of field it will produce. If the goal is to create images with lots of depth of field, stick with wider lenses. Conversely, as one progresses from medium to long telephotos, the depth of field becomes more and more narrow. This is why many landscapes are made with wide angle lenses and portraits are made with medium telephotos. Once you get to 300mm and greater, depth of field becomes very narrow and careful placement of the focusing sensor over the area of the subject that is most important is critical.


The last two factors that impact the range of sharpness both deal with distance. The closer you get to your subject, the more the background and foreground fall out of focus. This happens because the lens has to focus closer to its closest focus point which translates to distant elements falling out of the range of focus. The same principal holds true given the relationship of the distance of the subject from the background. If the subject and background are close to each other, then the proximity of all elements is such that most everything is sharp. Conversely, if the subject is moved far away from the background, the lens isn’t able to sharply render both the subject and the background which is far away. Both of these effects are enhanced using a telephoto lens with a low number f stop and both are reduced using a wide angle lens at a large number opening.

Take a class with Russ or a fellow Digital Photo Academy instructor in your area, check out the Digital Photo Academy. I took Russ' intermediate and advanced courses last year, and he continues to be a strong source of knowledge and encouragement as I progress in my photography.

Check out Burden's "How To Tips" featured on Outdoor Photographer's website. The seven that are dated February 4th are his. Just underneath the articles, be sure to click on page 1 to see an additional 9.

Don't forget to check Take Great Pictures for Burden's most recent tips. On the home page, click on the "Photo Tips And Techniques" button in the left hand column. Additionally, check out his "Digital Tip of the Month" found by clicking on the Digital Photography button.

To learn more about this subject, join Burden on one of his photo tours.
Monday, March 22, 2010

Instructor's Tip: Depth of Field Basics, Part 1

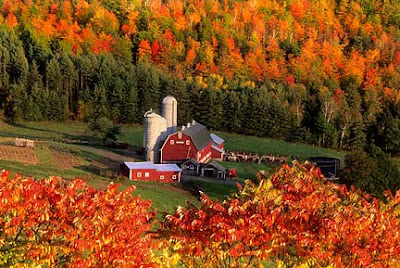
I hope you enjoy this week's "Instructor's Tip" by one of my favorite instructors, award winning nature photographer Russ Burden. To learn more about how Russ captured the above image, join him on one of his photo tours. Visit Russ Burden Photography to get more information.


Photos by Russ Burden

DEPTH OF FIELD BASICW - Part 1

When it comes right down to it, depth of field is synonymous with range of focus. It only seems natural that a photographer would want to produce a picture with a wide range of focus, but this is not always the case. If everything in the image is tack sharp, it tells the viewer to look at every detail and that every detail is important. Conversely, if only certain subjects in the image are sharp, the viewer is drawn to those areas and the rest of the elements become secondary. In the case of landscapes, images work better when everything is sharp from the foreground to the background. But for portraits, and many other subjects, the image is more successful if just the main subject is sharp and the remaining elements fade into softness. So how does a photographer create specific ranges of focus?

Depth of field is controlled by a combination of the following: the f stop used to make the picture, the focal length of the lens, subject distance from the camera, and subject distance from the background. With regards to f stop, the higher the number of the f stop, the greater the depth of field. In other words, with all other factors being equal, f22 will create much more depth of field than f4. This translates to a more sharply rendered foreground and background. With this in mind, as a guideline, for landscapes use f stops closer to f22 and for portraits, use those close to f4.

Take a class with Russ or a fellow Digital Photo Academy instructor in your area, check out the Digital Photo Academy. I took Russ' intermediate and advanced courses last year, and he continues to be a strong source of knowledge and encouragement as I progress in my photography.

Check out Burden's "How To Tips" featured on Outdoor Photographer's website. The seven that are dated February 4th are his. Just underneath the articles, be sure to click on page 1 to see an additional 9.

Don't forget to check Take Great Pictures for Burden's most recent tips. On the home page, click on the "Photo Tips And Techniques" button in the left hand column. Additionally, check out his "Digital Tip of the Month" found by clicking on the Digital Photography button.

To learn more about this subject, join Burden on one of his photo tours.
Monday, March 8, 2010

Instructor's Tip: Where water meets land

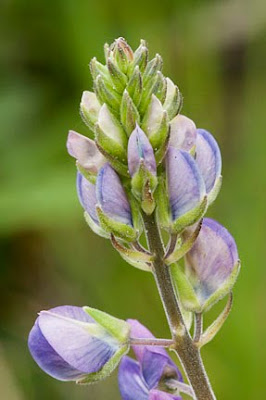
I hope you enjoy this week's "Instructor's Tip" by one of my favorite instructors, award winning nature photographer Russ Burden. To learn more about how Russ captured the above image, join him on one of his photo tours. Visit Russ Burden Photography to get more information.

Photo by Russ Burden. Taken on hia Oregon and Northern Calif Tour 5/22 - 5/31: One opening left


Where Water Meets the Land
Where the water meets the land brings to mind picturesque beaches, sunsets over the sea, crashing surf, and other images synonymous with the ocean. But the literal take of these words should not force you to think of these limitations. Land and water mesh around a lake, rivers carve terra firma, ponds, swamps, estuaries and streams are all bordered by earth. Every one of these settings give photographers plenty with which to work to produce great images.

Time of day is important with regards to what you want to capture. If dramatic warm light is the goal, then you’ll want to be out at sunrise or sunset. With the sun low to the horizon, colors are warm as the sun penetrates the particulates that hover near this point.

As gorgeous as the grand scenic can be, don’t overlook the details as the light or wave action changes. Glints of light from the setting or rising sun reflecting off the water have the potential to make great abstracts. If there is foreground detail, include it to make the glint wrap around a point of interest. Sand pattern images made in warm light are very powerful. Look for curving or leading lines. Even better if they lead out to the point where the water and land marry.

The image that accompanies this article was made while on my photo tour to the Oregon coast. I’d love to have you join me on this tour for an adventure of a lifetime.

Take a class with Russ or a fellow Digital Photo Academy instructor in your area, check out the Digital Photo Academy. I took Russ' intermediate and advanced courses last year, and he continues to be a strong source of knowledge and encouragement as I progress in my photography.

Check out Burden's "How To Tips" featured on Outdoor Photographer's website. The seven that are dated February 4th are his. Just underneath the articles, be sure to click on page 1 to see an additional 9.

Don't forget to check Take Great Pictures for Burden's most recent tips. On the home page, click on the "Photo Tips And Techniques" button in the left hand column. Additionally, check out his "Digital Tip of the Month" found by clicking on the Digital Photography button.

To learn more about this subject, join Burden on one of his photo tours.
Monday, March 1, 2010

Instructor's Tip: Achieving balance in composition

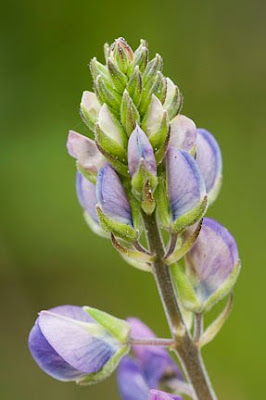
I hope you enjoy this week's "Instructor's Tip" by one of my favorite instructors, award winning nature photographer Russ Burden. To learn more about how Russ captured the above image, join him on one of his photo tours. Visit Russ Burden Photography to get more information.

Photo by Russ Burden
WEIGHTED TO THE LEFT

Photo by Russ Burden
BALANCED

BALANCE
My doctor tells me to eat a balanced diet. I do this to stay healthy - a good thing. Tightrope walkers depend on balance to make a living and stay alive - a very good thing. Photographically, I encourage you to achieve compositional balance before you press the shutter - a fabulous thing!

Balance in composition is important to make the image successful. If a photo is weighted too heavily on the top, bottom, left, or right, the viewer’s eye will fixate on that one area of the scene and have difficulty going to the others. The problem with this is the part where the viewer’s eye is not attracted is still part of the image making that section unimportant. This becomes wasted picture space yielding a picture that is not successful.

To achieve balance, key elements or focal points should be distributed within the image area. The balance may show symmetry from top to bottom or left to tight. Doing so makes for a more tranquil composition. If the balance is asymmetrical, one section of the image will appear heavier. The offsetting element in a different area of the image should be strong enough to draw the viewer to it. These images typically show more movement. Balance can be achieved using offsetting strong points of color, contrasting areas of light and shadow, size relationships, or other methods of including parts of the composition to draw the viewer to all parts of the image.

Take a class with Russ or a fellow Digital Photo Academy instructor in your area, check out the Digital Photo Academy. I took Russ' intermediate and advanced courses last year, and he continues to be a strong source of knowledge and encouragement as I progress in my photography.

Check out Burden's "How To Tips" featured on Outdoor Photographer's website. The seven that are dated February 4th are his. Just underneath the articles, be sure to click on page 1 to see an additional 9.

Don't forget to check Take Great Pictures for Burden's most recent tips. On the home page, click on the "Photo Tips And Techniques" button in the left hand column. Additionally, check out his "Digital Tip of the Month" found by clicking on the Digital Photography button.

To learn more about this subject, join Burden on one of his photo tours.

Wednesday, February 24, 2010

Get the Goods: Attending a Low Key Lighting Meetup Tonight!


Tonight I will be crashing...er ah, attending, a low key lighting photography meetup hosted by Bill Murphy. Murphy, shown at left, is the organizer of amazingly affordable and educational Basics of Studio Lighting workshops to meet other photographers and share techniques and ideas. Check out some of Murphy's work on his Model Mayhem account.

Because I was out of the state on vacation, I was too late to RSVP for this Meetup which is limited to only about 10 attendees for more personalized attention and enough room to maneuver without having to feel like a vulture when shooting a model. For just $25, photographers get hands-on instruction, access to a model and at least two hours of shooting time at the North Denver Photography Studio in Northglenn. NDP is a facility is amazing, and I've enjoyed many shoots help there.

Tonight's low key workshop will focus on integrating shadow play into my imagery by using a one light set up as well as reflectors and fill lights. We will be going from a photo like this one displayed of this adorable child to very little illumination except rim lighting! Because I've attending Bill's previous High Key Lighting seminar, I asked him if I could just show up tonight in case anyone who had RSVPed didn't show, and he said sure!

I think I'm going to have even more fun at this Meetup considering that one of my signature looks is having subjects appear to just float in out of the darkness of a totally black, solid background. To me, it creates drama and gives the impression of capturing a moment even though you are shooting a posed portrait. I love the moodiness and darkness of low key lighting and mastering this technique instead of relying on hit and miss attempts to achieve it will be a great boon for my photography. Here is an example of one of my favorite low key photos. My images of Anne Filler was taken during my first digital photography class held at the Denver Darkroom with instructor Efrain Cruz. Cruz is now the director of Illuminate Workshops. While I love this image, I think I was lucky to have shot it being so new to photography. I want to rely on true knowledge, rather than luck, on how to capture this kind of shot, and I think tonight's workshop will give me that!


You should join this Meetup group and maybe we can shoot together!

Monday, February 22, 2010

Instructor's Tip: No Merging Allowed


Photo by Russ Burden

I hope you enjoy this week's "Instructor's Tip" by one of my favorite instructors, award winning nature photographer Russ Burden. To learn more about how Russ captured the above image, join him on one of his photo tours. Visit Russ Burden Photography to get more information.

NO MERGING ALLOWED

While out on the road I often see yellow caution signs - “Lanes Merge - Drive with Care.” I love to ski and being the careful person I am, I take care when I see a sign that says, “Trails Merge - Slow Down.” I’ve heard boaters talk about how careful they need to be when they go through a narrow channel where different waterways Merge. As photographers, we need to heed the same warning when it comes time to create a composition.

Avoiding mergers is a very important guideline to follow when making a composition. A merger occurs when important elements in the photo overlap, touch the edge of the frame, or blend in tonality preventing separation, all in awkward ways. The quintessential example is the tree growing out of Aunt Sally’s head. In that the tree merges with her, it gives the appearance that the trunk or branches are part of her being. You’d think it would be obvious and very easy to avoid, but the fact of the matter is the photographer is usually so zeroed in on the main subject, the rest of the image area is overlooked. I encourage you to study the entire viewfinder for any and all mergers before pressing the shutter. This takes practice and patience but it will net you better images in the end.

Take a class with Russ or a fellow Digital Photo Academy instructor in your area, check out the Digital Photo Academy. I took Russ' intermediate and advanced courses last year, and he continues to be a strong source of knowledge and encouragement as I progress in my photography.

Monday, January 25, 2010

Instructor's Tip: Earth, Water and Sky

Photo by Russ Burden

I hope you enjoy this week's "Instructor's Tip" by one of my favorite instructors, award winning nature photographer Russ Burden. To learn more about how Russ captured the above image, join him on one of his photo tours. Visit Russ Burden Photography to get more information.

EARTH, WATER AND SKY
As a former teacher, I stressed to my students to always make connections. Whether I was teaching math, writing, or science, I wanted my students to be able to take their thinking to higher levels by making connections either between subject areas or within given concepts. As I practice what I preach, I try to do this with my photography. For instance, I apply the same principles of lighting that I use when I photograph a person to when I take a shot of an animal in the wild. Is the face turned the right way? Is the angle of the light flattering? If I were to challenge you to make a list of commonalities between earth, water and sky, what would you come up with? PAUSE TO THINK...... How many of you came up with color? impact? nature? drama? combining all 3? There are no right or wrong answers. The idea is to get you to think photographically to create the best possible image.


EARTH: The earth has a myriad of colors. From the fall foliage of autumn to the deep greens of the rain forest, every color in the universe can be found. Learning how colors play off each other is important in order to create striking images.


WATER: If you reduce water to its basics, it’s colorless. The reason we see color in water is dependent upon what’s reflected upon it, what’s underneath it, and what’s in it. When photographing water, a strategically chosen shutter speed is important to its overall look. Fast shutter speeds stop the movement while slow ones emphasize it.
SKY: Sky and dramatic color are a marriage made, forgive the pun, in heaven. When the sky goes electric, it often becomes the focal point of the image. A clear horizon with clouds above it create great opportunities for color. But the sky can also be dramatic when there’s an impending or clearing storm. This is true especially when the sky in front of the sun opens up spotlighting the landscape.

Take a class with Russ or a fellow Digital Photo Academy instructor in your area, check out the Digital Photo Academy. I took Russ' intermediate and advanced courses last year, and he continues to be a strong source of knowledge and encouragement as I progress in my photography.

Monday, January 11, 2010

Instructor's Tip: Dusk + Dawn Flash

Photo by Russ Burden

I hope you enjoy this week's "Instructor's Tip" by one of my favorite instructors, award winning nature photographer Russ Burden. To learn more about how Russ captured the above image, join him on one of his photo tours. Visit Russ Burden Photography to get more information.

DUSK + DAWN FLASH

The word photography comes from the Latin combining photo and graphy. Photo means light and graphy means to write. Hence photography means to write with light. How appropriate it is that in order to make a picture, a photographer needs light with which to etch an image onto a digital sensor. But what do photographers do when the sun level drops and they’re outdoors? For me, it’s flash to the rescue.


There’s a magic quality to the light right before the sun crests the horizon at sunrise and just after it sinks below at sunset. If the subject is front or sidelit by this gorgeous glow of color, detail can be recorded. But if you want to record the subject against this gorgeous backdrop, it falls into silhouette. If you need to reveal detail, it’s necessary to add artificial light. In that flash units of today are so portable and powerful, it’s become the light of choice. To make the image successful, it’s necessary to balance the amount of light emitted from the flash with the amount of ambient light in the sky. In order to do this, the flash has to be able to be dialed up or down from the ambient light meter reading. The amount depends on the effect you desire and the chosen f stop at which the image is made. The smaller the f stop, the more you’ll tax the capability of the flash to be able to emit enough light. On this week's photo, I used flash as a source of fill so detail could be revealed in the foreground dunes and yucca stalk. Come with me on a tour and I'll show you how to improve your images using flash.

Take a class with Russ or a fellow Digital Photo Academy instructor in your area, check out the Digital Photo Academy. I took Russ' intermediate and advanced courses last year, and he continues to be a strong source of knowledge and encouragement as I progress in my photography.

Monday, January 4, 2010

Instructor's Tip: The Shape of Things to Come

Photo by Russ Burden

I hope you enjoy this week's "Instructor's Tip" by one of my favorite instructors, award winning nature photographer Russ Burden. To learn more about how Russ captured the above image, join him on one of his photo tours. Visit Russ Burden Photography to get more information.

Personal Message from Russ:
I can’t believe another year has passed and it’s time to start a new round of Tips for 2010. I hope you have learned a lot from all the ones you’ve received so far and that they motivate you to get out and take some pics. Please help spread the word about my tours so I’ll be able to continue sending The Tip Of The Week year after year. Referrals are always appreciated. I’ve re-designated 2010 to be The Year of the Photo Tour. I’d love to have you join me so I can share with you first hand all the tips I’ve sent out over the last five years - that’s a lot of tips! Seeing the tips put into effect is a great way to learn more about our wonderful art.

The Shape of Things to Come
Shapes are the building blocks of all structures. From repetitive hexagons woven into beehives to the support systems of skyscrapers, they’re found everywhere. Made of lines, patterns and repeated forms, designs of intertwined networks await the discerning photographer to extract and isolate. Lens choice, light, color, contrast and shooting angle all contribute to the success of capturing images with shapes.

Shape plays a dominate role in identifying objects in everyday life. The silhouette of a dormant tree in winter or the outline of an airborne flock of geese at sunset need no explanation as to what they are. Their forms are familiar, yet often deemed mundane. As a photograph, they’re often overlooked. By learning how to integrate shape, form, texture, lines and patterns into an image, a whole new world of photography can unfold.

Take a class with Russ or a fellow Digital Photo Academy instructor in your area, check out the Digital Photo Academy. I took Russ' intermediate and advanced courses last year, and he continues to be a strong source of knowledge and encouragement as I progress in my photography.

Monday, December 28, 2009

Instructor's Tip: Be Persistent

Photo by Russ Burden

I hope you enjoy this week's "Instructor's Tip" by one of my favorite instructors, award winning nature photographer Russ Burden. To learn more about how Russ captured the above image, join him on one of his photo tours. Visit Russ Burden Photography to get more information.

BE PERSISTENT

To consistently produce great photographs, there are many concepts about which you need to learn. I consider reading the light to be the most important . Without good light, a good photo is hard to produce. I’ve often been quoted as saying, “I’d rather photograph an ordinary subject in great light than a great subject in ordinary light.” Next on my hierarchy is composition. Even with a great subject in great light, if the composition is weak, that image will lack drama. Also on my list of essentials are techniques with regards to depth of field, emphasizing movement, controlling backgrounds, and subject choice. Along with these obvious photographic concepts is one that has nothing to do with how well you know the art of photography. It’s the art of persistence. Without it, you’ll miss many a great image as you won’t persevere or be patient enough to let drama unfold or wait for the perfect moment when the subject displays the decisive moment.

The decisive moment happens when the action reaches an apex, when a subject portrays the perfect expression, when the animal conveys a special look, when the light becomes its most dramatic, etc. Waiting for this fleeting moment to occur may take, if you’re lucky, five minutes but it also may take hours. It may also never happen. The one guarantee I can give you is that if you don’t try to wait it out, you won’t get the shot. I’ve been told that I’ve been “lucky” that I got the shot where peak action or the perfect expression is captured. I offer to you that persistence and hard work played a much greater role than luck. Staying with your subject, waking up a little earlier than the other photographers, staying out a little later, keeping your eye up to the viewfinder even though it’s not comfortable all determine whether you increase the opportunity to get the shot or guarantee you won’t.

Take a class with Russ or a fellow Digital Photo Academy instructor in your area, check out the Digital Photo Academy. I took Russ' intermediate and advanced courses last year, and he continues to be a strong source of knowledge and encouragement as I progress in my photography.

Monday, December 21, 2009

Instructor's Tip: No Bull....seye: Is Centering Appropriate?

Photo by Russ Burden

I hope you enjoy this week's "Instructor's Tip" by one of my favorite instructors, award winning nature photographer Russ Burden. To learn more about how Russ captured the above image, join him on one of his photo tours. Visit Russ Burden Photography to get more information.

No Bull....seye: Is Centering Appropriate?

I’ve been taking pictures for over twenty five years. When I first started I did what most budding photographers do with their subjects. I placed them dead center in the frame and had a lot of extra compositional junk surrounding them. As I read more, took more pictures, joined a camera club, and studied great photos, I realized what an OOPS this was. As my photography evolved, it coincided with the advent of autofocus and did that ever create a profusion of dead centered compositions. With the focus point set dead center in the viewfinder, many photographers succumbed to locking in the focus point in the middle of the frame and not bothering to recompose the image to get the subject away from the middle of the image. Thankfully, camera manufacturers saw what was going on and created multi sensor focus points which helped alleviate bulls eyed subjects.

To create a more dynamic composition, it’s better to place the main subject off center in one of the power points of the frame. These points are often referred to as the rule of thirds. If you create an imaginary tic tac toe board in your viewfinder, the point at which you should place your subject is where the lines intersect. Doing so allows the viewer to bring his or her eye toward the main subject or it leaves room for the subject to move through the image. The choice of which power point the subject is placed can be determined by what surrounds it. If the peripheral environment has distractions and clutter, place the subject at a different intersection of tic tac toe lines and see if the composition is improved.

Take a class with Russ or a fellow Digital Photo Academy instructor in your area, check out the Digital Photo Academy. I took Russ' intermediate and advanced courses last year, and he continues to be a strong source of knowledge and encouragement as I progress in my photography.

Monday, December 14, 2009

Instructor's Tip: Backlit Landscapes

Photo by Russ Burden

I hope you enjoy this week's "Instructor's Tip" by one of my favorite instructors, award winning nature photographer Russ Burden. To learn more about how Russ captured the above image, join him on one of his photo tours. Visit Russ Burden Photography to get more information.

BACKLIT LANDSCAPES

Backlight can impart many looks to a landscape. It can emphasize a strong silhouette, it can rim light a subject giving it a strong outer glow, it can enhance the look of fog or mist, it can create shafts of light highlighting specific portions, and it can provide you with a sun star as the sun ever so slightly peeks from behind a portion of the subject. It presents a unique quality of light that is often overlooked by landscape photographers. It presents challenges, but the rewards are worth the effort. Subjects must be judiciously chosen. The more you realize which ones work, the more you’ll add many dramatic images to your files.

Backlit landscapes are mostly shot early and late in the day when the sun is close to the horizon. Shape and form of the subject become important as most texture and detail is lost when shooting into the sun. But as with all guidelines, there’s an exception. Autumn colored leaves are great to shoot even in the middle of the day. Backlit leaves take on a glow as if a switch was turned on from within each creating a special translucence and powerful image.

Take a class with Russ or a fellow Digital Photo Academy instructor in your area, check out the Digital Photo Academy. I took Russ' intermediate and advanced courses last year, and he continues to be a strong source of knowledge and encouragement as I progress in my photography.

Sunday, December 6, 2009

Growing Pains: Shooting my first night wedding


This coming weekend, I will face one of the most challenging lighting situations so far in my photographic journey. I will be shooting a Jessaca and Nathan's winter wedding at night inside a church lit only with white Christmas lights and candles!

To further complicate matters, I and my assistants will not be allowed to shoot the actual wedding since it is against church rules to shoot the sacred ceremony. That means flash is out. However, that could be the silver lining in the cloud. We will be able to shoot several staged shots, including the bride's walk down the aisle and the kiss. I am hoping the officiant will allow us to set up some flashes for those special moments. Attending the wedding rehearsal earlier this week will give us a chance to scope things out.

My 70-200 2.8 offers the fast glass I need, while my Canon 5D's extended ISOs to 3200 and above will be a must if we can't use flash. If we can shoot from the balcony, I will definitely be using a tripod or monopod. That should allow me to drag the shutter and let in whatever ambient light may be available. I think grainy images in black and white could create a sense of romance and intimacy.


To prepare for this event, my blog this week will focus on tricky lighting tips during weddings.

I found this great thread about the exact topic on Photo.net's Lighting Equipment and Techniques Forum. It is filled with wonderful suggestions to tackle this issue. I would welcome and appreciate any other suggestions my readers can give. I also read this forum thread on low light weddings that was very helpful too.

Monday, November 30, 2009

Instructor's Tip: Photographing Mountains

Photo by Russ Burden
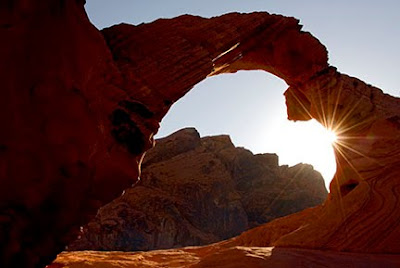
I hope you enjoy this week's "Instructor's Tip" by one of my favorite instructors, award winning nature photographer Russ Burden. To learn more about how Russ captured the above image, join him on one of his photo tours. Visit Russ Burden Photography to get more information.

REMINDER: There will be no Photo Tip of the Week next Monday as Russ willl be in Bosque Del Apache and White Sands National Monument leading a photo tour. If you really want to learn a ton about composition, depth of field, how to read the light, and so much more about the art of making great images, I strongly urge you to sign up for one of his photo tours. With over 30 years of teaching experience and my passion for photography, Russ will ensure you'll come home a much better photographer in addition to bringing home a lifetime of memories and great images.
Photographing Mountains
There’s an old expression that’s a play on words: “Life’s A Beach.” I have a T Shirt that says, “Life’s A Mountain, Not A Beach.” From the very first time I drove across country from New York to Denver and saw the mountains loom in the distance as I neared the front range of the Rockies, I was hooked.

Add Color For Impact: Autumn is my favorite time to photograph mountains as the deciduous trees reach their peak color. Whether you focus on the Rockies with golden toned aspens or the rolling mountains of the east with multi warm colored hardwood trees, the reds, yellows, and oranges that paint the hillsides add dimension, impact, and specific focal points to any mountain image.

Create Depth: A key technique in creating successful compositions of mountain scenics is to create depth. This is accomplished by including fore, mid, and background elements in the image. Wide angle lenses are employed to accomplish this. By getting close to an important focal point in the lower portion of the frame, the eye is drawn to that area in the photograph. The midground layer needs to support the chosen foreground element and contain interest. The final piece of the puzzle is the background element. When photographing mountains, this is often the key peak of the range. In the end, all elements should support one another.

Timing: Dramatic mountain images are made in the sweet light of the day. This occurs both at sunrise and sunset. Capturing images at these times means getting up when it’s dark and being on location just as the sun crests the horizon. It also entails being out at sunset just before the sun falls below the horizon. At these times of the day, the light is warm and soft. It gives the scene dimension and texture unobtainable in the middle of the day when the sun is overhead.

Quick Tips: I highly recommend you use a polarizer and shoot at right angles to the sun to maximize its effect. Use a long lens to compress scenes where layers of mountains exist to add impact. Use a long lens to create intimate portraits of just the peaks of your favorite range. Incorporate people into some of your shots to show scale. Shoot when there is an impending or clearing storm to capture dramatic light.

Take a class with Russ or a fellow Digital Photo Academy instructor in your area, check out the Digital Photo Academy. I took Russ' intermediate and advanced courses last year, and he continues to be a strong source of knowledge and encouragement as I progress in my photography.

Monday, November 23, 2009

Instructor's Tip: So You Want to be a Nature Photographer?

Photo by RUSS BURDEN
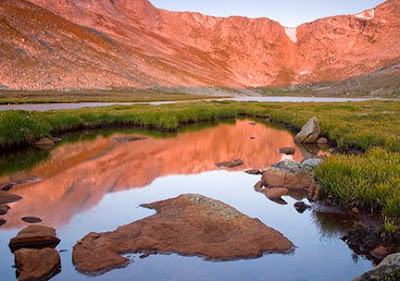
I hope you enjoy this week's "Instructor's Tip" by one of my favorite instructors, award winning nature photographer Russ Burden. To learn more about how Russ captured the above image, join him on one of his photo tours. Visit Russ Burden Photography to get more information.
So You Want To Be A Nature Photographer
I’ve heard it said that if you love what you do, you’ll never work a day in your life. As photography has been a long time profession in addition to being a passion, to some extent the above holds true. But before I encourage you to quit your day job, cash out and hit the road with your camera and camper, hear me out with regards to what I mean by, “to some extent, this holds true.”

When I’m out in nature and everything comes together, it’s tough to think of anything that’s better. When the light is dramatic, when the animals display seldomly seen behavior, when the flowers are peak, when the fall colors are prime, all make shooting in the wild, wonderful, productive, and quite often profitable. BUT for those seldomly experienced days or situations, there are countless ones where not a single image is made. The preconceived notion amongst the masses is that all postcard shots are easily repeatable. This is NOT the case.

Are you willing to be away from your home and family for weeks at a time? While you’re on the road, can you live on a budget that makes it feasible to justify the trip? Can you deal with eating meals out of a can while you wait for the light that may be obscured by thick gray clouds to be dramatic? Do you enjoy waking up at 4:30AM and driving an hour to a location and have nothing develop in the way of interest? Can you deal with the rising cost of gas to make the drive to the location you wish to photograph? Can you accept the fact the day you arrive at your location coincides with a severe weather front where rain is in the forecast for the next seven days? So far, how many “Yes” answers do you have?

Let’s continue: Are you capable of photographing other subjects if you are not making sales of your nature images? Does the thought of photographing an occasional wedding make you cringe? Do you have marketing skills that are superior to the hundreds of thousands of other photographers who are trying to make a living selling nature shots? Unfortunately, buyers are not going to knock on your door unless you get your name out there! Can you deal with editor’s deadlines and requirements that differ from publisher to publisher? Do you have computer skills and record keeping abilities so you’ll know which company has what photos and when they’re due back? When you make a submission, are you willing to wait nine months or more to see if you are even in the running to make a sale?

I could go on and on. My goal is not to discourage you from pursuing your dream but to have you appreciate that the glamour behind the occupation is not all it’s cracked up to be. More power to you if you have the drive. So the next time you see an amazing nature shot, respect the photographer for what he or she had to endure. For every published image I’ve had, there are myriads I’ve discarded, thousands I wouldn’t dare show in public, and many more I’ve taken just to prove I was there. As for the future, more of the same as I do love my job.

Take a class with Russ or a fellow Digital Photo Academy instructor in your area, check out the Digital Photo Academy. I took Russ' intermediate and advanced courses last year, and he continues to be a strong source of knowledge and encouragement as I progress in my photography.

Best Posts

Picture Your World Photography is a premiere photographer in the Denver, Colorado Photographer community on MarketingTool.com.