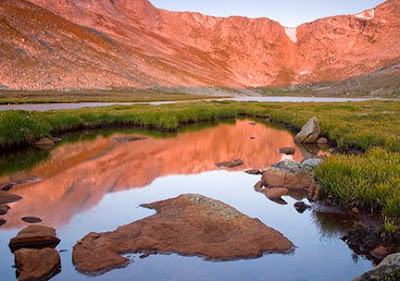
 Photo by Russ Burden
I hope you enjoy this week's "Instructor's Tip" by one of my favorite instructors, award winning nature photographer Russ Burden. To learn more about how Russ captured the above image, join him on one of his photo tours. Visit Russ Burden Photography to get more information.
REMINDER: There will be no Photo Tip of the Week next Monday as Russ willl be in Bosque Del Apache and White Sands National Monument leading a photo tour. If you really want to learn a ton about composition, depth of field, how to read the light, and so much more about the art of making great images, I strongly urge you to sign up for one of his photo tours. With over 30 years of teaching experience and my passion for photography, Russ will ensure you'll come home a much better photographer in addition to bringing home a lifetime of memories and great images.
Photographing Mountains
There’s an old expression that’s a play on words: “Life’s A Beach.” I have a T Shirt that says, “Life’s A Mountain, Not A Beach.” From the very first time I drove across country from New York to Denver and saw the mountains loom in the distance as I neared the front range of the Rockies, I was hooked.
Add Color For Impact: Autumn is my favorite time to photograph mountains as the deciduous trees reach their peak color. Whether you focus on the Rockies with golden toned aspens or the rolling mountains of the east with multi warm colored hardwood trees, the reds, yellows, and oranges that paint the hillsides add dimension, impact, and specific focal points to any mountain image.
Create Depth: A key technique in creating successful compositions of mountain scenics is to create depth. This is accomplished by including fore, mid, and background elements in the image. Wide angle lenses are employed to accomplish this. By getting close to an important focal point in the lower portion of the frame, the eye is drawn to that area in the photograph. The midground layer needs to support the chosen foreground element and contain interest. The final piece of the puzzle is the background element. When photographing mountains, this is often the key peak of the range. In the end, all elements should support one another.
Timing: Dramatic mountain images are made in the sweet light of the day. This occurs both at sunrise and sunset. Capturing images at these times means getting up when it’s dark and being on location just as the sun crests the horizon. It also entails being out at sunset just before the sun falls below the horizon. At these times of the day, the light is warm and soft. It gives the scene dimension and texture unobtainable in the middle of the day when the sun is overhead.
Quick Tips: I highly recommend you use a polarizer and shoot at right angles to the sun to maximize its effect. Use a long lens to compress scenes where layers of mountains exist to add impact. Use a long lens to create intimate portraits of just the peaks of your favorite range. Incorporate people into some of your shots to show scale. Shoot when there is an impending or clearing storm to capture dramatic light.
Take a class with Russ or a fellow Digital Photo Academy instructor in your area, check out the Digital Photo Academy. I took Russ' intermediate and advanced courses last year, and he continues to be a strong source of knowledge and encouragement as I progress in my photography.


No comments:
Post a Comment