Monday, March 31, 2008

Instructor's Tip: Side Light for Scenics


Enjoy this week's Photo Tip by instructor Russ Burden. To take a class with Russ or a fellow instructor in your area, check out the Digital Photo Academy. I took an intermediate and advanced course with Russ and he has continued to be a strong source of encouragement and education as I have progressed in my photography.

Don't forget to check Take Great Pictures for Russ' most recent tips. On the home page, click on the "Photo Tips And Techniques" button in the left hand column. Additionally, check out his "Digital Tip of the Month" found by clicking on the Digital Photography button.

To learn more about how Russ took the above photo, join him on one of his photo tours. Visit Russ Burden Photography to get more information.

Side Light For Scenics
"The direction of light is very important in determining the success
of an image. Whether the subject is lit by flash, room light, or
illuminated by the sun, if the angle is wrong, the photo will fall
short. Frontlight falls squarely on the subject. This direction of
light is very flat. Backlight produces silhouettes which limits the
detail in the photo. Sidelight hits the subject at a ninety degree
angle. The result is an image with strong highlights and shadows.

Frontlight can be beneficial with certain subjects. Wildlife is a
great example. While running my photo tours, when the opportunity to
photograph a terrific specimen of an animal presents itself, I tell
my participants to aim their shadow toward the animal. The more
perpendicular it is, the more direct the front light. Backlight can
be dramatic and create mood in an image. If a subject’s outline is
easily identifiable, a silhouette offset against a vibrantly colored
background can produce a gorgeous photo. But for scenic photography,
the best light is sidelight.

Sidelight for scenics is beneficial for many reasons. To begin, the
sky behind the subject will have maximum polarization. This allows
the sky to pop off the page as the colors and tones become rich and
saturated. Sidelit subjects are lit at this angle. To determine the
angle of light at sunrise or sunset, face the direction in which your
shadow is falling. Turning ninety degrees to your left or right of
this direction is where sidelighting occurs."

- Russ

Friday, March 28, 2008

Breaking News: First Client Contact Through A Link

I am happy to report that I received my first potential client contact today through a link on another website.

A client emailed me after she came across my website, which was linked here at the Slippers-N-Sliders Ski Club site. She is relocating her business to the Denver metro area and is interested in business and casual headshots.

You may remember that I was the official photographer for the National Black Skiers' annual summit which was held in January in Breckenridge. The Slippers-N-Sliders club is the local Colorado organization which attended the summit and posted links to my galleries of the photos I shot at the summit.

I wanted to share this information with my readers because I think it's a great example of how referrals can be the foundation of your photography business. As I grow and progress in my understanding of how to start and maintain a prosperous business, I think it is essential to have your name or brand be available to as many people through as many venues as possible. The Internet has made this a relatively easy process enabling us to provide links and other ways to connect, so you should take advantage of it whenever possible. You never know when an opportunity like this will land at your doorstep!

Thank you Slippers-N-Sliders for posting my galleries and for helping clients connect with me and my business.

Thursday, March 27, 2008

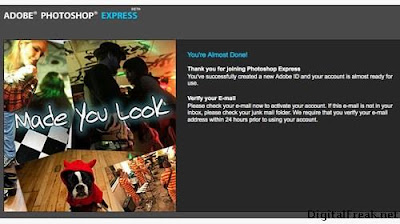
BREAKING NEWS: Adobe Launches Photoshop Express


I got an email today from Richard Peterson (yet another of my favorite instructors) about Adobe's launch of "Photoshop Express," its new online photo editor with free storage and sharing. The application has been released as a beta, which means Adobe needs you to help them finish creating it.

Try it out, then sound off about it. What worked? What didn't? What desperately needs improvement? Select the "Feeback" tab and give Adobe a piece of your mind.

Edit photos, create albums and share them online. The 2GB worth of photos you get to upload should be more than enough to get you started. Once your in, view and share your albums publicly or be nosy and browse community galleries and albums others have uploaded. Create your personal URL to share with friends and family (mine is http://shebawheeler.photoshop.com)

I like being able to crop, rotate and tweak images. Plus it's very convenient to be able to ship them directly into my blog or Facebook page, although I haven't used that function yet. It was a breeze to upload my images from Picasa and Photobucket into Photoshop Expres. Users also get to take advantage of some easy retouching tools to give your friends that coveted glamour look minus the pimples and wrinkles. ;) Get it now here.

Don't leave me hanging. Let me know what you think!

Wednesday, March 26, 2008

Get the Goods: Essential Photoshop Keyboard Shortcuts

I got so much great information out of just my first three-hour class with Nat Coalson, a certified Adobe Photoshop expert, that I couldn't wait to share it. Here is a list of his essential PhotoShop keyboard shortcuts. These shortcuts are listed for Windows. For a Mac, substitute the Command (Apple) key for the Control (CTRL) key. Most of these commands also work in Photoshop Elements for those who have yet to upgrade.

Nat assures me that if I take the time to learn these shortcuts, my editing process will be more streamlined. EEK!!!!That's going to be tough, I think since I have both a Mac and a PC. For more tips or to take a class with Nat Coalson check out his website (see link above) or Illuminate Photography Workshops.

There are two main kinds of shortcuts in Photoshop -- those that switch between tools and those that execute a command.

TOOL Shortcuts: press the letter on the keyboard to switch to that tool. Though the letters are shown in caps, you don't need to hold the shift key. Hold the shift key along with the letter key to switch to the other versions of the tool.

Move..................................................................V
Marquee selection (rectangular and elliptical)........................M
Lasso tools (freehand and polygon)....................................L
Quick Select and Magic Wand...........................................W
Crop tool.............................................................C
Healing brushes.......................................................J
Clone stamp...........................................................S
Paintbrush............................................................B
Gradient..............................................................G
Type..................................................................T
Increase Brush Size...................................................]
Decrease Brush Size...................................................[

NAVIGATION Shortcuts
Zoom in...............................................................CTRL +
Zoom out..............................................................CTRL -
Pan image.........................................Hold Spacebar & drag image

MENU COMMAND Shortcuts
New...................................................................CTRL N
Open..................................................................CTRL O
Close.................................................................CTRL W
Save..................................................................CTRL S
Save As.........................................................Shift CTRL S
Print.................................................................CTRL P
Fill............................................................... Shift F5
Free Transform........................................................CTRL T
Levels................................................................CTRL L
Hue and Saturation....................................................CTRL U
Curves................................................................CTRL M
Invert................................................................CTRL I
New Layer.......................................................Shift CTRL N
Merge Visible onto New Layer.............................Shift Option CTRL E
Select All............................................................CTRL A
Deselect..............................................................CTRL D
Invert Selection................................................Shift CTRL I
Feather Selection..............................................Option CTRL D
Show/Hide Selection Borders...........................................CTRL H
Show/Hide Rulers......................................................CTRL R

Tuesday, March 25, 2008

Get the Goods: Photoshop Basics -- Digital Photo Workflow

Monday night, I took a Photoshop 101 course with the newly established Illuminate Photography Workshops. Even though I completed an online Photoshop CS2 course last year, I thought I could fill in some of the gaps with hands-on, traditional instruction. Plus I enjoy being able to interact with and learn from fellow students.

Instructor Nathaniel Coalson is an Adobe Certified Expert and was extremely knowledgeable. He helped me pinpoint some shortcomings in my own digital photo workflow -- mainly how I should integrate backups and save my master files as TIF (rather than PSD) to avoid compression and maintain original resolution.

I think what's key to note is that you have to develop a workflow that works for you. Feel feel to tweak this as long as whatever you come up with makes things easier and faster for you to produce the best images possible.

Here are Coalson's tips:

1. Capture: Capture your photos in either RAW or JPG mode. RAW provides the highest quality but requires processing in the computer. JPG is lower quality but can be viewed and shared (such as in email attachments) right from the camera.

2. Transfer Images to Computer: Use a card reader (do not upload directly from camera) and copy the files to your computer. Immediately make a backup onto another hard drive or removable media such as CD/DVD. Depending on the software available, you can automatically rename the copied files, convert to other file formats and add metadta during the copy. If using catalog software, import the images into your database during this step.

I MUST get into the habit of backing up my images as soon as possible. I tend to wait until I have finished editing, then I save the edited versions. But I like Coalson's idea of fitting this early into the workflow so it becomes as second nature to me as sharpening or editing for color balance.

3. Review your edit: Use your file browsing software to review the photos from the shoot(s) and begin rating them for further processing. Mark your selects with flags, stars, labels, etc. to filter them from the rejected files. Delete the rejected files to save disk space. For the remaining images, add more detailed metadata, especially copyright notices and keywords. Sort the images as desired and create collections.

4. Process selects: Using your photo editing software, process your selected images to perfection. Consider tone and contrast (the range of light to dark) color (accuracy and saturation), sharpness and the need for cropping and retouching. Apply creative effects such as black-and-white conversion, colorizing, multiple image composites, localized dodging and burning in this step.

5. Save master and derivative files: A derivative file is any file that would be saved off your master. Using Adobe software, open your file and "Save As" a TIF. TIF files work with the nondestructive editing principle that says to leave a way for yourself to go back in later and make changes. You can also save flattened and resize files for other purposes, including JPG for the web, etc. If you intend to make prints of your photos, prepare the necessary files during this step. Make regular backups of your working files.

I asked Coalson about some problems I had been having saving PSD files in CS3. I could save an image as a PSD, but I had trouble reopening the file. Sometimes it would appear and other times it wouldn't. Coalson said the problem is well-known and yet another reason why TIF files might be a better choice.

6. Print and Present: Using your finished image files, you can make your own prints or send them to a lab for printing, uploading them to a web site, email them to friends, make multimedia presentations, etc. The requirements and specifications for these scenarios will depend on the situation.

Monday, March 24, 2008

Get the Goods: My New Home Studio


Interior designers say your home should reflect who you are. Well, mine certainly does now. The first thing people see as they walk through my front door is my new home studio which now boasts my backdrops, Alien Bees and Westcott Spiderlites, reflectors and other tools of the trade. I easily have enough room for a background light and at least two more key lights to create numerous lighting schemes and diagrams such as those seen here.

It doesn't take long before a burgeoning photographer gets tired of rearranging furniture in the living room to make way for a photo shoot. Now, granted some of the first great shots I captured actually (including the lovely shot of Teri and her daughter Avery which graces my banner) took place in a makeshift studio about the size of a walk-in closet in my entertainment room. I parceled off the space in front of the patio doors leading to my backyard, moving back the couch and other furniture. That's some back-breaking work!

While my budget won't currently allow me to rent a private studio, I spent the weekend transforming an unused sitting room in the front of my house into my new home studio. I had grand ideas about having a sitting room filled with shelves overflowing with books, comfy overstuffed chairs, mood lighting and a water fountain for relaxing. So much for good intentions. That room mostly sat empty, and I think I read in that area exactly twice.

Photographytips.com suggests that the studio should be at least big enough to photograph a person full length using a normal lens, and hopefully roomier if you've got the space. While the studio can be as complex as your space (or budget) will allow, it doesn't have to be for the creation of beautiful pictures, especially basic headshots. "Sometimes, all it taks is a single light, properly positioned, to create the appropriate mood for a fabulous picture." One of my favorite instructors told me that no one would ever be able to tell that a great portrait was taken at the bay windows inside your kitchen, in a corner in your living room or in a cleaned up section of your garage. My sitting room fit the bill and also had a large window for natural light. The room's high ceilings give me plenty of space to set up my backdrops and adequate space to separate my subject from the background.


This picture is a shot of the set I used to take beautiful and sexy boudoir shots of Teri seen in this gallery.


I've also added some of my own framed photos on the white walls to create an overall gallery-type feel. Oddly enough, I think it lends a great air of mystery and expectation for visitors to my home. As soon as people walk in, they can't wait to get in front of the lights or lounge in the chairs I use for props. And then the questions begin: "You take photos? How much do you charge? My family could use some portraits." This could be the cheapest advertising campaign yet for my business!

Need more ideas for setting up your own studio?
Use these tips from ehow.com, taking special note these warnings:

1) Color finishes on walls and ceiling will create an unwanted cast in color photographs.
2) Make sure the lighting you'll be using will not overload the circuit. To figure out the number of amps drawn by your equipment, divide the lamp wattage by the supply voltage.

Sunday, March 23, 2008

Instructor's Tip: The Enhancing Filter


Check out this week's "Instructor's Tip" to enhance your digital photography from Russ Burden. Don't forget to check Take Great Pictures for his most recent tips. On the home page, click on the "Photo Tips And Techniques" button in the left hand column. Additionally, review his "Digital Tip of the Month" found by clicking on the Digital Photography button.

To learn more about the above photo shot by Russ Burden join him on one of his photo tours. Visit Russ Burden Photography for more information.

"Filters are wonderful tools that allow photographers to improve their
craft. But as with any tool, each has its place and should only be
used when the circumstances are right. The same way a carpenter
wouldn’t use a chisel as a screwdriver, photographers should not
abuse the use of a filter.

For some scenic images, one of the filters I like to use is the
Enhancing Filter. Many filter companies manufacture their own
versions. Each has a slightly different quality. The differences are
evident in how much of a pinkish color is rendered on the film. The
brand you choose should be governed by your taste. The principal
behind the filter is it enhances the warm tones and doesn’t impact
the cool and neutral ones. Although the effect can be mimicked using
Photoshop, there are nuances that don’t translate.

As with all filters, the enhancer has its place. Sunrises and sunsets
are great subjects for its use to help the warm hues pop. Red rock
country of the South West and fall foliage are two more that call for
the filter’s use to add zip to the image. Additionally, I often use
it at dawn or dusk to accentuate an alpenglow. Subjects to avoid are
people, animals, rain forests, interiors, or anything else that
should remain neutral in tone. As with any filter, I suggest you find
its nuances and tweak it to your taste."

Thursday, March 20, 2008

Breaking News: Foto3 Conference and Contest


The annual foto3 conference and trade show will be accepting entries for its photography competition from April 1 through May 1. The contest is open to all photographers. Prize winners and honorable mentions will be exhibited during the Foto3 Conference being held the first week of June, 2008, in Fort Collins, CO. Download the entry form here.

There are two categories, Student and Master Photographer, with one Grand Prize and several division prizes: Overall Grand Prize: $2,500 Yee haw, that would definitely help me pay off some of the equipment gone into debt for! Good luck everyone! If you enter something, feel free to post up your images here and tell us about it. I may have a little sumthin' sumthin' I plan to enter as well! ;)

Student Competition
First Prize: $1,000
Second Prize Black & White: $500
Second Prize Color: $500
10 Honorable Mention Awards

Master Photographer Competition
First Prize: $1,500 (PLUS a Workshop session)
Second Prize Black & White: $750
Second Prize Color: $750
10 Honorable Mention Awards

Please note any technical details you care to share with the judges with each image submitted. Selected images will be published in an upcoming issue of View Camera and other magazines. See submission requirements here.

Entry Fees

$35 for three images (additional images may be submitted at $10 per image).

Students may enter three images for $15 ($5 each per additional image). Copy of student I.D. required with entry.

In all instances, the fees must include return postage or other prepaid return shipping for all entries (e.g., a FedEx label with your account number or credit card number). Any entry that does not include the necessary return shipping labels or postage will not be judged and will be destroyed on receipt.

The annual Foto3 conference and trade show is based on a simple concept: photographers dedicated to the art and craft of photography. Bringing together the ideas and resources of two conferences that had been held separately by View Camera and Calumet, Foto3 provides a venue for photographers to display their work, share experiences and advance their skills.

Sponsors at Foto3 2008 will include industry leaders such as Canon, HP, Fujifilm, Epson, Ilford, Adobe and Calumet Photographic. Events will range from informative seminars and hands-on workshops to a variety of special exhibitions. Learn traditional darkroom workflow or digital color management, ambient portrait lighting or painting with light, plus many more creative, technical and business techniques. And Foto3 will host its first photography competition, open to all photographers in all formats. Register for the conference here.

From My Portfolio


The image above is one of my favorites captured during last weekend's shooting assignment at the Denver's St. Patrick's Day Parade. Bill "Stretch" Coleman hired me to photograph his team of giant puppets and stilt walkers while they performed during the parade. I think what draws me to this photo is the wonderful emotional interaction between Bill and the little boy from the crowd. The bright colors of Bill's costume and his pink duster really pop against the cool blue sky.

The photo is also a good example of how affective fill flash can be while shooting in direct sunlight. It may seem odd, but shooting in sunlight can be one of the more challenging situations a photographer can face. Direct sunlight can cause high contrast, blown out highlights, lens flare and colors that look overly saturated. If you are trying to shoot portraits of people, the light from the sun will cause them to squint their eyes and will can cast terrible shadows under the eyes and nose making them look like ghouls. And if they are wearing hats, their entire faces could be cast in shadow making it difficult to see them clearly. Just a touch of fill flash will brighten up a subject's face while shooting outdoors.

Use these tips from the Digital Photography School when shooting in direct sunlight:

1. Move into the shade
Move subjects (and yourself) into the shade. This is particularly relevant with portraits where your subject is highly portable. Sometimes the simplest solutions are best.

I used this technique myself when I asked Bill and his team to move into a shadow cast by a building to take a wide angle shot. Bill seemed perplexed by my request, but he trusted by instincts as a photographer to know what type of lighting situation would be best to get the best image. Fill flash can also be added to the photo later in Photoshop, although I would also recommend trying to get the image you want in camera first instead of relying on Photoshop later.

2. Make your own shade
If your subject is not movable (for example if you’re shooting macro work with a flower) create your own shade. Use your own shadow, the shadow of someone else or bring an object with you (like an umbrella, a reflector or large sheet of card) to block out the sun.

3. Use Fill in Flash
Most of us were trained to put the sun behind you when taking a photograph so that your subject will be well lit. Shooting into the sun may lead to lens flare or a dark subject - but at times it can improve it drastically - particularly if you use a flash to fill in the shadows that are created by doing so (learn more about using fill flash).

4. Use a Reflector
Another way to fill in the shadows caused by direct sunlight is to use a reflector. These bounce light up into the face of your subject and are great because they allow you to shoot into the sun - as with when you’re using fill in flash.

5. Change Your Perspective
Sometimes moving your subject isn’t possible - but moving around it can give a different impact. This might be moving to the other side of the object, shooting from directly above or even getting down low and shooting up. Doing so will change the angle of the sun hitting both your subject and the camera and give your image a completely different feel.

6. Use a Lens Hood
Suffering from lens flare? If your lens came with a lens hood - get it out and use it. If you don’t have one - it’s not difficult to construct one out of card - or to even use your hand to shield your lens from the sun. Just make sure that your shot is free of your hand or the DIY hood that you’re using (learn more about eliminating lens flare).

7. Filters
Sometimes a filter can be handy when shooting in bright sunlight. I try to take a Polarizing filter or Neutral Density (ND) filter with me at all times. The polarizing filter will help cut down on reflections and both will cut down the light getting into your camera to let you use slower shutter speeds and smaller apertures if you’re looking for more control over these elements of exposure. Polarizing filters have the added bonus of giving you some control over some colors - particularly when you’ve got a blue sky in your shot (learn more about using filters).

8. Play with White Balance Settings
Many digital cameras come with the ability to choose different white balance settings. While you can make adjustments later on post processing (particularly when shooting in RAW) choosing the right setting at the time of shooting can be worth experimenting with. I personally shoot in RAW and do this later on my computer - but have friends who prefer to do it in camera.

9. Metering
Direct sunlight makes correct metering tricky. In these conditions I generally choose the spot metering mode on my DSLR and choose the main subject of the scene that I’m photographing (the focal point) to meter off. Alternatively pick a mid-tone area to meter off if you want everything to be exposed relatively well. Check your shots immediately to see if you need to adjust your technique (your histogram can be handy here) and if you have the luxury of time - take multiple shots metering off different parts of the scene so that you can choose the best one later.

10. Pick The Time of Day to Shoot
For many of us, we won’t have the luxury of sitting all day long waiting for the perfect light - but if you do, the time of day can dramatically impact your shot. Dawn and dusk are particularly good times to shoot as the direction and color of the light is often more useable than the direct overhead light of noon.

11. Shoot Silhouettes
‘If you can’t beat em join em’ is a saying that could come into play here. If the bright light of the sun is causing you a headache - why not use it to your advantage and make your subject into a Silhouette against a bright background.

Wednesday, March 19, 2008

Get the Goods: Fashion Photography Workshop in New York City


I received information about this special event featuring a two-day intensive workshop and cover fashion shoot with legendary photographer Claudio Basso in New York City April 28-29. Register here at the Renovance TV Photographic Reality Training website.

Basso will share tips on how to succeed in one of the most competitive fields of photography as well as insider details about key players in the industry. His step by step training session will offer techniques on how to plan, execute, edit and deliver a successful fashion shoot with a supermodel. Network with the best techs in the industry, the supermodel, the agent and the creative crew during Basso's shoot. Eight participants will be randomly picked to shoot with Basso. The weekend concludes with a ceremony showcasing participants' images and awards given to the three best images.

Be sure to check out other opportunities including monthly portfolio reviews and these upcoming workshops: "The Power of Light," and "Platinum Book."

Tuesday, March 18, 2008

Get the Job Done: Artistic Nude Shots A Hit!


I just finished editing Terilynn's artistic nude/boudoir shots this morning, and she LOVES them! Her husband will be getting the goods later this month as his birthday gift. Shhhh, don't tell! Well, actually Teri already spilled the beans because her husband kept prying ("The only reason why you would be going over to Sheba's house is so she can take your picture!")

Not only was the shoot a great success, but Teri was forced to learn something about herself that I have no idea why she didn't know before: She is GORGEOUS!

After she saw the proofs, she kept saying that she couldn't believe it was actually her. Of course I wanted to smack her because Teri has always been beautiful. But what I could definitely appreciate was taking photos that helped her believe it too! I have had plenty of experience photographing models for fashion shoots, but none of that gave me the personal satisfaction I now have knowing that I had a hand in helping Teri discover her own beauty. "These are the type of shoots that happen once in a lifetime for the ordinary person. It is your chance to feel beautiful and capture it in print."

I am hoping that these photos will encourage other friends and potential clients to have their own sexy photos taken. Everyone is beautiful...models do not have carte blanche on that one!

Monday, March 17, 2008

Instructor's Tip: Easter Photography


Enjoy this week's Photo Tip of the Week from Russ Burden. Don't forget to check Take Great Pictures for his most recent tips. On the home page, click on the "Photo Tips And Techniques" button in the left hand column. Additionally, check out his "Digital
Tip of the Month" found by clicking on the Digital Photography button.

The above photo was taken by Russ Burden, and his comments follow as well.

"Easter is a great time for photography. Not only does it present
wonderful photographic opportunities with kids dressed in pastels,
adorable faces adorned in bonnets, and expressions of wonderment as
surprises in Easter eggs are revealed, it also coincides with the
time many photographers dust off their cameras from winter
hibernation. With this in mind, take your SLR’s and point and shoots
out of the closet and use the following tips to capture great egg
hunt photos.

CAPTURE THE ENVIRONMENT: Great photography doesn’t have to be
restricted to cramming everything into one image. Often a series of
pictures has more impact. When making pictures of your kids chasing
down Easter eggs, an important shot to have is the overall
environment. This allows the viewer to see the vast area in which the
hunt occurs and establishes a size relationship between the young
child and his locale.

MOVE IN CLOSE: Once you’ve captured the environmental shot, make
sure you get one that shows your kids reaping the rewards of the eggs
they’ve found. If the lighting is contrasty, use fill flash to open
up the shadows. If you don’t have a flash, use a shaded area to
soften the light. The overhang of a tree or side of a building or
house work well.

MAKE A CONNECTION: There are many symbols of Easter, but the most
obvious is the Easter bunny. Always include some images of your
children that connect the symbols of Easter to them. Grab an image
that shows the enjoyment on your kid’s faces."

To learn more about this subject, join Russ on one of his photo tours.
Please visit his website to get more information.

Sunday, March 16, 2008

Get the Job Done: Shooting Stilt Walkers


A business contact I made while photographing an event in Breckenridge hired me again this past Saturday. Stilt Walker Bill Coleman and his giant puppets were performing during Denver's annual St. Patrick's Day Parade, and Bill needed images for advertising his company. The day couldn't have been more beautiful, with warming sunlight and Colorado's signature skies boasting an amazing shade of blue.

Even on a bright day such as that, I still benefitted from using fill flash on my subject's face so their eyes wouldn't be shadowed. My new Canon EF 16-35mm f/2.8 II USM lens was my primary piece of glass for the assignment and was an excellent choice because of its full-frame, wide field of view. I had no problem taking group shots of the large puppets and stilt walkers. And it was also easy to capture wider story-telling images showing how the crowd interacted with them.


It was fun to shoot different angles and perspectives, especially when I sat or laid down on the ground to shoot at the point-of-view of a child gazing up at the 18 foot tall giants.


The only thing I might change next time is maybe getting some rollerblades to make it easier and quicker to stay in front of the coming parade! It was a lot of hard work to keep up as the parade snaked along its route in downtown Denver. Bill is a great resource because he is a member of the entertainment circuit that travels throughout the state and performing. Becoming a part of this circuit could be very beneficial for me and my photography business.

Friday, March 14, 2008

Get Connected: Join Local Photo Clubs

Earlier this week I attended a meeting at the Denver Photo Martini Club, and I can't tell you how inspiring it was. Just spending a few hours in company with other talented photographers had me revved up with new ideas and better techniques for capturing images. And I immediately made new friends who helped me feel as if I were a part of a community instead of an isolated photographer struggling alone in my craft. If you haven't done so already, join a photo club in your area to maintain your zest for photography.

Too often I have allowed myself to get overwhelmed with shooting portraits and events for paying clients while still working 40 plus hours a week at my day job as a reporter at the Denver Post. Suddenly my photography was starting to feel more and more like work and not enough like a creative outlet.

I think the monthly assignments I receive at the Photo Martini Club will give me a chance for personal expression. Last month, club members were asked to photograph "Secrets" for their assignment. What is (or was) a secret, and how would you go about interpretting that mysterious topic in captured images? It's those type of questions that get the creative juices flowing again, that force you out of your comfort zone, that help you remember why you started taking pictures in the first place: to share your world in pictures.

Joining a photo club can even suit the practical needs of showcasing your work. For example, the Photo Martini Club produces bi-monthly photography shows featuring members' photography and their interpretations of the different monthly topics. The work is debuted of the members work is debuted at local studios, clubs and other venues where friends, family and fellow photographers can view their work. For example, one upcoming event will be held in the Denver Museum of Art. Now that is an incredible opportunity for exposure!

The Photo Martini Club also produces "SHOT! Magazine," a photography publication featuring members' work. The magazine's cover art is always chosen from one of the photographs taken by club members for the show that coincides with the magazine issue. Paying $100 can net a member a full sample artist page in the magazine displaying their pictures and bio information to a magazine circulation of 10,000 potential clients. That's the best advertising I think I can get for my money right now. On top of that an online website gallery for all club shows, exclusive opportunities for photography work available only to members and a discount card good for products and services all over town -- all for about $25 per show. Plus, at the meetings, each member has a chance to show their images and receive critiques. Being able to explain why you did something and getting an immediate response is very beneficial for a photographer, no matter if they are beginners or pros.

I'm going to join this group, and I would encourage others to check out the offerings in your home town to see how you can get connected. And what is next month's topic, you ask? "Decay!" I've already got some ideas, but I would love to hear what your first thought was in how you could photograph this topic.

Wednesday, March 12, 2008

Get the Goods: Studio Business Management Course

Efrain Cruz, one of my favorite instructors, has left his position as Operations Manager at the Denver Darkroom to begin his own photography school, Illuminate Photography Workshops. The new school will offer workshops, classes and clinics on Digital Photography, Studio Lighting, Photoshop and the Business of Photography for photographers of all skill levels.

Efrain's departure is a terrible loss for the Denver Darkroom, but I'm very proud of his new endeavor. I actually found out about his new goals when we bumped into each other last month at a South Metro Denver Small Business Development Center workshop on starting a home business. He truly listens to his students to discover what they need to progress. When he asked me what kind of classes would be helpful in bolstering my photography career, I told him I could use some direction from a professional photographer on how to run a studio or business. Being a great photographer involves one set of skills, but not necessarily those that are needed to be a good business owner or entreprenuer. I needed to learn how to create a solid business plan for potential lenders, keep records and books, and market myself.

Efrain wrote everything I said down in a his little notebook....and the next thing I know, he's offering a "Managing Your Photography Business: Passion + Profits" course -- an offering I haven't seen in any other local photography schools' programming.

I often tell people how Efrain's unfailing confidence in my ability to succeed was the reason why I am a photographer now. You see, Efrain was the instructor of my first Digital Photography course taken at the Denver Darkroom. I was so overwhelmed and intimidated with all the information that was thrown at me that I told Efrain I wasn't sure I was coming back. I feared I would never be able to learn as fast as the other students who clearly had had experience in digital photography before. Their ability to effortlessly speak the lingo with Efrain during that first class scared the heck outta me. I went home that night and had nightmares...as if my mind still couldn't figure out what aperture meant!

What I remember most about Efrain was his calm response when he told me that I should come back to class, that I WOULD get the hang of it, that he could already see that I had the energy and excitement that would pull me through. And he said all that after only spending those first few hours with me in class when I know I had a strong "deer caught in the headlights" glare in my eyes. He saw something in me, and if he did, then I had to be brave enough to at least try too. And throughout the month long course, I held on to every push Efrain gave me, every statement he made in class about my growth. He even said I was brave once for having the nerve to get under a Jeep and take some macro shots of the transfer case with my brand spanking new $1000 Rebel XTi! At the end of the course when my self-portrait was voted as one of three finalists for "Photo of the Month," I knew I was onto something if I just had the faith to believe and the courage to keep getting educated. (see the photo below).


Thank you Efrain, for being my lighthouse in an internal storm of insecurity. And I wish you luck in your business!

Tuesday, March 11, 2008

Get the Job Done: Teaser (Artistic Nude Shots)


I finished my artistic nude shot of Teri on Sunday and it was AMAZING! She is a natural model who really seemed to be enjoying herself. She has allowed me to showcase a couple of images on my blog and business website. I have about 300 more to edit. When I'm done with the project, I will post my gallery, although some other shots Teri has approved of me posting can be seen here. This was Teri's emailed reaction:

"Wow! Who the heck is that!?! That's not me!! Wow! The makeup is flawless. Felisa needs to be a makeup artist. Your lighting is very awesome. I love the one with the black tulle. You did a beautiful job. Thank you, Thank you!

Please share your comments. I'm very anxious about this, as this is my first time doing this kind of shoot.

Instructor's Tip: DPS' "Light and the Pinhole Camera"

Yesterday, the Digital Photography School online forum began its highly anticipated ongoing weekly series of articles titled "Photograhy 101 - A Basic Course on the Camera." The series will cover all the basics of camera design and use, including the "exposure triangle," focus, depth of field and sharpness, focal lengths as well as an indepth look at the camera itself.

When the first "semester" of Photography 101 is finished (and depending on the series' success) future semesters will be offered, possibly including Photography 102 - A Basic Course in Taking Photos, Photography 103 - A Basic Course in Processing and Photography 104 - Increasing Your Options with Gear.

I've been looking forward to this and will be following the series closely. Each lesson includes a list of resources for further study and fun assignments to try out at home.

Get the Goods: Why I'm Not Upgrading to Rebel XSi


Pre-orders for the new Canon EOS Rebel XSi have already swamped my email. While I think it's a great looking camera, I won't be upgrading from Rebel XTi. Calumet Enews announced today it's offering preorders for "the new Rebel XSi, an irresistible upgrade for owners of older Rebel cameras and those looking to make the jump to a digital SLR."

"Previously only available in higher-end bodies, Canon's EOS Rebel XSi introduces Live View to the EOS Rebel series. You'll be able to compose and fine-focus on-screen with up to 5x magnification. Canon has updated Live View by adding a live, contrast-based AF mode that operates similar to a point-and-shoot, letting you autofocus without interrupting the display. Of course, this wouldn't mean a thing without the latest image-processing technology. With the new DIGIC III processor, 3.5 frames-per-second bursts, 12.2 megapixels, SD card compatibility and 14-bit conversion, the Rebel XSi packs exceptional speed and image detail into its lightweight body."

I agree that if you are just making the leap to DSLRs, the Xsi would be your best bet. But I wouldn't spend the money on it if you already have the XTi. The XTi has been a wonderful camera for me, and I intend to stick with it until I can afford the Canon EOS-1Ds Mark III. I would instead suggest investing your money in as much high quality glass (or lenses) you can afford and keep whatever DSLR body you are working with now. I just got a new Canon 16-35 2.8, and Canon EF 70-200mm 2.8 L IS USM and they are FABULOUS when mounted on my XTi body. Check out my galleries for yourself...all of those were shot with either my XTi or my Canon G9.

Get the Goods: Adobe Bridge Home "Studio"


This press release came across my desk today from Adobe Bridge Home:

"Check out the new Studio area of Adobe® Bridge Home, where top designers reveal secrets for success, motivation, and keeping things fresh.
• AdamsMorioka: Sean Adams and Noreen Morioka show how Tupperware, and other inspired design ideas, changed the world.
• The Basement: Special effects artist Robert Legato tells how digital experimentation is key to real-world film directing.
• Honest: Cary Murnion and Jonathan Milott reveal the importance of fun in even the most straightforward design work.
• You: Have your say and learn from others in a new interactive forum.
Adobe Bridge Home is the creative sanctuary for CS3 product owners. Use it to find the latest tutorials, demos, event invites, and more, all organized by creative discipline and kept fresh to keep you sharp."

Note: You must have Bridge version 2.1 or higher
to use this link. Get it now. Mac or Windows.
You can also access Adobe Bridge Home by
choosing File > Browse from any Adobe Creative
Suite® 3 application, or just paste this link into
your browser: adobebridge:bridgehome://home

Monday, March 10, 2008

Another Aside: Rest In Peace, Mom

Today marks the 3rd anniversary of my mother's death. Elizabeth M. Banks died of emphysema and COPD March 10, 2005. She was only 48. If you read my profile, you will learn that I took up photography initially to help me stay footed in this world and learn how to appreciate living (instead of wanting to give up just so I could be with her again). I think I can honestly say that I am at peace with her loss, and the photography gives me a new reason to leap out of bed each day. Just the time and energy it takes to learn new techniques keeps me yearning for more, as I love learning and being educated.

And I know she is still very near me. I can almost hear her...especially when I do something stupid. Right before she passed, I was trying to introduce my Harlequin Romance obsessed mother to a new genre of books called "Paranormal Romance" a blending of my personal love of fantasy and the supernatural with her love of bodice ripping, brooding heroes and "traveling" to foreign places. I'm not sure if she ever got around to reading the last box full of paranormal romances I sent her, as the books were still neatly stacked inside the package I sent her when I went home for the funeral. But I know she is reading them over my shoulder now and giggling with me when I get to the steamy love scenes.

And I think she is proud of me for finding a way to cope with her loss, for chosing life. I hope your photography inspires and fulfills you as much as it does me. And when I see my Mom again, I'm going to have a whole mess of photos to show her!

Breaking News: Could you shoot for National Geographic?

You would think that I coveted a shot as a National Geographic photographer with all the news I've been spilling about upcoming seminars hosted by this magazine. ;)

Here's something new that my buddy Derrin over at Wolf Camera tipped me off about: a magazine conference being held in Boulder next month:

"Could you shoot for "National Geographic" or maybe "Backpacker," "Free Skier," "Women's Adventure" or "Climbing?"...make your passion a career by joining us in Boulder April 11-13 for a weekend that could change your life. You'll have the opportunity to meet with and hear from the top photo editors and photographers in the outdoor sports and travel world of publications. NG Senior Photo Editor Sadie Quarrier will be the keynote speaker."

Dang, this is one expensive obsession. If I register before March 15, it will only cost me $350 clams instead of $380, but I think this could be worth it just to swap business cards with such photographic greats! I could use some financial aid, or try to sell a photo.

An Aside: POTW -- Traditions

This week's POTW assignment is really wracking my brain. I have until Wednesday night to come up with a photo depicting a tradition. I think the hardest part of this is trying to figure out what a tradition is and what it means to the photographer. Then you've got to find or recreate the tradition to take pictures of it.

What immediately sprang to my mind was a family sitting down to eat dinner (a long lost tradition all in itself) and maybe stopping to have prayer before they eat. I also thought about blowing out candles on a birthday cake, quinceaneras, or placing flowers at a tombstone. I've gotten some of my friends to discuss the issue with me on the Digital Photo School blog.

What do you think I should try to photograph?

Instructor's Tip


Enjoy this week's "Instructor's Tip" on portraits from my favorite instructor Russ Burden. The above image was photographed by Russ Burden.

Don't forget to check Take Great Pictures my favorite instructor's my most
recent tips. On the home page, click on the Photo Tips And Techniques
button in the left hand column. Additionally, check out Russ' Digital
Tip of the Month found by clicking on the Digital Photography button.

Open Up For Portraits
A good portrait reveals something about a subject’s character. A
simple smile, an intent stare, a subtle turn of the head, or overall
body stance all help to bring out who he or she is. If elements
within the frame compete for the subject’s attention, it makes it
difficult to discern the nuances in the subject’s face that help
communicate the subject’s character. One fault that appears in many
beginning photographer’s portraits is how they handle the background.
A good rule of thumb is to keep it as simple as possible.

To me, as with any subject, the background is equally as important as
the main subject. If the background is busy and doesn’t complement
the subject, it will compete for attention. In portraiture, the
obvious focal point should be the subject. But a busy background
prevents the eye from focusing on the person. Placing your subject
against a plain background or using a wide open aperture to try to
throw a busy background out of focus is critical in the success of
the portrait.

To learn more about this subject, join Russ on one of his photo tours.
Please visit Russ Burden Photography to get more information.

Sunday, March 9, 2008

BREAKING NEWS: Artistic Nude Shoot

This morning I will be shooting my first artistic nude. I've still got some setting up to do, but I just wanted to write a quick post to commemorate the event. Last night my boyfriend helped me transform a room of my house into a makeshift studio complete with a backdrop, one of my new Alien Bee strobes and Westcott Spiderlites. I will add more light as I go and take pictures of the studio set-up so I can hopefully get some critique from readers to let me know what I did right and what I can improve upon. I've got about two hours to get ready before Teri and my burgeoning make-up artist Felisa Cardova arrive. This will be Felisa's first shoot using her own equipment as well, and I am hoping that if she enjoys it, she can work with me in the future. Wish us luck!

Saturday, March 8, 2008

Get the Goods: Gary Fong's Puffer


OK, so maybe I am a little "Fong Obsessed," as one of my buddies at the Wolf Camera store called me yesterday during my daily lunch break spent at the shop. But seriously, the Gary Fong Puffer Pop-up Flash Diffuser is an amazing piece of equipment for under $20.

The Puffer mounts into the hot-shoe slot of digital cameras with a pop-up flash and softens the quality of the light. It's a great tool for the budding photographer who isn't ready to invest in a costly external flash, but still wants to be able to take great portraits of family and friends. By now, the features staff at the Denver Post are aware of my photography and quite used to me trolling around the office taking practice shots whenever I get new equipment. I think I heard one utter under her breath "Oh God, here she comes again with that damn camera!" before she fessed up and told me, "You know I don't like myself in pictures." But I was able to convince Ed Smith, the entertainment editor, to pose for me while I tried out the Puffer (as long as I promised to send him the good pictures, which of course I did).


This image without the GF Puffer


The shadows are noticeably softened with the Puffer in the second image. And Ed's skin tone is more natural and true to form without that harsh glare unfiltered pop-up flash produces in the first image. The Puffer was incredibly easy to install, packs completely flat for convenient storage and has eight different mounting positions to fit any popup flash camera. Get one. It really works for those quick snap shots you want to take of people or close-ups of objects.

Thursday, March 6, 2008

Get the Goods: Gary Fong's Lightsphere


Yesterday, my new Gary Fong Lightsphere flash diffuser showed up at work. Just being able to get this piece of equipment was worth forcing my flu-ravaged butt out of bed and back into the office. While some of my colleagues have complained that the Lightsphere (and most of Gary Fong's other inventions) look ridiculous and are hard to store in a camera bag, I think they are just bitter because they don't have one yet.

So far I think I'm in love with this diffuser for the almost studio quality softlight it produces. I have yet to use it on a human subject, but my cat Nikita was willing to model for me, well sorta. I had to capture her attention with a straw, but whatever works when it comes to getting a cat to pose for you.


Without the Lightsphere


With the Lightsphere


My 580 EX II was able to light up my darkened bedroom, but clearly, using the Lightsphere lends more detail, depth and texture to Nikita's fur. It also was worth my time to watch the DVD tutorial that came with the equipment. It includes interviews with Gary Fong demonstrating the best ways and appropriate situations to use the Lightsphere and its companion pieces, the chrome and amber domes and the inverted dome for an extra power boost. Smugmug customers get a great discount, so I think this equipment was a steal for less than $150. I can't wait to practice with it on a human subject for portraiture.

Tuesday, March 4, 2008

BREAKING NEWS: Shooting artistic nudes?!

My friend Terilynn has asked me to take artistic nude shots of her to give to her husband for his birthday. But I have never taken these type of shots before, and I need your suggestions to make this a success.

The shoot is a celebration of sorts, commemorating Teri's successful juice feast in which she persevered for 93 days straight only drinking healthy juices but eating no solid foods. She is a wondrous 47 pounds lighter and ready to get in front of the camera. I have been doing some research on shooting the body as an art form, a landscape in its own right. I've seen some beautiful works where the photography manipulated light and shadows (as well as the subject's curves) to create a sensuous and intimate mood. While this is for her husband (sssshhhh, told tell him; it's a secret!!!!), she wants the images to be clean enough, so to speak, so that she can hang them in a family room where her children could see them as well.

A friend sent me this video link which offered some great suggestions to get me started. Thanks Tiffany! She also suggested I check out modelmayhem.com to get other ideas. Please share tips on how you shot artistic nudes and the photographers you admire that do them well. Both Teri and I are sick this week, so our shoot may have to be postponed, but if we get well, I could be shooting as early as this weekend. Thanks in advance!

Monday, March 3, 2008

Instructor's Tip

Every week, Russ Burden, one of my favorite photography instructors, shares shooting tips with his former students. Russ is one of the instructors participating in Panasonic Lumix's Digital Photo Academy. I have taken two of his classes and intend on taking several of his nature photography tours offered at his site, Russ Burden Photography . Because Russ has continued to be so helpful to me, I thought I would pass his expertise along to you, too.

Diversity in Your Composition (Following commentary and photos in this post were taken by Russ Burden)


"I’m a firm believer in the school of making a connection with my
subject to be able to create better images. The stronger the
connection, the more a photographer will be willing to remain with
the subject. The stronger the connection, the more a photographer
will be willing to work the subject and augment the light. The
stronger the connection, the more a photographer will be willing to
play with the composition, try different lenses and try different
angles. The nonchalant photographer can get lucky now and then and
nail a good shot but not as consistently as the involved one.

When I lead my photo tours, I tell my participants to “Exhaust All
Possibilities” before leaving a subject. Whether the subject is a
close up of a flower or a grand scenic, this means not leaving it
until all the options are covered. After an initial photo is taken,
this could mean looking at it with a different focal length lens. If
it was shot wide, use a longer lens to isolate details. If it was
shot close, try a wide setting to see if the subject can be a part of
the overall scene. If possible, walk to the opposite side of the
subject to see how the composition and light change. Get on your
belly to see how the perspective changes."

-Russ Burden

At the beginning of each month Russ shares his Photoshop techniques at Take Great Pictures. Find March's topic about "Complete Cloning" here.

Sunday, March 2, 2008

BREAKING NEWS: National Geographic Seminars

I was checking out the photo tips offered on the National Geographic website when I ran across this information: National Geographic will be hosting traveler seminars in numerous US cities. Each seminar will be instructed by some of its most talented photographers. Here's hoping the seminar will be hosted in your hometown or a city near you. For seminar questions only, contact: info@ngtravelerseminars.com or call 505-983-1400.

Luckily, the NG will be heading to Denver April 27 to present: "PHOTOS FROM THE EDGE: BRINGING HOME GREAT ADVENTURES
Experience the adventure out on the edge with National Geographic Traveler photo editor Dan Westergren and I photographer Pete McBride for a one-day seminar as they give you the tools to capture your own incredible journeys on film. Uncover the secrets of how to photograph not just as a passive observer, but as a part of the action — whether you hike, bike, ski or climb. Let our experts show you their solutions to the problems they encounter while on assignment in the most unforgiving environments."

I will have to shoot a gig so I can afford to pay for the registration price of nearly $200, but this is a great opportunity I don't want to miss. Just being able to meet an NG photography is very cool, not to mention learning some tools and tricks of the trade from some of the best professionals in the field.

Get Out There: Exhibiting Your Photos


The photo above was chosen to appear on exhibit at a Denver restaurant. I can't tell you how exciting it is to have your work shown to the public like this. Somehow it seems different than having my photos available online. The people that come to this restaurant are a captive audience that might not have come in contact with my photos any other way. It's a great opportunity, and I encourage all my readers to take advantage of similar ways to display your work. Just don't let your insecurities cause you to miss out like mine almost did.

The Denver Darkroom created this opportunity for its students to exhibit and sell their work in participating venues throughout the community. It's a great way for the school and its talented students to promote themselves. For this first exhibit, students could enter up to 20 photos that would be judged and then put on display at Carmine's Cucina, an Italian and Mexican restaurant. I made the mistake of peeking at what other students had turned in. Their work was incredible, and I started to feel my work didn't measure up. I dragged my butt, waiting until the last possible minute to submit my images because I kept arguing with myself about how fruitless this would be and how terrible I would feel when none of my pieces were chosen to go on display. Sometimes it's hard for even me to believe how far I've come in less than a year...from knowing nothing, not even understanding what aperture meant to being able to shoot and edit my images, manipulating layers and quick masks on Photoshop CS3.

But we have to have faith in our own eye, in our own abilities. Someone told me it doesn't matter how long you've been shooting, especially if you can do the work as well as or even better than someone who has been shooting for years. One of the three images I submitted was not only chosen to go on display, but the restaurant owner himself picked my image as a personal favorite. He told me that if no one else buys it, he intends too and will always have the image hanging in his restaurant because he loves it that much. He loves how the slow shutter speed transforms the water from a photo into something that looks like a painting.

Don't let your fears stop you from succeeding. Acknowledge your insecurities so they don't have power over you anymore; do the work you need to make yourself feel more competent and GET OUT THERE! You will never know who will connect with your work if you keep it hidden.

Saturday, March 1, 2008

From My Portfolio


One of the best compliments I have ever received came from a newsroom colleague: "I don't think I've ever seen Bishop so alive and animated before." My colleague was talking about some portraits I took of Terilynn's shy and introverted son, Bishop. Having the opportunity to reveal a rarely seen side of this beautiful child was incredibly rewarding.

You might remember this image of Terilynn and her daughter Avery (it has become my signature shot). Before I took portraits of Teri, her husband and four children, I spent time at Teri's informal birthday party getting to know her family so they would be more comfortable with me when I brought them into my home studio a few days later. The key with shooting Bishop, and I believe all children, is allowing them to be them. Initially, Bishop seemed afraid of my camera, so I let him gently touch the lens and ask questions about my equipment. After that, I followed the children into the backyard and simply watched them play, snapping shots here and there. I wasn't too concerned about the images I took at that moment. I just wanted them to get used to me being in their space. I adjusted my settings to the wonderful late afternoon sunlight as I went. If they wanted me to take a picture of a flower they found in the garden, I did, making sure to show them the digital image immediately afterward. Soon, they were calling me "the camera lady" and asking me to take pictures of them jumping and running and throwing horse shoes.

So when Bishop decided he wanted to see if he fit inside this plastic storage bin, I was ready for a great shot. He was comfortable and at ease, and I think the resulting images show that. I shot this at f10, 1/200, ISO 200. If I were to take it again, I might use a shallower depth of field to blur out the grassy background, maybe at f4. Not every situation will allow a photographer that kind of quality time with a young subject. But when ever children are involved, it will be worth any time you have to spare getting to know them better.

Need more tips? Joel Sartore, a National Geographic magazine photographer, shared these ideas in the book "Photographing Your Family" (National Geographic Society, $24.95) featuring his work:

1) Consider what the child likes to do. Do they ride tricycles around the dinner table or wear a Superman outfit everywhere? Keep a camera handy to capture those moments before a child outgrows those antics.
2) Get down (or up) on the subject's level to create more intimacy and take advantage of great compositional angles.
3) People will do more interesting stuff if you let them do their own thing rather than direct them. Pretend to be looking at the camera, or fixing it, and take a few frames. You'll get more interesting pictures that way.

Best Posts

Picture Your World Photography is a premiere photographer in the Denver, Colorado Photographer community on MarketingTool.com.