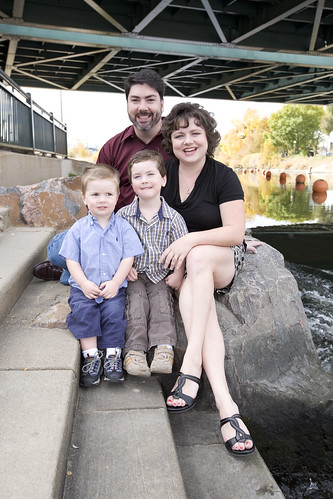
Sunday, November 30, 2008

Congratulations November Monthly Photo Contest Winner: Sean Donnelly

© Image by Anthony Sean Donnelly

Congratulations Sean for winning November's monthly photo assignment contest! The theme was WINDOWS. Sean gets to choose December's topic, and I will post his choice on Monday.

Saturday, November 29, 2008

Saturday Morning Cartoons


Enjoy today's installment of Aaron Johnson's photocentric comic strip "What the Duck." The popular comic is celebrating it's 2nd year anniversary. Congratulations Aaron! And thank you for encouraging me and others to seek comfort in our sense of humor when the ebbs and flows of the photography business threaten to overwhelm us. The comic is available now for syndication as "W.T. Duck," appearing in a local newspaper near you!

BREAKING NEWS: Baby on the way!

Guess my maternity photo session today is a bust! I have learned when babies are ready to be born, there is no stopping them! Baby Edie decided she was done with the whole womb thing and wanted to make an early debut several weeks ahead of schedule. So her Mom is busy delivering her right now!

Hopefully instead of maternity photos, Mom will let me take portraits of a newborn Edie with her parents in a few months to come.

Congratulations to Mom and Dad, and welcome to the world, daughter-to-be.

Friday, November 28, 2008

This Weekend: Shooting business portraits, a maternity and boudoir session and promotional shots

This weekend is going to be another busy one with photography assignments running Saturday, Sunday and Monday!

I kick off the weekend with a maternity session for my daytime gig boss, a Denver Post features editor. Throughout the week, my boss had I have been discussing her favorite poses and the kind of shots she's interested in having. She prefers black and white photography, so it will be my first session dealing with only black and white imagery. To prepare for my shoot, I picked up some tips showcasing black and white photo's ability to:

1) accentuate the depth of the photograph
2) heighten emotional content
3) transform everyday captures into works of art
4) produce a clean, crisp look
5) make a dingy or overcast look into a striking photo

I think black and white will give my boss' photos a timelessness she will value for all time as she prepares to welcome her first baby, Edie (short for Eden), into the world.

On Sunday, I will shoot another set of artistic boudoir shots for a client who wants to send an elegant, sensual treat to her husband serving in the war overseas. She said her hubby and his buddies are always ogling the women featured in Maxim magazine. I told her we could beat that!


I want to personally and publically thank Efrain Cruz, director of Illuminate Workshops, for allowing me this opportunity to shoot this session. When the client, a student of Efrain's, emailed him asking for a referral to a photographer who specialized in boudoir shots, Efrain gave the client my name and business website, as well as the name and contact information for another local female photographer. I've blogged before about Efrain's generosity in providing business opportunities for his photography students, including the fact that Efrain helped me nail my first photography assignment a year ago. It's these beginning and nurturing these kind of relationships that I think have made all the difference in my fledgling business's success.

So, I emailed the client, providing a link to some of my boudoir samples and a note about my holiday special featuring a one-hour photo shoot for $75. I got a response a few minutes after, and she will be working with me on Sunday. Efrain asked if I knew why the client chose me over the other equally talented referral he shared. My only guess is that I contacted the client promptly and that I made sure she knew about her chance to take advantage of my holiday special.

Finally, on Monday, I will be shooting business portraits for staff on the Auraria campus. Last Monday, I had to cancel an appointment due to a terrible cold that still doesn't want to let go of me. I guess if you are going to be loved by something, it might as well be a virus! ;) I am hoping to shoot environmental type portraits of the professors and staff members working in their offices or classrooms instead of doing studio-type work.

And later that evening, I will be shooting some promotional photos for an all-girls dance troupe. Guess there is no rest for the wicked! Wish me luck!

Get the Goods: Black Friday Discounts on Photography Classes!


This weekend one of my favorite local photography schools is having a special "Black Friday" discount on Gift Certificates and classes. Shop early and save.

I'm telling all of my friends to buy me gift certificates for classes. It's the perfect gift for the photographer in your life who already seems to have everything. Besides, the things photogs need are too expensive anyways....like new lens and stuff. Education is much better, and your friends will know they are contributing something useful.

Before going to the malls, you can do some of your shopping online. Buy someone a Gift Certificate for a class in photography. You could also buy them a class on his or her favorite topic: Lighting, Photoshop, Wedding, Architecture and more. Hey, if you are looking for gifts to give to your favorite photography blogger (that would be me of course! ;) I would LOVE to be able to take Armando Martinez's Photoshop 3 class as well as Andrew Clark's wedding class! HINT HINT!

Now through Sunday, enjoy big savings on classes and gift certificates. The sooner you buy, the more you can save.

Starting Friday, save 25% on classes and Gift Certificates. Beat-the-Clock and save more.

Gift Certificates can be applied toward classes and workshops. Gift Certificates can be mailed or emailed. Please provide your mailing address with the Google Checkout, your Gift Certificate will be mailed immediately.

If you prefer to pay over the phone call: (720) 324-0111 or email: info@illuminateworkshops.com

Wednesday, November 26, 2008

Get the Goods: Maternity Photography Tips and Instruction

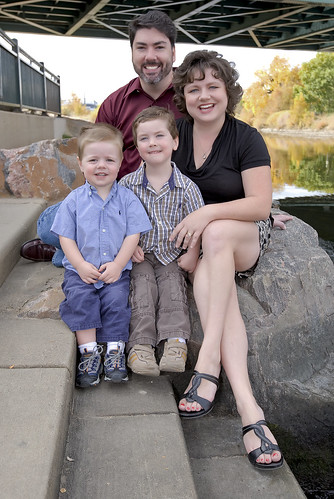
ⓒ Image by Robert Austin Fitch


The people who work at Photovision scare me sometimes. Their ability to send me an instructional DVD exactly when I need it to brush up for a new photo session is just damned uncanny. When I was nervous about shooting my first wedding, a DVD showed up in the mail offering suggestions on unique poses. Right before my first senior portrait session, a DVD showed up in the mail that recommended edgy locations for cool portraits teenagers would love.

My rational guess is that different types of shoots are cyclical in the photo industry....senior portraits, weddings, etc etc all happen at the same time across the country. So that has to be why the DVDs hosted by Ed Pierce all seem so timely. At the end of this month, I've got my first maternity portrait session, and you guessed it: a DVD showed up in my mail this week with a segment called "Belly Love," offering ideas on getting the most out of a maternity shoot.

The segment was hosted by photographer Brian Killian. Killian's lighting set-up was very simple. He used two Westcott Spiderlites, one as the main light, the second as back light. A third light lit up a muslim background.

The subject was placed in between the main and back lights, while a reflection was used directly to the side of her to help focus light on your stomach. The main subject is the woman's belly, so lighting and clothing should be simple so as not to distract from the belly.

Killian says it's not necessary to shoot a lot of these images because they aren't likely to be publically displayed in the home, but kept as private keepsakes. Aim for two or three images with a few different poses.

Here are 10 tips pregnant mothers can use for a successful maternity portrait session from Austin-based professional photographer Christie Stockstill, who specializes in maternity, newborn, baby, children, H.S. Senior and family photography.

ⓒ Image by Christie Stockstill

Christie Stockstill, owner of Christie Stockstill (pho.tog.ra.phy), is an Austin-based professional photographer specializing in maternity, newborn, baby, children, H.S. Senior, and family photography.

1) Schedule your photo shoot for between weeks 31 and 36 if possible. Your belly may be too small before then. Of course, you don't want to risk running out of time, either.

2) About two hours before your photo shoot, remove any clothing or accessories with elastic. Such items as bras, pants with elastic waistbands, even socks, leave marks on your skin that will show up in your pictures.

3) Discuss with your photographer ahead of time the look and style of the portraits you desire. Do you plan to be clothed the entire time? Do you love the intimate look of skin on skin? Will someone else be in the photos with you?

4) If someone else will join you in the pictures, be sure to select clothing and accessories for them that do not distract from the main subject: your belly. Bright-colored clothing and shiny accessories (watches, belt buckles, etc.) attract light and lead the eye away from the main focus.

5) What should you wear? Many women choose to go au natural, or at least topless with a pair of cute undies. If that's not your cup of tea, try to choose a fitted top-something that accentuates the bust line and belly. If your clothes are too big, your belly will not be highlighted, and that's the main idea of these pictures. Right? If you despise your pregnancy jeans, the ones with the panel, bring a pair of regular jeans and unzip them. That looks really cute with a tank top or a bikini top. Be adventurous! You don't get a lot of opportunities to take these kinds of photos!

6) You may want to bring a few of your baby's things to hold in your photos. Maybe you have already purchased an adorable pair of shoes, someone may have given you something at your shower that means a lot to you, or maybe there is a family heirloom that you would love to memorialize in your pictures.

7) Avoid rubbing lotions on your belly before the shoot. You don't want the light to bounce off the shiny surface of your belly. Do, however, consider moisturizing your elbows and feet.

8) Your hands will likely be in the pictures, so consider a manicure, or at the very least, be sure your nails are trimmed. This rule also applies for toes.
9) Bring powder and lipstick or tinted Chap Stick for touchups during the shoot. Bring your brush or comb and several changes of clothes.

10) Last, allow at least two hours for your photo shoot, and try not to schedule anything for immediately afterwards. Most maternity shoots, like weddings, cannot be re-shot, so don't rush yourself! Enjoy yourself!

ⓒ Image by Natalie Norton

Digital Photography School writer and photographer Natalie Norton shared these seven tips for taking great maternity photography:

1) The Great Outdoors:
So many maternity sessions are done in studio. Taking that natural beauty of a woman who’s ready to bring new life into the world and placing her in the majesty of the great outdoors is simply breathtaking.

2) At Home:
When you shoot a mommy-to-be in her own home she’s comfortable to let go in a way that she may not be otherwise. It’s wonderful for a couple to have a capture that truly shows what their life was like at the time their baby came to be a part of their family.

ⓒ Image by Natalie Norton

3) Simplify:
No matter where you shoot, studio, home, outside, 7Eleven, you’ve got to simplify your surroundings. The beauty of a mother anticipating the arrival of her child should be captured in a way that allows the miracle to speak for itself. Pregnancy doesn’t require anything “else” to be present in a photograph to help tell it’s story. Everything in the frame that may not belong will simply serve to distract from the story that’s already being told, naturally. Pay attention to background.

4) Help Her Feel Beautiful
Women don’t generally feel very sexy when they’re pregnant. Pull that beauty out of her. A good way to do this is by talking as you shoot. It’s perfectly appropriate to say things like: “That’s beautiful!” “Yes, perfect!” “Oh that’s just LOVELY.” “Pregnancy looks good on you girl!” Whatever works! I If she feels pretty she’ll look a whole heck of a lot better. It’s that simple.

5) Highlight Relationship:
Hopefully new babies are coming into a loving home. I always try to include photographs that highlight the tender relationship between mom and dad, because bringing a child into the world with someone is arguably love in it’s purest form.

6) Don’t Forget the Siblings… or the dog for that matter:
Remember that often a baby is coming into an established family unit. If there are siblings and they are available, make sure to include them in at least a few frames. Don't forget pets. They are as much a part of the family too!

ⓒ Image by Natalie Norton

7) Give ‘em Something Different:
Don’t just shoot what’s always been shot. This is a good general rule of photography. I really try to be “consistently inconsistent” Approach each shoot as it’s own and tailor each shoot for the subject you are photographing.

Tuesday, November 25, 2008

Growing Pains: Free Marketing For Your Photography Business


A great thread on the Digital Photography School forum tipped me off about a free marketing services we can use for our businesses.

In the thread, people talked about whether or not networking organizations such as Facebook or Myspace helped their online business presence. One poster mentioned creating a free ad with Google Maps Local Business Center; so I decided to give it a try.

It was incredibly easy to create a listing for my business. I love that it allows you to upload samples of images as well. Plus, I got to create coupons to run with my listing, which will be especially helpful in my efforts to secure new clients during the upcoming holiday season. Be sure to check it out!

As far as Facebook and Myspace goes...well, I prefer Facebook for social networking because I don't get spammed as bad as I did when I frequented Myspace. But I'm not sure yet how helpful this application will be for my business. I was able to create a group specifically for my business. Hopefully, I will be able to gain some "fans" and see if those contacts lead to some booked sessions.

Monday, November 24, 2008

Instructor's Tip: Bracket to be Safe


Enjoy this week's "Instructor's Tip" by one of my favorite instructors, award winning nature photographer Russ Burden. The photo(s) in this post were taken by Russ.

Bracket To Be Safe
Certain lighting situations make it difficult for a meter to produce good exposures. Backlit compositions, night time cityscapes, sunsets and sunrises, and foggy conditions are just some. Add to these a lot of white, black or other bright or dark tones and the meter is further taxed. The more you encounter these conditions the more you’ll get to learn how your meter reads the light, but until you’re 100% confident about how to compensate for your exposure, bracketing is a great safety valve.

Bracketing produces a series of images that are both darker and lighter than the metered exposure. If you’re shooting digitally, I suggest you bracket in one half stops. Bracketing starts from the given meter reading in the camera. The degree to which you bracket should be determined by the lighting conditions - the more extreme, the greater the range of the bracket. As your familiarity with Photoshop increases, use the bracketed series with a feature called Merge To HDR which will optimize the high dynamic range of the image.

-Russ

To learn more about how Russ captured this image, join him on one of his photo tours. Visit Russ Burden Photography to get more information.

To take a class with Russ or a fellow Digital Photo Academy instructor in your area, check out the Digital Photo Academy. I took Russ' intermediate and advanced courses last year, and he continues to be a strong source of knowledge and encouragement as I progress in my photography.

Don't forget to check Take Great Pictures for Russ' most recent tips. On the home page, click on the "Photo Tips And Techniques" button in the left hand column. Additionally, check out his "Digital Tip of the Month" found by clicking on the Digital Photography button.

Vote Now For November's Monthly Photo Assignment: "WINDOWS"

Vote Now for your favorite interpretation of November's monthly photo assignment "WINDOWS." Thank you to all those who took the time to shoot for this assignment and turn in an entry. These topics seem to keep getting more and more challenging. I hope you learned to see your subjects in a new light. And good luck to everyone.

The winner will choose December's topic, which will be announced on Monday.

Sunday, November 23, 2008

Growing Pains: Client Who Cares about Photo Storytelling


Michael and Kim

My latest client's love of photos was a great thing to see and be a part of.

Too many times, people take photography for granted and are to willing to scrimp on the money to pay for a professional photographer. New stats are showing all the time that photography budgets are the first to get slashed during event planning. So many people believe that they can give a camera to anyone and end up with shots that are just as good, if not better than those taken by professionals. I have to admit I've seen some shots taken by so called pros that made me shutter, but the majority of the time I'm simply in awe of the work that so many talented professional photographers can produce. I'm glad Kim and Michael, my last clients, understood the importance of photography and made images and the power of storytelling a hallmark in their engagement.


I was blown away when I arrived at the events center to shoot their party. Every single guest was greeted with the photo I took of them during their engagement session and it totally set the stage for more images guests would see throughout the evening. Kim created wonderful displays of images that showcased the progression of her romance with Mike. They made you feel like you were being included in this great journey the couple were taking together, and the impact was amazing.


I loved hearing people ask "Who took THAT picture." I still can't believe how great it felt to hear Kim proudly say, "my professional photographer, the one taking pictures over there!" That's me they were talking about!!!! Other people kept coming up to me all night long telling me that Kim was pleased and gushing about my work, which makes me happy because I was very nervous about shooting for them. I know that Michael had originally wanted a friend of his to take the photos, but the photographer never really agreed to do it. So they hired me. I was worried they wouldn't be happy with my product, wishing Michael's friend would have shot the party instead.

I think Kim will be a great referral for me. Having my pictures featured so prominently during her party was better than a slideshow presentation. And she has a website up as well that will be highlighting more of my photos. I've agreed to offer her low-res online versions of the pics. I wish I could travel with them to take their wedding photos and I hope they get a good photographer to capture those memories as well. But I'm extremely thankful for the boon I'm sure they have brought to my fledgling business.

I think what Kim did at the party is a great precedent that you might try getting your clients to do as well. If you take the photos early enough in their wedding process, you too can have images showcased at engagement parties, bridal showers, receptions, etc. etc. I hope that I can be Kim and Michael's professional family photographer too throughout their lives, and those of their children and grandchildren.

On Deadline: Monthly Assignment Due By Midnight!

You are officially On Deadline! Submissions for this month's blog photo assignment, WINDOWS, is due in to my email by midnight tonight.

Send your entries to srwheelr@comcast.net and please include a link to your business website, Flickr account or any other site to help promote your photography.

Good luck!

Saturday, November 22, 2008

Saturday Morning Cartoons


Enjoy today's installment of Aaron Johnson's photocentric comic strip "What the Duck." The popular comic is celebrating it's 2nd year anniversary. Congratulations Aaron! And thank you for encouraging me and others to seek comfort in our sense of humor when the ebbs and flows of the photography business threaten to overwhelm us. The comic is available now for syndication as "W.T. Duck," appearing in a local newspaper near you!

This Weekend: Moving My Home Studio to the Basement

This weekend, I plan to take advantage of some down time in between assignments. I've been battling a terrible cold for the past week and it doesn't seem to want to let me go. So I'm going to take it easy and let my tired mind, body and eyes rest.

Come Monday, I will be back to work again -- this time photographing Auraria Higher Education Center staff. I've got a plan to take environmental type portraits of each staff member in their class rooms instead of making them pose for me in studio.

Until then, the only real project I have is to move my home studio down into my basement. Now that I'm finally alone in my house (I used to have three roommates), I have tons of space and I want to be able to fit it to my current lifestyle needs. I think the finished basement would be the perfect location for my home studio because it will be much easier for me to control the light.


I will take advantage of those white walls in the basement as well, using them as a a gallery for my larger prints. I do have one worry though...will all the lights and technology in use down there cause my circuit to trip? The basement doesn't have nearly enough power down there....ie, can't run the washer and dryer at the same time as a hair dryer in the bathroom. Maybe it's time for me to get a separate circuit breaker panel just for the basement.

Friday, November 21, 2008

Get Out There: One of My Images Featured in a Traveling Exhibit

Want to see one of my images up close and personal? Here's hoping a traveling photography exhibit featuring one of my pics will reach a city near you next year.


My image above, "The Allure of Water," was chosen as one of 12 assignment winners from 2007/2008 and will be featured in a traveling exhibition beginning February 2009 in 11 of the museums and art galleries where Digital Photo Academy classes were held.

If you remember, I took two DPA classes with Highlands Ranch-based photographer Russ Burden, whose guest "Instructor's Tips" run on my blog on Mondays. Each month, DPA students and others submitted photos for various topics and a winner was chosen. Now, the 12 assignment winners will be featured in the exhibition running across the 20 participating cities where the DPA host photography workshops, including: ATLANTA, BOSTON, CHICAGO, CLEVELAND, DALLAS, DENVER (my home town), DETROIT, HOUSTON, LOS ANGELES, MIAMI, MINNEAPOLIS, NEW YORK, ORLANDO, PHILADELPHIA, PHOENIX, SAN DIEGO, SAN FRANCISCO, SEATTLE, TAMPA and WASHINGTON, D.C.

Congratulations to all the winners and their images (check them out here), especially Jean Hayes who took top honors as "the overall monthly assignment winner," with her fabulous image seen below.


THE EXHIBITION GALLERY SCHEDULE FOR FEBRUARY 2009:

Tilt Gallery in Phoenix on Tuesday, February 3 - Sunday, February 8. Opening night gathering on February 3.

The Park Shelton Gallery in Detroit on Tuesday, February 3 - Sunday, February 8.

Ray Street Studios Gallery in San Diego on Wednesday, February 11 - Tuesday, February 17. Opening night on Saturday, February 14th during community gallery walk.

Windermere Gallery in Seattle on Wednesday, February 11 - Tuesday, February 17. Opening night on Saturday, February 14th.

ICEBOX Gallery in Minneapolis on Wednesday, February 11 - Tuesday, February 17.

Paul Duda Gallery in Cleveland on Wednesday, February 11 - Tuesday, February 17.

Light Wave Studios Gallery in Bethesda, MD, on Friday, February 13 - Thursday, February 19. Opening night party on Friday, February 13th during community gallery walk.

Griffin Museum of Photography in Boston on Friday, February 13 - Thursday, February 19. Opening night party on Saturday, February 14.

The MAC Gallery in Dallas on Friday, February 13 - Thursday, February 19. Opening night party on Saturday, February 14.

Fastback Creative Books & Gallery in NYC on Friday, February 13 - Thursday, February 19. Opening night party on Saturday, February 14.

Yo! Darkroom Gallery in Philadelphia on Friday, February 13 - Thursday, February 19. Opening night party on Saturday, February 14.

Working With Artists Gallery in Denver on Friday, February 13 - Thursday, February 19. Opening night party on Saturday, February 14.

Image Mechanics Gallery in Los Angeles on Friday, February 13 - Thursday, February 19. Opening night party on Saturday, February 14.

Ron Gould Studios Gallery in Chicago on Friday, February 13 - Thursday, February 19.

I would be honored to meet some of my blog readers if you have a chance to stop by the opening night party in Denver.

Think you can top the winning images? Then upload some already and get involved in a DPA workshop in your town! The gauntlet has been thrown. Now BRING IT! ;)

Thursday, November 20, 2008

Get the Goods: Free Holiday Photo Cards


Picture Your World Photography is running a holiday photo blowout!

Book a one hour portrait session for $75 with the studio between now and Dec. 28, and get a FREE BOX of 20 4x8 glossy holiday cards featuring your portrait.

Choose from more than 40 unique and beautiful card designs.


Don't forget to buy extra prints. Get 8x10s for just $10 with this holiday special. Book your session now! Contact me at shebawheeler@picture-yourworld.com.

Wednesday, November 19, 2008

In My Library: Takegreatpictures.com Newsletter

Copyright © Image by Tim Grey

Last week's issue of my takegreatpictures.com newsletter had a great article from digital photography guru Tim Grey sharing step-by-step instructions for adding a dreamy infrared effect to a regular photograph.

Infrared is a hot look right now in digital imagery, but this article proved that you don't need costly software to achieve the effect. Some simple steps in Photoshop will simulate it equally well using adjustment layers and channels. I have yet to truly venture into Lightroom as I'm still having so much fun learning insider Photoshop tricks just like these. Try using this technique on greenery and other foliage in some of your landscape photography.

Copyright © Image by Tim Grey

If Photoshop isn't your bag, try using an IR filter such as a HOYA R72, which was used to capture this image from discoversomething.com.


Copyright © Image by discoversomething.com

Get more inspiration from checking out this gallery, "The Beauty of Infrared," by J. Andrzej Wrotniak. It was fun for me as a portrait photographer to learn from Wrotniak that the technique can also be used when shooting people, transforming skin into blemish-free porcelain.

Copyright © J. Andrzej Wrotniak

Tuesday, November 18, 2008

Instructor's Tip: Long Lens Landscapes


Enjoy this week's "Instructor's Tip" by one of my favorite instructors, award winning nature photographer Russ Burden. The photo(s) in this post were taken by Russ.

"Long Lens Landscapes
ISOLATE DETAILS: With many subjects, you’ll encounter opportunities to
find an image within an image. For instance, if you‘re photographing
native people in a market place, a good shot to include in your cache
is a tight shot of what’s being sold. But sometimes you can’t get
close to their wares. Out comes the telephoto. Why not apply the same
principal to your landscapes? Instead of just using a stand of fall
colored aspens as a foreground element, zoom in to single out a
uniquely shaped tree that works on its own.

COMPRESS PERSPECTIVE: Telephoto lenses compress perspective. What this
means is foreground and background objects appear much closer than
they actually are. This can be used to your advantage if you want the
compositional elements to appear more closely compacted. The
quintessential example is receding mountain layers that seem to be
very close to each other, but in actuality are separated by miles.

EXTRACT: When I run my photo tours, it’s my goal to find at least one
new shot for my participants at each location on the tour. While in
Bryce Canyon, the standard lens with which to shoot is a wide angle
zoom. Shifting paradigms, I decided to photograph an entire sunrise
with a long telephoto. Shooting exclusively with my 80-400, I began to
extract portions of the wide angle landscape. Guess what - lots of new
images!"

To learn more about how Russ captured this image, join him on one of his photo tours. Visit Russ Burden Photography to get more information.

To take a class with Russ or a fellow Digital Photo Academy instructor in your area, check out the Digital Photo Academy. I took Russ' intermediate and advanced courses last year, and he continues to be a strong source of knowledge and encouragement as I progress in my photography.

Don't forget to check Take Great Pictures for Russ' most recent tips. On the home page, click on the "Photo Tips And Techniques" button in the left hand column. Additionally, check out his "Digital Tip of the Month" found by clicking on the Digital Photography button.

Monday, November 17, 2008

Get the Goods: I Need a New Printer!

This weekend, my Dell 966 All in One Printer crapped out on me. Of course it died just one year after I purchased it! It keeps jamming every time I try to print something. Dell customer service couldn't wait to offer me a bright and shiny new wireless printer that supposedly works better than the one I got pushed into buying during their previous hard sell. Perhaps it could be repaired, but it might cost me as much to fix it as it would to buy a new one. All kind of curse words!

No deal! Needless to say, I'm in a market for a new, more durable printer. Thank God I have that Kodak ESP 3 I blogged about last week. It may not have the photo print quality I prefer, but it is more than capable of serving me for basic printing needs while I save up for a professional photo printer.


After consulting with some of my photography buddies, I'm thinking I will stick with Canon and budget for a Canon Pixma Pro 9500.

Here's on overview of what it has:
"With 10 full-time color pigment inks, advanced new software, camera-direct printing of contact sheets, and support for fine art papers up to 13"x19", it's the new standard for creating your own professional images.

For photographers that need high-contrast or beautifully reproduced colors, photographers need look no further than the PIXMA Pro9500. Its 10-color pigment ink system includes gray, black and matte black cartridges that collectively produce monochrome photographs of unrivaled quality on both fine art paper and glossy photo paper. With pigment ink, photographers will enjoy incredibly smooth gradations and can create long-lasting prints that resist the damaging effects of light for up to 100 years."

Sounds good to me...but I need to get more gigs if I hope to afford that nearly $900 price tag! If you have a different printer that you use and get great results from, please leave me a message. I'm open to new ideas.

Sunday, November 16, 2008

Growing Pains: Unexpected Sales!

On Friday, I got some unexpected sales from my Smug Mug business website.


The father of the groom from my first wedding purchased some 4x6s from the event. What intrigues me about this purchase is that I shot that wedding earlier this year but prints are only being purchased now. I don't know if this is a normal occurrence or not. It seems as if it took a very long time, but I am thankful for any additional sales I could make. I'm glad I decided to leave those galleries up on my website for as long as I did. But I wonder if I could have spurred more sales if I limited the time the galleries were available to the public.

Also, the mother of one of the Auraria college students I photographed two weeks ago purchased several photos. Her son was one of the models wearing clothing with the campus logos. She sent me a sweet email thanking me for the photos and the memories they preserved.


I think it's a great lesson for me and other new photography business owners. Even though I was paid by the university for their use of those images, putting them up on my website also made it possible for others to purchase them as well. Accessibility is key. Plus, the mother said she now knows who to come to when she needs other photos taken in the future. Sometimes the best marketing for your business is the good job that you do.


Turns out those business post cards I put on doors in my neighborhood has helped me secure a sale too. A neighbor needs some family portraits done for Christmas cards. She said she initially was just going to head down to a Sears or some place like that to get some shots of her sons. But her husband remembered the post card I left on their door months ago and told her to contact me instead!

Saturday, November 15, 2008

Saturday Morning Cartoons


Enjoy today's installment of Aaron Johnson's photocentric comic strip "What the Duck." The popular comic is celebrating it's 2nd year anniversary. Congratulations Aaron! And thank you for encouraging me and others to seek comfort in our sense of humor when the ebbs and flows of the photography business threaten to overwhelm us. The comic is available now for syndication as "W.T. Duck," appearing in a local newspaper near you!

Friday, November 14, 2008

This Weekend: Editing


This weekend, I am editing photos from Kim and Michael's engagement party as well as another set of images I took on Monday of college students modeling clothing with Auraria campus logos on them.

More sessions are getting booked, including my first maternity session scheduled for next Saturday and a neighbor's family portrait session for Christmas cards.

Also on Monday, I will be meeting with a graphic design artist about creating my business logo. It's taken far too long, but I finally decided that this had to be a priority and is an important step in the management of my business. Kelli Parker, a former Denver Post features graphic designer, is the owner of the KRP Creative design firm. I worked with Kelli on numerous page layouts for section front covers at the newspaper and I value her abilities. Wish me luck!

Thursday, November 13, 2008

Get the Job Done: Creative Post Processing with Photoshop

I have grown more adventurous in my photo processing now that I have had several Photoshop classes under my belt, including two offered at Illuminate Photography Workshops by instructors Nat Coalson and Armando Martinez. I decided to try some creative retouching with some of the photos I took during a family portrait session earlier this month.

Overall the photos I took of the Newell family were very successful. However, I had a devil of a time making sure that both boys were always looking at me during the posed shots. Their attention spans were very short, since they are only 4- and 2-years old, and one or both would often look away right as I pressed the shutter.
Thank goodness there were plenty of other images where both boys are looking straight ahead. I was able to combine success aspects of one photo with another to create a new photo composite.

Here is the BEFORE, RAW unprocess image. After I carefully posed the family on the rocks near the South Platte River and took a few steps back to compose my image, something caught little Tristan's eye, and he looked to the side right as I shot the photo.
Before

and here is the AFTER, processed. I copied a portion of Tristan's smiling face (in the looking straight ahead at me) from another photo and placed it on top of the other image where he is looking off to the side.
After: Step One

The first step in my photo processing in Camera Raw included cropping the image, and making some color balance and curve adjustments. Once the image was called up into Photoshop, I used some glamour processing to whiten teeth and eyes, heal out wrinkles, and balance out overblown skin tones. I also used "Clone" to take out the distracting orange markers in the river in the upper right hand corner of the frame. I saved that image as a TIFF keeping all the adjustment layers intact and opened this new image that had Tristan looking directly into camera.


I carefully selected a portion of Tristan's face that included his eyes, his noise, lips and rosy cheeks, feathering the selection so the edges would blend in seamlessly and copied it. Then I dragged that selection onto the other original photo, which automatically created a new layer.

As it turned out, the new image of Tristan's face was much larger than the original, so I had to use the Free Transform mode (under "Edit") to reshape the face and fit it smoothly over the original. I combined the layers and healed the edges of the new selected face to make sure it blended with the existing head.

I don't think I'm done with this image yet. I like Liam's smile in the second image better as well, so I may try to replace his face in the main image. That featureless white sky is bothersome to me, so I may add a new blue sky with some puffy clouds into the photo. And I don't like the bottom of the bridge at the top of the frame. Does the post processing ever end? Only when I get it right in camera the first time like I'm supposed too, I guess! ;)

Wednesday, November 12, 2008

Get the Goods: Product Review Kodak AiO ESP 3 Printer


Over the past three weeks, I have been trying out a new ESP 3 Kodak All-in-One (AiO) Inkjet printer that arrived at my desk in the newsroom for review. Many of my photography buddies told me it wouldn't be long before I had two printers in my home office...one for normal printing documents and another reserved for printing photos. So I couldn't wait to add the ESP 3 into my production work flow.

Overall, I think the ESP 3 is a great printer for the novice photographer to produce prints at home. But for me as a professional, I don't think the print quality is good enough for selling those same prints to clients.

The ESP 3 (retail $129) is one of the newest models in the Kodak product lineup that prints, copies and scans, and uses Kodak Perfect Touch Technology to enhance less-than-perfect images. Installation of ink cartridges was very easy, and the included instructions were simple to follow. A USB cable had to be purchased separately for under $10, which I thought was a major inconvenience, but once I connected it and installed the software, I didn't have any other issues printing.

The Facial Retouch editing feature in the Kodak Aio Home Center Software that automatically detect faces and enhances facial features with just one click. I think those features are great for the novice photographer who isn't yet ready to invest in advanced photo programs or expensive professional photo labs. The designated family snap shooter won't be able to beat the one-click that reduces the appearance of skin blemishes, whitens teeth and eyes and smooths skin tone, restores color and reduces red eye. Again, as a professional, that's not a feature I needed, since I do my own post-processing and retouching in Photoshop.

So in order for me to use this printer, the quality of the prints themselves would have to be on the mark. I was disappointed. The photos consistently printed out much darker than what was shown on the computer screen. Even after I tried to adjust the images using the retouching software and resaving the image, the photo was still darker when printed. It may have something to do with the fact that the printer and monitor aren't calibrated. But I wouldn't feel comfortable having clients pay full price for the prints from the ESP when it's clearly obvious that the prints are darker than those images shown on my laptop or desktop. Clients gave in to the impulse buy when I had some ESP 3 prints on hand selling for a reduced price during a presentation. While one client said he thought the photos "were still very good given that they were printed at home," but he said they were definitely darker than what he had seen during his slideshow presentation.

The Kodak photo paper that came with the printer was very glossy and thick (assuming it would be more durable) and dried extremely fast. But the paper was easily scratched. I had to reprint several photos numerous times and keep them covered with paper to prevent scratches and fingerprints (although if you get fingerprints on them, you can use a microfiber cloth to remove them fairly easily, but don't rub too hard or you will rub away the ink from the photo paper). I also noticed that several prints had inexplicable pairs of vertical, dashed lines going through them, requiring more reprinting.

For now, I will stick with having client package photos professionally printed at Wolf until I can afford a higher quality model such as an Epson or Canon dedicated solely for printing photos.

The ESP did have several saving graces though. I think the prints were great as rough drafts to inspect before sending the final image to the professional printer. There are some things you just don't notice on a screen that are more evident once the image has been printed. It's a lot easier to see what needs to be tweaked in post-processing once you have an actual photo in your hand. And I was finally able to print out samples of my work to be displayed on my walls at home. The final display wall is beautiful and eye catching, which went over well with my clients.

Monday, November 10, 2008

Instructor's Tip: Proper Portraiture Perspective


Enjoy this week's "Instructor's Tip" by one of my favorite instructors, award winning nature photographer Russ Burden. The photo(s) in this post were taken by Russ Burden.

Proper Portraiture Perspective

I often get asked what is the proper lens to make a portrait. I respond with one of many questions. Are you creating a head shot or a full length shot? Is it a group portrait or a shot of one person? Will the background in the area in which you’re shooting be distracting? As you can see there are variables that need to be addressed before I can give a “correct” answer. The bottom line is the best lens is the one that allows you to properly frame the subject at a specific distance that yields the perspective you desire.

To create portraits, I’ve used focal lengths from 28mm to 300mm. If I work in tight quarters photographing a group of people, the situation dictates a wide angle lens. The size of the quarters coupled with the number of people determines how wide I need to go. With single subjects, if all I need is a head shot, my first action is to evaluate facial features. For instance, if the nose is long, I tend to use a longer focal length lens to compress the distance from the face. The result is a smaller looking nose in the picture. This is just the tip of the iceberg. If people photography is your thing, use this article as motivation to learn more.

-Russ

To learn more about how Russ captured this image, join him on one of his photo tours. Visit Russ Burden Photography to get more information.

To take a class with Russ or a fellow Digital Photo Academy instructor in your area, check out the Digital Photo Academy. I took Russ' intermediate and advanced courses last year, and he continues to be a strong source of knowledge and encouragement as I progress in my photography.

Don't forget to check Take Great Pictures for Russ' most recent tips. On the home page, click on the "Photo Tips And Techniques" button in the left hand column. Additionally, check out his "Digital Tip of the Month" found by clicking on the Digital Photography button.

November Photo Assignment Topic Announced: Windows


Matt Lewis, aka gcmandrake has chosen November's photo assignment topic.

The topic is WINDOWS. Here's how Matt explained it: Windows seen from the inside or the outside. The window(s) must be the main subject of the photo.

The rules:
1) The image must be taken between NOW and Nov. 23. The goal of the monthly topic is to get us out there shooting new subject matters on a regular basis. Interpret the topic as you wish, as long as the window is the main subject. Submit a photo related to the topic to my email at shebawheeler@picture-yourworld.com.

Please have EXIF intact. Photos not taken during the time frame will not be included.

Now, GET OUT THERE!

Saturday, November 8, 2008

Saturday Morning Cartoons


Enjoy today's installment of Aaron Johnson's photocentric comic strip "What the Duck." The popular comic is celebrating it's 2nd year anniversary. Congratulations Aaron! And thank you for encouraging me and others to seek comfort in our sense of humor when the ebbs and flows of the photography business threaten to overwhelm us. The comic is available now for syndication as "W.T. Duck," appearing in a local newspaper near you!

Best Posts

Picture Your World Photography is a premiere photographer in the Denver, Colorado Photographer community on MarketingTool.com.