
Overall the photos I took of the Newell family were very successful. However, I had a devil of a time making sure that both boys were always looking at me during the posed shots. Their attention spans were very short, since they are only 4- and 2-years old, and one or both would often look away right as I pressed the shutter.
Thank goodness there were plenty of other images where both boys are looking straight ahead. I was able to combine success aspects of one photo with another to create a new photo composite.
Here is the BEFORE, RAW unprocess image. After I carefully posed the family on the rocks near the South Platte River and took a few steps back to compose my image, something caught little Tristan's eye, and he looked to the side right as I shot the photo.
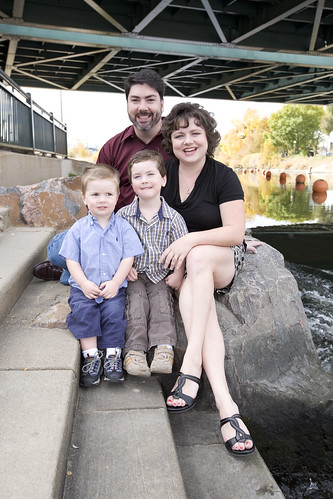
and here is the AFTER, processed. I copied a portion of Tristan's smiling face (in the looking straight ahead at me) from another photo and placed it on top of the other image where he is looking off to the side.
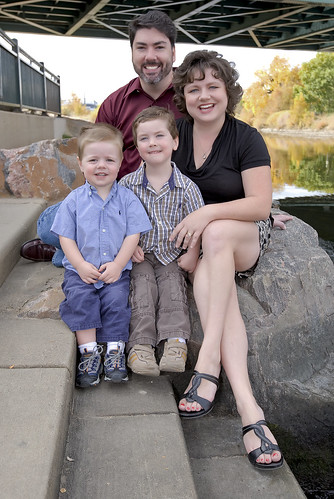
The first step in my photo processing in Camera Raw included cropping the image, and making some color balance and curve adjustments. Once the image was called up into Photoshop, I used some glamour processing to whiten teeth and eyes, heal out wrinkles, and balance out overblown skin tones. I also used "Clone" to take out the distracting orange markers in the river in the upper right hand corner of the frame. I saved that image as a TIFF keeping all the adjustment layers intact and opened this new image that had Tristan looking directly into camera.

I carefully selected a portion of Tristan's face that included his eyes, his noise, lips and rosy cheeks, feathering the selection so the edges would blend in seamlessly and copied it. Then I dragged that selection onto the other original photo, which automatically created a new layer.
As it turned out, the new image of Tristan's face was much larger than the original, so I had to use the Free Transform mode (under "Edit") to reshape the face and fit it smoothly over the original. I combined the layers and healed the edges of the new selected face to make sure it blended with the existing head.
I don't think I'm done with this image yet. I like Liam's smile in the second image better as well, so I may try to replace his face in the main image. That featureless white sky is bothersome to me, so I may add a new blue sky with some puffy clouds into the photo. And I don't like the bottom of the bridge at the top of the frame. Does the post processing ever end? Only when I get it right in camera the first time like I'm supposed too, I guess! ;)


No comments:
Post a Comment