Tuesday, September 30, 2008

Get the Job Done: Image Selected For Gallery Showings Throughout the US


One of my images will be on display during Digital Photography Academy gallery showings held throughout the United States beginning in February 2009. The DPA will be sharing the scheduled dates and locations for the gallery showings soon. A different topic and winner was chosen over the year and the 12 assignment winners will be in the traveling exhibition across the 20 DPA workshop cities: the Griffin Museum of Photography, Park Shelton, Ray Street Studios, Dallas Contemporary, Carousel Studios, Working With Artists, the Windermere Gallery, Rabbit Hole Studio, the Farmani Gallery, Tilt Gallery, Think Big Studios, YO!darkroom and Dana Bowen's studio. Check out the other winning entries here.

Thank God for Progress! I like this image of a child running through water fountains at a local area shopping center, but it's definitely an example of how far I've come in my photography since this image was taken last year. This photo was one of the first images I ever shot with my then new Canon Rebel XTi for an assignment during my first digital photography class at the Denver Darkroom with Efrain Cruz, who now owns his own school, Illuminate Workshops.

One of the problems I can see right off the bat is the distracting background and my futile newbie Photoshop attempts to put the focus back on the little girl. Back then, I was still shooting with jpegs and didn't know a thing about RAW. Consequently, the image was tiny, and I didn't have a decent high resolution image to give DPA. I also didn't have a solid workflow in place, so I couldn't go back into the photo to make editing changes based on new things I've learned in the past year. In spite of all that, it's clear that my ability to capture candid portraits was something I had early on and have continued to develop over the year. It's a great self-esteem booster to see my own growth and education.

Despite my own reservations about this image, here is what judge Paula Tognarelli, Executive Director, The Griffin Museum of Photography in Boston, said about my winning image:

"This image Gotcha is my choice for best photograph in this round of DPA Assignment photographs. I love the spontaneity of the photo as well as the narrative of the piece. Immediately I begin to find meaning from the image. I also chose this image because it is technically produced and designed well. We are looking forward to exhibiting winners of the Digital Photo Academy Assignments at our museum.”

An Aside: No More Blog Monthly Photo Assignment?

September was the first month that I didn't receive any entries for my blog's photo assignment. I'm not sure if that means that the topic I picked crashed and burned or if people have lost interest.

For myself, I know I would have had trouble finding the time to get an entry in given how many paid assignments I've been juggling this month. It's possible that time was the enemy for my other normal entrants. However, if my readers don't think the monthly assignment is beneficial, please just let me know. I won't assign another topic unless I get comments from others saying they want the monthly topics to continue.

Remember, there are tons of other assignments to participate in other photography sites throughout the web, whether you are looking for a weekly or bi-monthly contest. The benefit of participating is to keep us shooting and challenging our interpretation of topics. Take advantage of any chance you have of "Getting Out There" with your camera. Let me know if you are interested in revamping my blog's photo assignment and/or what changes you would like to see to make it better.

Sunday, September 28, 2008

Growing Pains: My Business is Now an LLC

On Friday, I took an important legal step for my business: Picture Your World Photography has changed its designation from a sole proprietorship to a limited liability company, or an LLC.

Often mistakenly called a limited liability "corporation" instead of the correct term "company," the LLC is a hybrid business entity sharing characteristics of both a corporation and a partnership. LLCs are popular because owners, also called members, have limited personal liability for the debts and actions of the LLC. That means, if the LLC goes bankrupt, I will not be required to make up the difference with my own money. If the assets of the LLC can't cover the debts and liabilities, the creditors cannot look to me, other members, managers or officers for recovery. Other features of LLCs are more like a partnership, providing management flexibility and the benefit of pass-through taxation.

An LLC is a separate and distinct legal entity. Because of that, I was able to get a federal tax identification number (also known as an Employer Identification Number) open a bank account and do business all under my company's, name "Picture Your World Photography LLC." I filed documents with Secretary of State's Business Center , and paid a $50 fee.

Under Colorado law, my company is also known as a "Single Member Liability Company," which is taxed as a sole proprietor for income taxes. Being an SMLLC becomes important when determining employment tax requirements. I can use my companies name and EIN, but I, as a single member owner, is ultimately responsible for collecting, reporting and paying employment taxes. I'm still very confused about this designation, so I will have to do more research to make sure I understand because different federal tax reporting rules apply depending on whether or not I have employees, which I don't yet.

I will have to take all of this up with my accountant. He will be pleased to know that I now have separate bank accounts for personal and business use, will make it easier to figure out my profit and losses come tax time next year.

Need help starting your own LLC? Use this checklist from findlaw.com to help get you started. I am about half way done with the list, working on 4-7, including creating an LLC operating agreement and filing articles of organization. Make sure your business complies with your state's legal requirements by checking with the Secretary of State's office and the Internal Revenue Service. Consulting with a business attorney is a great idea as well.

Saturday, September 27, 2008

Saturday Morning Cartoons


Enjoy today's installment of Aaron Johnson's photocentric comic strip "What the Duck." The popular comic is celebrating it's 2nd year anniversary. Congratulations Aaron! And thank you for encouraging me and others to seek comfort in our sense of humor when the ebbs and flows of the photography business threatens to overwhelm us. The comic is available now for syndication as "W.T. Duck," appearing in a local newspaper near you!

Friday, September 26, 2008

This Weekend: Editing Images from Denver, Food and Wine Classic


This weekend, I will finish up editing the photos from the Denver, Food and Wine Classic event I covered for the Auraria Higher Education Center. These photos are looking great and I'm very proud of them so far, so I believe the media relations director will be pleased too. She intends to use them on the AHEC website to promote the center as a great venue for multiple events, including weddings and festivals.

I'm not sure why I love the shot above, but it's one of my favorites so far from the event. Every person who attended the food and wine classic received this commemorative glass that fit snugly into a plastic plate -- a perfect set designed for taste-testing. Throughout the day, these glasses overflowed with some of the best tasting alcoholic beverages I've ever had. And while I took photos of people entering the event and being handed the glasses and plates by volunteers, this fun shot of a volunteer holding up one of the glasses just better captures the moment for me.

I'm going to take advantage of the lull in photography assignments for a few weeks to do some advertising of my own for the upcoming holiday season. I also plan on getting back into some classes and "shoot and greets" with some fellow colleagues. One of my favorite things about photography is the opportunities for continuous learning....everyday there is something new to help make me a better photographer!

Thursday, September 25, 2008

Get the Goods: Adorama's 100 Days of Digital Photography Tips


It's not too late to get caught up with Adorama's 100 Digital Photography Tips in 100Days event already in session.

Adorama Camera of New York City serves the photographic community not only by supplying merchandise, but by providing great, free, digital photographic tips. The company already has two successful series under its belt. Now, Adorama has recently started the thrid installment of their "100 Tips in 100 Days."

Here are the latest 100 Adorama digital photography tips.

Here's the link to the original Adorama 100 Digital Photography tips.

Here's the second edition of the Adorama 100 digital photography tips.

Wednesday, September 24, 2008

Get the Goods: Valuable Nationwide Wedding Statistics

My business management instructor Jim Turley sent me an email tipping me off about a new resoure for aspiring wedding photographers. The Wedding Statistics and Market Research for the Wedding Industry website has tons of valuable information, including free access to:

US and State level Wedding Statistics and Industry Research
State of the Industry Vendor Survey Results
Monthly Top 10 and Annual Trend Reports
Industry Facts Overview and Business Common Reports

According to the website, account holders can use the market research to fine-tune your marketing plan for snagging wedding clients. The Wedding Report will help you:

Strategically create and fine-tune your business or marketing plan
Better understand your wedding marketplace
Target your ideal bride and groom
Make superior pricing decisions for your products and services
Spend your advertising dollars more wisely
Discover the latest consumer wedding trends
Get local wedding market data for your media or press kit
Find statistics and data for your wedding market research

Check out the wedding industry blog for more information.

Tuesday, September 23, 2008

Get the Goods: Computer Tethered Photo Capture

During my last shooting gig, my friend and colleague Jason Peckovitch mentioned that he wanted to learn how to "tether" his Nikon to his laptop where he uses Lightroom to edit images. I didn't really know what he was talking about, but since that weekend, I've been doing some research to understand how this could benefit my business.

How many times have you been fooled by your camera's LCD screen into thinking an image was sharp only to view it later on your computer's larger monitor and be disappointed because the focus was off? Tethering allows you to view a large histogram, check for sharpness and make small, hidden details more easily visible when the photos are enlarged to 100%. Then the files can be quickly tagged and managed -- a system Jason could have taken advantage of when he shot portraits for attendees of a wedding reception.

On Monday, Jim Talkington of prophotolife.com released one of his popular instructional videos explaining how to shoot tethered to a computer with a DSLR so images go directly to the hard drive for viewing on the monitor. I found it very useful and thought I would repost it here for my readers. It was great to find out that my 5D came with Canon capture software! Plus, Talkington uses a 5D in his video to explain how the process works. Shooters who use Nikon are required to buy software. The video has great information about cables and protecting your equipment that was also extremely useful.


Episode 29, computer tethered photo capture from Jim Talkington on Vimeo.

For photographers who are already using the tethering features, try upping the ante on the process by tethering to Lightroom.


Friend and colleague Chester Bullock posted this link to a great article that ran on pixsylated.com explaining how to do it.

Get Out There: Share Your Pet Photos & Win


Sometimes I don't know what strains my pocketbook more, my love of photography or my love for my dogs! I try not to think about how much I spend on dog toys and chews, glucosamine supplements, and high quality dog food to keep my Husky, Raina, and my Malamute, Isis, happy and healthy.

But here's a chance for my two loves to offer a mutual benefit: Enter your favorite photos of your pets to win coveted Drs. Foster and Smith gift certificates. Ten categories will give you a chance to show off your scaled, gilled, and fine feathered friends, too.

There are 30 winners every month, with prizes ranging from $100 to $300 of certificates. That's a ton of rawhides and interactive toys for The Girls, as well as some catnip for their nemesis, Nikita the Cat.

Win a monthly contest and qualify to win an anniversary contest with a trip to two for Maui as the 1st place prize. Enter your images online here.

Make sure you read and agree with user rights: "All entry information becomes the property of Sponsor. Entrants retain the copyright to their photographs; however, by entering the contest, Entrants grant Sponsor a perpetual, irrevocable, royalty-free, worldwide license to display any submitted photographs, Entrant name and pet name on Sponsor website, in Sponsor product catalogs, and within Sponsor advertising and promotions without any fee or other form of compensation."

Monday, September 22, 2008

Breaking News: Flickr Upload Chosen for Possible Inclusion to Schmap Guide

I just got an email a few minutes ago from Flickr that one of my uploaded photos has been short-listed for inclusion in the fifth edition of the Schmap Denver Guide to be published late October 2008.

Schmap Guide is an online interactive experience that includes maps and guide content allowing intuitive, real-time access to reviews and photo slideshows for places of interest.


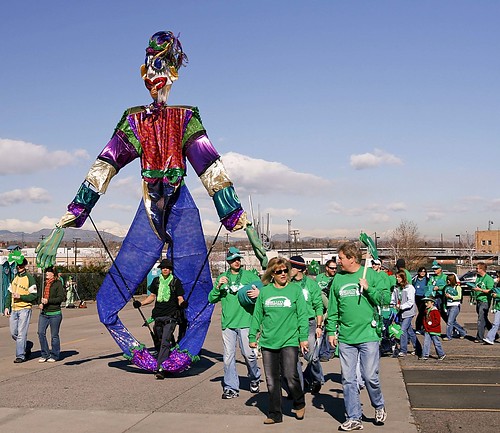
The image above was chosen out of my Flickr uploads to be submitted into the final selection phase for the edition. It is one of the shots I took while covering Bill Coleman's Giant-sized Puppets participating in the Denver St. Patrick's Day Parade earlier this year. The Guide will send a message to my Flickr account when the guide is released, letting me know whether or not my photo has been included.

While the Guide offers no payment for publication, many photographers willingly submit their photos, as Schmap Guides give their work recognition and wide exposure, and are free of charge to readers. Photos are published at a maximum width of 150 pixels, are clearly attributed, and link to high-resolution originals at Flickr.

I emailed the managing editor and let her know I regularly shoot images in Colorado and might have other photos she would like include in her guide. I included a link to my business website and gave her my cell phone number too. Maybe this could lead to other commissions.

This is definitely an example of how advertisers and companies are gaining access to a talented pool of advid pro and semi-pro photographers who regularly upload their images to the online community. It's the second time someone has come across one of my uploaded images and asked to use it. The first time, a nonprofit pregnancy crisis center found one of my Flickr images that they wanted to use for an ad campaign. When I told them how much the image would cost ($150) they said they didn't have enough funds for the image. Even though I blogged about this incident and decried the Freebie Photo Phenomenon, I have often worried if not giving the center the photo for free was a mistake.

In this instance though, I think possibly allowing Schmap to host one of my images for free online might work in my favor because of the worldwide audience and exposure.

ON DEADLINE: Monthly Photo Assignment Due by Sunday!


Cornelia: Notice Me Eyes, originally uploaded by Sheba Wheeler.


Dear blog readers, you've got until this Sunday to turn in your submission for September's monthly photo topic: THE EYES HAVE IT. Voting polls open on Monday for best interpretation.

Email your entry to shebawheeler@picture-yourworld.com

Instructor's Tip: Digital Black and White


REMINDER: No "Instructor's Tip" next week as Russ will be leading his ten day photography tour to the Tetons and Yellowstone. I can't wait until I can save up enough to treat myself to one of Russ's tours. (Russ just wants me to so he can smirk while this admitted night owl is forced to get out of bed at 4:30 in the morning!

Digital Black and White

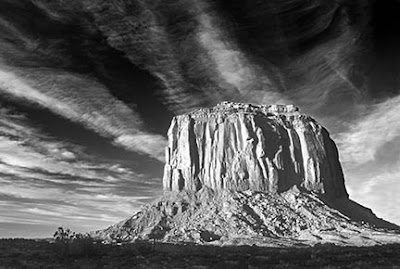
Black and white photography has a special place in my heart. I’ll never forget shooting my first roll when I took an introductory course to photography in college. I still remember the anxious feeling I had when I had to spool it onto the metal reel as I was the one who was going to develop it. What a thrill it was to make my first contact sheet and realize I did everything right. And then the absolute magic that did occur when I developed my first 8x10. I was hooked for life. But here’s the irony- with the sophisticated digital techniques that have evolved, I haven’t shot a roll of B&W in years. But that’s OK as the magic is still there. It’s just created via a different means.

There are numerous ways to digitally create a B&W image. Most cameras even have a setting that allows this at capture. There are many plug ins and stand alone programs that make the job easy and provide a lot of control to the finished product. Regardless of how you get to the final print, I strongly encourage you to dabble. If you haven’t tried the B&W adjustment layer in Photoshop, stop whatever you’re doing and give it a whirl.

Enjoy this week's "Instructor's Tip" by award winning nature photographer Russ Burden. The photo(s) in this post were taken by Russ Burden. To learn more about how Russ captured this image, join him on one of his photo tours. Visit Russ Burden Photography to get more information.

To take a class with Russ or a fellow Digital Photo Academy instructor in your area, check out the Digital Photo Academy. I took Russ' intermediate and advanced courses last year, and he continues to be a strong source of knowledge and encouragement as I progress in my photography.

Don't forget to check Take Great Pictures for Russ' most recent tips. On the home page, click on the "Photo Tips And Techniques" button in the left hand column. Additionally, check out his "Digital Tip of the Month" found by clicking on the Digital Photography button.

Sunday, September 21, 2008

Get the Job Done: Crystal and Jaime's Wedding Reception


Crystal and Jaime

In a few hours, I will be done editing photos from my last assignment: Crystal and Jaime's wedding reception. I think the event was a great success. My second shooter, Jason Peckovitch, was able to set up an impromptu portrait session and take photos while I walked around the reception itself shooting candids and highlights of the night. I will blog about that later, but take a look at his images here.


Jaime, Crystal and Dolores

This assignment was also special for me because it was the first one I got based on a referral from another photographer. It never ceases to amaze me how wonderful the Denver photographic community truly is. I have met so many talented people who are more than willing to share their time and their skills. My very first assignment was referred to me from my instructor Efrain Cruz. Now, my buddy Doug Shatto took it a step further by giving my name to a colleague who needed shots taken. Doug lives and works primarily in Colorado Springs, and he wasn't able to shoot the wedding reception, so he referred the client to me. Thank you so much Doug for sending Dolores Olsen to me. I owe you big time buddy!


Having this happen helped me come to terms with an idea I had been mulling over. In a recent issue of the "Professional Photographer Magazine," celebrated children's photographer Trista Blouin said one of the first things she wished she had known when she started her business was the fact that she couldn't take on all aspects of her business single-handedly. "Determine your weaknesses and outsource to the best talent within your budget." Unfortunately, I felt the same way (as many photographers often do) and end up doing everything themselves for fear of losing control -- but only end up wasting time and money. I had been thinking about possibly outsourcing specific photo requests that I no longer am interested in, or can just admit that I'm not good at it. I have lost my initial interest in covering fashion shows namely because of their predictability and terrible lighting situations. Plus, covering sports is not my strong suit either. I've decided that when I'm asked to do those kind of shoots, I will refer out to photographers I know enjoy those kind of jobs and can do it much better than me. I no longer think that's a weakness; I think it's good business sense.


My business management instructor Jim Turley suggested all photographers should have a list of photographers, printers, photoshop gurus etc etc to refer or outsource too so you can spend the time doing the things you love to do. For me, that is shooting portraits and editing in Photoshop. I already outsource out my printing to Wolf Camera and my website design and maintenance to SmugMug. And I'm developing my list of photographers to refer clients too as well.

Growing Pains: Portrait Sales During Event A Big Hit


As I mentioned earlier, Jason and I came up with this plan to try to make some additional print sales from our last gig at Crystal and Jaime's wedding reception. You guys already know I hate taking "grip and grin photos" where everyone stands together, puts on a smile and says "CHEESE!" But I know full well that those are the kinds of shots everyone seems to want! So I asked Jason if he could set up an impromptu portrait session with some constant hot lights during the reception, giving people the option to go take single or group shots while I shot candids and reception highlights.


I think our first time doing this was a great success! Jason made about $150 in print sales that very night and would have made more if we would have had a printer on hand. He was able to quickly edit photos on his laptop with Lightroom, show the customers what the images looked like and take orders for print sizes all during the same event. I think having this service available gave the added dimension I was hoping for, and created the possibility of even more clients for us in the future. While I walked around the reception, I made sure I told everyone Jason was on hand to take portraits, and soon people started lining up. Because I couldn't afford to pay Jason for shooting this event, I told him he could have all the money from whatever print sales he made. He had his images edited and up on the web in three days, and I've already heard from clients at the reception say they couldn't wait for their photos to arrive in the mail. Nice job Jason!


One of the things we really need to do is get a compact printer to take with us on location. And Jason needs some quick and easy backdrops to set up because we can't always be certain the location will give us a good background to work with. I think I'm going to contribute a smaller gray backdrop that came with one of my lighting kits. It can be easily hung and taken down, plus the neutral color works well with just about all skin types and clothing colors.

Saturday, September 20, 2008

Saturday Morning Cartoons


Enjoy today's installment of Aaron Johnson's photocentric comic strip "What the Duck." The popular comic is celebrating it's 2nd year anniversary. Congratulations Aaron! And thank you for encouraging me and others to seek comfort in our sense of humor when the ebbs and flows of the photography business threatens to overwhelm us. The comic is available now for syndication as "W.T. Duck," appearing in a local newspaper near you!

Tuesday, September 16, 2008

In My Library: Professional Posing Techniques for Wedding and Portrait Photograhers


When it comes to posing subjects, my natural gift of interacting with people helps them achieve comfortable positions for shots. But I have trouble posing group portraits and making sure I carefully pose a subject to flatter their figures. To get a more sound understanding of the fundamental skills needed to pose men, women, couples and groups, I picked up acclaimed photographer Norman Phillips book, "Professional Posing Techniques for Wedding and Portrait Photographers." The book is a comprehensive, must-have tool for photographers new to portraits, but it's also got enough new tricks to keep old hat photographers interested as well.


I loved the chapter on slimming techniques. The photographers who get the most business are the ones who are aware of making their subjects look their best. I also found the group portraits chapter indispensable. Phillips' decision to split his examples into groups of two, three, four and larger were extremely helpful in learning how to keep subjects visible, evenly lit, and showing some type of affinity for one another. The important of placement of arms, hands, feet and legs is simple, yet effectively, explained to make sure one subject doesn't dominate another. His design strategies for group portraits offer reliable concepts a photographer can arm himself with no matter the shooting situation.

Highlights in the book include:
1) Understanding the goals of good posing, and the most common obstacles to success.
2) Styles of posing, from formal to casual
3) Critical differences between posing me and women
4) Understanding body language and how it impacts the viewer of a portrait
5) Tips for making each part of the body look its best
6) Standing, seated, and floor poses
7) Strategies for posing group portraits
8) Before and after sequences showing common posing problems and how to fix them
9) Using careful posing to flatter every figure type

Monday, September 15, 2008

Instructor's Tip: Better Exposures in Tricky Situations


Enjoy this week's "Instructor's Tip" by award winning nature photographer Russ Burden. The photo(s) in this post were taken by Russ Burden. To learn more about how Russ captured this image, join him on one of his photo tours. Visit Russ Burden Photography to get more information.

Better Exposures in Tricky Situations
Over the many years I’ve been photographing, I’ve seen many advancements in metering systems to help ensure photographers get proper exposures. Manufacturers incorporate sophisticated algorithms and lighting scenarios into a camera’s computer to try to cover the many different lighting situations that commonly occur. Yet as complex as these systems have become, there’s nothing smarter than the knowledgeable photographer to nail a proper exposure. Knowing when, why, and how to override the meter is essential to getting proper exposures.

BACKLIGHT: When a subject is backlit, the camera doesn’t know whether you want to record it as a silhouette or with detail. The difference in exposure between the two may vary by as much as five f stops. Based on the effect you want, you need to tell this to the camera and override what it thinks it wants.

WHITE: A camera meter is designed to record everything 18% gray. This translates to incorrect exposures if most everything in the picture is white. The camera doesn’t know you’re photographing snow, but you do. To prevent your snow from looking gray and dingy, take charge. Use your histogram, blinking highlights and LCD to make sure your snow looks neither gray nor blown out with no detail.

FOG: Fog is one of my favorite conditions in which to shoot but it presents a tricky metering situation. I discovered the hard way that cameras tend to underexpose fog which yields dreary and dull images. To prevent this from happening to you, dial in + compensation.

-Russ


To take a class with Russ or a fellow Digital Photo Academy instructor in your area, check out the Digital Photo Academy. I took Russ' intermediate and advanced courses last year, and he continues to be a strong source of knowledge and encouragement as I progress in my photography.

Don't forget to check Take Great Pictures for Russ' most recent tips. On the home page, click on the "Photo Tips And Techniques" button in the left hand column. Additionally, check out his "Digital Tip of the Month" found by clicking on the Digital Photography button.

Sunday, September 14, 2008

Growing Pains: Letting Clients See Unedited Photos (Part 2)

Nina's pick for her senior portrait


Today I finished editing my last trio of senior portraits referred from Jordan. It was a great pleasure to be able to shoot these lovely young ladies and capture memories of this very important year in their lives. I hope I have given them photos they can cherish for years to come. And it's wonderful to think that my images will be printed inside a yearbook! Thank you ladies for giving me this opportunity, and now I have examples to send to schools across the metro area in hopes of securing more senior portrait sessions next year. I have also been following the work of Anne Martin, a Dallas-area photographer and blogger who specializes in senior portraits. Martin does a tremendous job, and her images have been a great source of inspiration. I love the section on her site that discusses "Senior Secrets," and I will definitely share these tips with my future senior portrait clients to help them prepare for the session.

Gloria's pick for her senior portrait


Last week, I blogged about a new work flow I would be trying out during my post processing of Nina's pictures. I had been worried that editing all of my images before I presented them to the client took too much time, especially when it was clear the client preferred some shots over others. I decided to try a different tactic and allow Nina to see unedited proofs. Thankfully, the majority of the images I took looked great coming straight out of camera, or I wouldn't have had the courage to do this. I think that if you are going to go this route, it's even more important for you to take the time to get the shot right instead of relying on Photoshop to save you later. Nina and her mother had already had the chance to see the result from sessions I completed with Jordan and Gloria and knew that I could produce. But I was still more than a little nervous going into this.

Jordan's pick for her senior portrait


Out of 100 or so images, Nina chose about 20 shots that she wanted fully processed. That alone saved me days worth of editing, and I was able to get all of her favorites (plus about 10 of my own to use in my port) done in a single afternoon! Overall, I think this process worked well. For my next portrait session, I may process one or two images to the max just to give my client an idea of what to expect when I show them proofs.

It will be interesting to see if the process works the same with the several hundred wedding reception shots I took yesterday. With more than 500 images, I would hate to spend time editing photos that the client doesn't want. But there's a big difference between the 25 to 50 shots clients get from a portrait session versus the 150 to 200 shots promised them from an event. More to come on this topic later.

Friday, September 12, 2008

This Weekend: Shooting a Wedding Reception


This weekend, I will be shooting a wedding reception with my friend and fellow photog Jason Peckovitch. The couple had a small wedding ceremony, and decided to spend the bulk of their money on a larger reception for family and friends. One of the things I've been wanting to try out is to have another photographer on hand to take portraits during an event in hopes that it would create more sales. I'm not sure if that idea will work, but I thought I could give it a try at this event.

I will also be editing like crazy, including my last round of senior portraits, a fashion shoot I shot last weekend and the food expo as well! No rest for the weary (or the wicked)!

Thursday, September 11, 2008

Breaking News: Photoshelter Collection Closing


The email I received this morning from Photoshelter was a total shock: The PhotoShelter Collection will be closing on Oct. 10! The letter contributors received this morning is reprinted here for your convenience:

"Dear Friends,
We're contacting you today with some unfortunate news - we will be closing The PhotoShelter Collection, effective October 10, 2008. Going forward, our team will refocus heavily on enhancing our original product, The PhotoShelter Personal Archive, which several thousand photographers use for bulletproof storage and online image sales directly to their own clients. Our financial position remains solid and we look forward to working with the photography community for years to come.

More details about timing and the implications for contributors can be found in a personal statement on our corporate blog, and this FAQ document.

Just one year ago, we started the Collection with a mission to "change the image marketplace for good." Since then, we've amassed a remarkable global community. We've built a unique position in the industry fueled by integrity and a true passion for photography. We've held our commitment to fair treatment of photographers with a 70/30 split of every transaction, opened up your access to information through our School of Stock and symposium events, and gave every photographer - regardless of one's network, location, or level of expertise - a fair shot at selling your work to the industry's top buyers.

However, our approach was insufficient to change buyer behavior on a grand scale and generate revenues quickly enough to satisfy our goals for this product line. While image buyers worldwide appreciated our new approach, the size of our image selection and the incumbent player's entrenched subscription relationships were a persistent challenge. As a result, we saw few strategic options for the Collection that would allow us to stay true to our commitment to a better deal for photographers and our desire to change the industry.

Despite today's decision, we remain committed to using technology to advance both the art and business of photography. Our team's energy and innovative resources will ensure that the Personal Archive remains the best online solution to help independent photographers write their own success stories. If you are not yet a Personal Archive subscriber, we hope you will continue your relationship with the PhotoShelter community through that product.

We want to express our deepest gratitude to our global community of contributors. We've enjoyed a full year of seeing your exceptional images cross our desks, developed warm relationships with many of you through PhotoShelter events, and shared in your excitement when you've achieved sales through our marketplace.

We're looking forward to chatting more with you in person and demonstrating some new Personal Archive enhancements at October's PhotoPlus International Conference.

With gratitude,

Allen Murabayashi
CEO"

Numerous other photographers I know who contribute to Photoshelter are bemoaning its loss as the only agency that really advocated for photographer's interests. I had yet to get any images accepted into its collection but was totally excited about the opportunity to have some of my work included. Now, Photoshelter contributers are left reeling, wondering if they can gain a foothold in other agencies such as Istock.

Is Getty Images to blame for Photoshelter's collection demise, or is this more indicative of a troubled industry? This announcement came at the same day that Corbis announced it was laying off about 16 percent of its staff.

Wednesday, September 10, 2008

Get the Goods: Photoshop Portrait Makeover -- Digital Makeup


Here is the third and final part of the portrait makeover tutorial videos crafted by Digital Photography School forum member Yanik (image-y). Thank you again Yanik for sharing your knowledge.

I was looking forward learning how to use Photoshop to add eyeshadow, blush and lipstick to portrait subjects. Some of my clients cannot afford to upgrade their packages to include a personal session with a make-up artist before the shoot. So it will be good to know that I can add a little more life and color to their portraits myself if necessary without overdoing it.

Important tips from this lesson include:
1) always working on a duplicate layer
2) keep your brushes soft with a 0 hardness
3) use dodge or burn to add contrast
4) lower opacity on your layers to keep the adjustments soft and natural

As usual, Yanik explains there are many different ways to do the same action in Photoshop, so if you have any other great techniques that you use during your editing process, please share them here in the comments section. And if you need some more ideas, YouTube has plenty of similar tutorials that can help you.

Tuesday, September 9, 2008

Growing Pains: Letting Clients See Unedited Photos


The shot Gloria chose for her senior yearbook picture because she thought the natural dramatic lighting made her look more mature.

After giving it more thought, I decided to follow some colleague's advice and allow a client to pick their favorite proofs and then edit only those images. I have struggled with this decision, since I always edited the images from a session before my clients saw them.

However, I paid closer attention to how one of my senior portrait clients reacted to the images during presentation to prove what I thought was ultimately the truth: I had been spending too much time editing images that my clients were not interested in purchasing.

It's not that my editing was bad; it's just that the client didn't prefer some of the images no matter what wonders I worked with Photoshop. Things that didn't occur to me while editing really stood out to the client. For instance, she didn't like one picture because she thought her body position made her look fat and unattractive. I completely disagreed with her because I think she is an amazingly slender and beautiful young lady. Another image (that I loved) was dismissed because she thought her head looked too big. I spent a lot of time nitpicking and editing the photo I THOUGHT she was going to choose for her senior portrait (which was actually her mother's favorite). Meanwhile, the image she ultimately chose for her yearbook had very basic tonal, lighting and portrait makeover adjustments.

The bottom line is this: it doesn't matter what I think about an image; it only matters what the client thinks.

Out of the 50 images I edited, my client only really seemed to like about 30 or so of them...that doesn't seem like a big difference in numbers, but I'm thinking about how much time I spent meticulously editing those other 20 images. That's time that could have been spent working on another project (such as the one that I'm on deadline for now!).

As a matter of fact, my client seemed overwhelmed with those 50 images, and she had a very difficult time narrowing down her choices. I thought that was a sign that the session was successful and that they were ALL so good that she couldn't chose the ones she wanted. Now I'm starting to wonder if it's still just too many photos for a client to chose from. Remember in the old days, film only printed about 24 images. I don't want to overburden my client and make it too hard for them to decide to order prints.

So after I finished my last senior portrait shoot with Nina on Sunday, I did some initial edits on the images, paring them down from about 500 shots to 125. I put them on my website and told Nina and her mother to pick their favorite shots (up to 50 images), and I would edit only their favorites.

I hope this doesn't back fire on me, but I'm willing to take the chance to put a more beneficial work flow into place.

Get the Goods: Photoshop Portrait Makeover Tutorial -- Removing Pimples and Reducing Wrinkles


Yesterday, Digital Photography School forum member Yanik (image-y) introduced us to Part 1 of his Photoshop Portrait Makeover tutorial dealing with whitening teeth and eyes.

Part II teaches us how to remove pimples and diminish wrinkles. Yanik explains why he chooses to "lessen" rather than "remove" wrinkles because he wants to make sure his subject's remain realistic and not overprocessed.

Here is a summary of the basic steps in the tutorial:

1) Duplicate Layer -- to avoid making adjustments to the original image
2) Use spot or regular healing, remembering to use a small brush to remove blemishes
3) Flatten image and then duplicate layer again. This was a new step for me. Usually I just keep adding duplicate layers, but I think flattening one step will save me a lot of effort later when I need to change opacity or use some other type of blending mode to adjust a specific layer without affecting the entire image
4) Lower the opacity of the layer to 50 percent to bring back some of the wrinkles.

I'm really looking forward to tomorrow's post about using Photoshop to add makeup to a subject's face, including eyeshadow and lipstick, as this is a technique I've never tried before.

Monday, September 8, 2008

An Aside: Now COME ON, this is just too much!

I ran across this thread on the Digital Photography School forum where a member posted this insane article. http://www.dailymail.co.uk/news/article-1035315/Father-branded-pervert--photographing-children-public-park.html. A father was apparently branded as a pervert from passersby who saw him take photographs of his OWN children while they played at a public park.

I hope to God that this is a prank article and I, like everyone else who responded to this thread got hoodwinked because I'd rather look like a fool than believe we live in a society that has been so overcome by paranoia and fear. Now don't get me wrong; I understand how the nefarious actions of individuals who do prey on children could have all of our "Spidey-senses" on alert for any assumed threat. But after this man showed that he was the father of these two little boys, that should have been the end of it. Are we getting "way too perv sensitive" as one of my editors said when she read the article?

Maybe I'm a bit more touchy about this subject after what happened to me this weekend while I was shooting the Denver Food and Wine Festival for the Auraria Higher Education Campus. I had been patiently waiting to snap a shot of participant signing up a silent auction item. After making several passes throughout the event, I finally happened upon someone who was bidding on some wine. I took several quick shots of him only to have him stand up, put his hand in front of my camera and yell at me that he didn't want his photos on my Myspace page and storm off.

First of all, people have to assume that if they go to a public event like this, they will likely be photographed. Second of all, I explained to him I was working for the campus, taking photos for their business website and I had credentials to show it. And thirdly, chill, already.

Am I wrong here? I may have to chew on it some more. Mind you, at the same event, I took tons of shots of the only baby that seemed to be at this primarily adult event and the Mom loved the shots. Guess you just never know how someone is going to react when you whip out a camera.

Instructor's Tip: Tips for Sharper Images


Enjoy this week's "Instructor's Tip" by award winning nature photographer Russ Burden. The photo(s) in this post were taken by Russ Burden. To learn more about how Russ captured this image, join him on one of his photo tours. Visit Russ Burden Photography to get more information.

Tips For Sharper Images

Let’s face it, we spend a lot of money on equipment. We purchase sharp lenses and we want our pictures to impart their maximum capabilities. In order to accomplish this, we must refine our picture making methods and techniques. This means proper camera handling, using a tripod as often as possible, using mirror lock up, shooting with proper shutter speed / aperture combinations, and using autofocus sensors properly.


TRIPOD: First and foremost, use a tripod to help ensure you get sharp images as the potential for camera movement during the exposure is significantly reduced as compared to hand holding.


APERTURE / SHUTTER COMBO: Aperture and shutter speed work both independently of each other and also in conjunction to create sharpness. If the action is fast and you want to freeze it, a high shutter speed is necessary. If lots of depth of field is important, you need to use a small aperture.


HAND HOLDING: If for whatever reason you can’t use a tripod, proper hand holding techniques will help you obtain sharp pictures. Use your focusing hand to support the camera and lens to create a firm base to prevent up and down movement of the camera. With your shutter hand, grip the body tightly to prevent left to right movement. Additionally, press the top of the camera against your forehead to further stabilize the system. Right before you press the shutter, inhale, tighten your grip, and gently press down.

-Russ


To take a class with Russ or a fellow Digital Photo Academy instructor in your area, check out the Digital Photo Academy. I took Russ' intermediate and advanced courses last year, and he continues to be a strong source of knowledge and encouragement as I progress in my photography.

Don't forget to check Take Great Pictures for Russ' most recent tips. On the home page, click on the "Photo Tips And Techniques" button in the left hand column. Additionally, check out his "Digital Tip of the Month" found by clicking on the Digital Photography button.

Get the Goods: Photoshop Portrait Makeover Tutorials, Whitening Teeth and Eyes

Last week, Digital Photography School released some sorely sought after Photoshop tutorials to help portrait photographers makeover their subjects. I wanted to personally thank DPS forum member Yanik (image-y) for putting together these amazing series that will be exceptional additions to our post-processing workflows.

I often use plug-ins such as Portraiture to quickly do "glamour makeovers." But a little bit of these type of programs goes a long way -- sometimes too far, I think, leaving the subject looking over-processed and plastic unless you tone the opacity down on your glamour duplicate layer. Learning to do piecemeal techniques such as whitening teeth and eyes, removing pimples and wrinkles, creating makeup and changing eye color might take longer. But I think it could ultimately give you more control in your editing to create realistic makeovers that retain a client's natural beauty without making them look overdone. I can't wait to try these out. If you haven't joined the Digital Photography School forum and receive their update emails, this is definitely a great reason to do so because the school helps you stay on top of new technology and techniques that can make you a better photographer.

Part 1: Whitening Teeth & Eyes


New ideas I culled from this video:
1) use desaturation to tone back yellow teeth or red eyes
2) keep your selection feathered with at least a 1 pixel so your edges won't be hard
3) keep things natural by using a soft touch in your editing.
4) learn how to do both the "lazy" and "more precise" methods so you can use both depending on how much time you have to edit.

If you know of any other ways to do these techniques, please leave a comment here to "share your wisdom" as Yanik suggests. I will present each of these tutorials throughout the week, so make sure to come back!

Sunday, September 7, 2008

Growing Pains: Get a Selling Edge

This week's "Growing Pains" tip comes from Printroom, a digital services website for professional photographers that prints photos and stores online photo albums.

To get a selling edge, Printroom suggests offering different packages and promotions for your clients to make their shopping experience more personalized and rewarding. Use these strategies from Printroom to drive more business to your site:

1) Offer promotions or volume discounts such as "Get a 20% discount when purchasing $100 or more".

2) Bundle different print sizes and/or gifts into packages. Combine up to 6 different print sizes/products and make available up to 20 different packages.

3) Offer free print redemption to customers or pre-sell photos at an event for online redemption.


Another technique that worked for me during my last batch of senior portraits was offering one free 8x10 photo to Gloria's sister, Jessica to thank her for serving as my assistant during the shoot. Jessica held reflectors for me and was instrumental in producing real smiles and laughter from Gloria, who was somewhat camera shy when we started. During the shoot, I took photos of the sisters together and gave Jessica the above image.

Saturday, September 6, 2008

Saturday Morning Cartoons


The popular online comic strip is celebrating it's 2nd year anniversary. Congratulations Aaron! And thank you for encouraging me and others to seek comfort in our sense of humor when the ebbs and flows of the photography business threaten to overwhelm us. Beginning on Sept. 8, the comic will relaunch as "W.T. Duck."

Friday, September 5, 2008

This Weekend: Shooting First Assignment for Auraria Campus

This is going to be another busy weekend for me, but I'm looking forward to all of my assignments, including my first official freelance assignment for the Auraria Higher Education Center.

The weekend starts out with a presentation of senior portrait shots to Gloria at noon. It was a lot of fun shooting Gloria, and she was definitely a trooper. Our photo shoot encompassed land, air, and sea -- well, sort of, if you count a flower bed as "land," climbing a tree "air" and playing in a fountain "sea." She was a real trooper and was generally open to anything I suggested. I can't wait for her to see all of her pics and pick out her print packages.


Gloria posing in a flower bed.


Gloria frolicking in the water fountains


Gloria climbed up into a tree for this playful shot.

Late Saturday afternoon, I will shoot another senior portrait session with Nina, another friend Jordan referred to me. I will shoot a few images of Nina in studio to try to recreate some similar poses of Marilyn Monroe that Nina said she wanted, and then I hope to take her around our neighborhood (she only lives a few blocks from me). There's also a really cool outdoor water fountain with beautiful lights that I thought might be a good background for some night shots with Nina, but we will see what time we have to work with.

I blogged earlier about being hired as a freelance photographer for the Auraria Higher Education Center. On Sunday, I get to cover my first event for the campus public relations director Cheryl Carter. If you remember, I shot a rededication ceremony for Cheryl's parents last year and then reconnected with her a few months ago when I discovered she was the event coordinator for my first wedding shoot. Tolisa and Jordan's wedding was held at St. Cajetan's Church on the Auraria Campus, and it was then I learned that Cheryl had just recently taken a job with Auraria.

Cheryl said she has been trying to find work for me, but many of the events that have been held on campus in the last few months have been during the week. I haven't been able to do any shoots because I still work full-time at The Denver Post (no, don't go there, I am SOOOO not ready to give up my gig at the newspaper yet and be a professional photographer full time!)

On Sunday though, the campus will be hosting an upscale food expo, and I will be shooting it for four hours. Cheryl has also asked to purchase two CDs from the wedding and reception held at the church and the Tivoli Student Union so she can use them for advertising on the school's website.

Thursday, September 4, 2008

Get the Goods: School is in Session at Lodo Wolf Camera

Today I stopped by one of my favorite Wolf Camera stores in downtown Denver and spent some time with staff there learning how to use Lightroom. I am always impressed by how knowledgeable these guys are and how willing they are to share that knowledge. They don't just give you prints, but they take the time to explain to you why that head got chopped off in print or how an added step in your work flow might give you better results in your post processing.

When I couldn't figure out why a photo I thought I had cropped down to a 4X6 didn't print correctly, Cory, the store manager, whipped out his own MacBook Pro, popped my CD in and opened the image in CS3 to see what happened. Turns out the image wasn't a 4X6 at all, but actually more like a 4X7 1/4, which meant that the subject's head was going to be chopped off during printing to squeeze it into a 4X6.

Cory took the time to explain an easier (and more full-proof) way to make sure my image size is constrained by using presets in CS3. Another staff member, Derron, even gave me a quick Lightroom lesson. Derron has been trying for months to persuade me to give Lightroom a try by hosting mini-lessons whenever the store is quiet, even though he knows I'm somewhat intimidated by new software (especially since it took me so long to get comfortable with CS3.) To make me feel more at ease, he let me play with some of his images while I tried out batch image processing and importing and exporting images.

What all of this boils down to is this: Wolf isn't just the place where I get prints or buy equipment. It's also the place where I learn how to become a better photographer. Not only do I tend to get my equipment from them, Can Walgreen's, Walmart or even quick prints at the neighborhood grocery store do that for me? I'm thinking not.

Check to see if your local professional photography printing and equipment store offers classes to help you get better at your craft. Wolf University has a complete list of classes from now through December that help their customers be more successful with their equipment and capture better images. Choose from three class descriptions, including "The Essentials" such as Introduction to Digital, "The Electives" such as Quality Lighting, at Home and "Special Events" such as a Photo/Video Excursion and Nature Walk at Garden of the Gods.

Wednesday, September 3, 2008

Get the Goods: Outdoor Portraits Instructional Videos

Cincinnati professional photographer Jim Talkington's blog, prophotolife.com recently released a three-part series on outdoor portraiture that I have found extremely useful for posing and mixing ambient light with on location strobes.


episode 25, outdoor portraits #1 from Jim Talkington on Vimeo.


episode 26, outdoor portraits #2 from Jim Talkington on Vimeo.


Episode 27, Outdoor Portraits #3 from Jim Talkington on Vimeo.


The videos also convinced me that I need to buy a Calumet Calumet 42x78" Aluminum Frame with Translucent Fabric and Leg Set and a Calumet 42 x 78" (107 x 198cm) Gold/White Panel Fabric.


Having those items on hand will make it much easier for me to bounce and diffuse light without bugging my client's friends to act as assistants for me. I think I will also take Jim's advice and start using my 70-200mm instead of my 16-35 which distorts a subject's features.

Tuesday, September 2, 2008

September Monthly Photo Assignment Announced: "The Eyes Have It!"


I wracked my brain trying to figure out what to pick as September's monthly photo assignment. But I have it now, and I shamelessly copied the idea from one of my favorite photography sites, Digital Photography School.

My topic choice is: "The Eyes Have It!" Since the eyes are the windows to the soul, let's see what's lurking inside. Have fun interpreting this topic. Remember, it doesn't have to be human eyes...it could be animal eyes, or whatever you define as "eyes." Need some inspiration? Check out the blog topic and some of the submissions DPS readers turned in here. The photo above is also one of my favorites focusing on Cordelia's lovely eyes.

The only stipulations is that the photo has to be taken between NOW and Sept. 28. Turn in your submissions at shebawheeler@picture-yourworld.com and they will be posted for voting when the polls open on September 29.

Now -- GET OUT THERE!

Growing Pains: Reaching Customers Online and at Home

This weekend, I came in contact with two new clients in very different ways.

A plumber who fixed a leak in my bathroom noticed the 20x30 black and white print I have hanging up in my home of Teri and Avery (the photo on my blog banner) as well as other images I have on display in my hallway and home studio.

"Are you the photographer?" he asked. Yep, yep I am! We talked for a few minutes and he told me that he and his wife for looking for a photographer to take family portraits of them and their 3-week old baby boy, and he was struck by the image of Teri and her child. He asked me how much I charged for a session and was shocked when I told him $150. Another photographer he had contacted wanted $900 just for the session! He said he could tell I did great work and that he would be calling me to set up an appointment this Saturday once he consulted with his wife.

LESSON LEARNED? Find some creative way to display your work in your home. It could be an easy way to gain new clients or give existing clients ideas on more photos they could take (and purchase!). The same thing happened when one of my brides who had come over for a bridal portrait session liked a boudoir image I had hanging up, and decided to get a similar image done as a surprise for her new hubby.

Also on Saturday, I got an email from a client who wants senior portraits done for her son. My blog allows me to backtrack and see where my visitors are coming from. Turns out, my new client did a very simple Google search for "senior portraits, discounts and Denver," and my blog was the first item on the hit list.

LESSON LEARNED? Never underestimate how important and vital labels, tags, and keywords can be for your business. Think about the kinds of things potential clients might be looking for, or Googling online to help them narrow down their search, and write those "tell-tale" gems in titles of your blog post, throughout the post itself and in your tags and keywords. Make it easier for potential clients to find you!

Monday, September 1, 2008

Instructor's Tip: Small Shift = Big Difference


Enjoy this week's "Instructor's Tip" by award winning nature photographer Russ Burden:

Small Shift = Big Difference
Clean backgrounds are VERY important. I make mention of it many times on my photo tours. Regardless of the size or type of subject, often a small shift in the camera position can make or break a photo regarding the background.

The two images that accompany this article highlight the black swallowtail butterfly. In the first, there is a dark area in the top left corner that is a distraction as it breaks up the smoothness of the out of focus green foliage that creates the background. What’s causing it is a shadow from a bush. In the second image, I moved no more than three inches to my left so that the entire background would be uniform. The antenna on the butterfly are now more prominent and there is no tonality difference in the green area pulling the viewer’s eye away from the subject. I patiently waited for it to move and when it did, I created the image.


-Russ

The photo(s) in this post were taken by Russ Burden. To learn more about how Russ captured this image, join him on one of his photo tours. Visit Russ Burden Photography to get more information.

To take a class with Russ or a fellow Digital Photo Academy instructor in your area, check out the Digital Photo Academy. I took Russ' intermediate and advanced courses last year, and he continues to be a strong source of knowledge and encouragement as I progress in my photography.

Don't forget to check Take Great Pictures for Russ' most recent tips. On the home page, click on the "Photo Tips And Techniques" button in the left hand column. Additionally, check out his "Digital Tip of the Month" found by clicking on the Digital Photography button.

Congratulations August Monthly Photo Contest Winner: Sheba Wheeler

PYWP Monthly Assignment: Rural Architecture


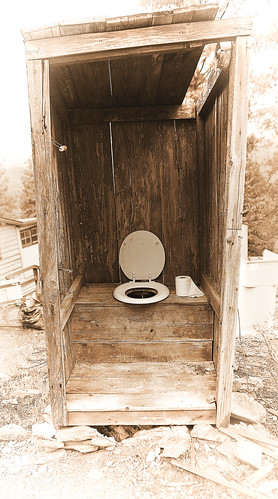
Hey, the winner is me! YES! This is kind of odd congratulating myself for winning August's monthly photo assignment Rural Architecture, but the votes are in. Thank you everyone for taking the time to shoot, submit an entry and vote. Several people asked me where I took that shot of an outhouse. I captured it in a mountain cabin subdivision of Pine Junction, Colorado, where my friend Mike lives. Thank you Mike for allowing me to hike around your property. Many of the cabins where Mike lives were built in the early 1920s, and several of them still have the original outhouses. I used some sepia toning and a white vignette for an antique setting.

I will announce September's topic tomorrow when everyone is back to work from the holiday.

Best Posts

Picture Your World Photography is a premiere photographer in the Denver, Colorado Photographer community on MarketingTool.com.