Saturday, October 31, 2009
Saturday Morning Cartoons
Here is my favorite "What the Duck" comic from this week. Rock on Aaron! "What the Duck" is an online comic strip created by Aaron Johnson. I just love how Aaron's wry sense of humor reflects the current state of the photography industry. But what really freaks me out sometimes when I read his strip is how much they reflect whatever situation I'm currently experiencing too...whether it's working with clients or desperately trying to stay on top of technology like Facebook or Twitter or a host of other things that all add up to being a professional photographer.
The genius of his strip is the way viewers can interact with Aaron and his comic character. Folks are welcome to link, post, copy/paste, or save the strips to their own sites, blogs, forums, newsletters, etc. Aaron also allows viewers to suggest titles for his individual strips, and post photos of their own plushy and stuffed W.T. Duck working or hanging out.
Labels:
Aaron Johnson,
comic strips,
comics,
online comic strip,
photography comics,
photography humor,
Saturday Morning Cartoons,
What the Duck
Spooky Halloween Photograpy Tips
Halloween is one of my favorite holidays. "Trick-or-treaters, jack-o'-lanterns, costume parties, and decorated haunted houses will surely be a part of your Halloween weekend" according to Ritz Pix's photography instructor Digi Pixels. This cool episode should help you get some unforgettable photos:
Costumes are the centerpiece of any Halloween celebration. They come in many varieties, from last minute masks to elaborately planned group themes. Wearing a costume on Halloween is expected almost anywhere you go, but my number one piece of advice for photographing costumes is to take the pictures early! The makeup is still fresh, the masks are on, and the kids' sugar rushes have not yet hit their peak. Take several photos: group shots, individual shots, posed shots, and candids. Use backgrounds to enhance your photo, like a spooky tree or a decorated yard. Also, compose your photo to be appropriate for the costumes in the picture. For example, a beautiful princess will look better on a grand staircase than at a haunted cemetery. Encourage your subjects to act the part of the costume...you'll be surprised at how quickly both kids and adults will get into it!
Nothing says "Halloween" like a picture of a jack-o'-lantern, but many people never seem to get a good shot of their favorite carved pumpkin. Usually, the problem is your flash. Most cameras will pop the flash automatically, especially if it's dark. However, the tone of the flash is cold compared to the warm glow from the jack-o'-lantern, so the photo doesn't turn out like you want it to. To fix this, turn off your flash, raise your ISO to 400 or 800, and slow down the shutter speed. Also, try using a tripod or table to avoid a blurry photo.
- The autumn leaves and colors make a great background for Halloween photos. Weather permitting, be sure to capture the autumn colors in your photos.
- Play around with night mode on your camera. It will pop a flash but allow for ambient light to show in the background, which can create a wonderful (and sometimes spooky) color shift.
-Try shooting from different angles rather than straight on. A unique angle can turn an ordinary photo into a fantastic one!
- Try a few different techniques a day or two in advance, so when Halloween arrives, you'll know how to get the perfect shot!
- Convert your Halloween photos to black and white or sepia to add suspense or enhance their overall "spookiness."
Wednesday, October 28, 2009
Get Connected: Finally a Denver SMUG!
Yeah! Just got an email today letting me know that a Denver SmugMug User Group (SMUG) has finally been organized!
The First Denver SMUG meeting is:
Tuesday, Nov. 17, 2009 | 7:00-9:30PM
Blake Street Tavern (map)
2401 Blake Street (@ 24th)
Denver, CO
SMUGs are FREE and open to everyone who loves photography.
No RSVP is needed, but SPACE is LIMITED, so get there early for the best seats.
New SMUG leaders Chris & Katie Humphreys and Sara Frances & Karl Arndt welcome Smugmug's chief marketing guru Jeff Jochum. Jeff will reprise his Igniting Fusion presentation at this month's meeting. Featuring incredible videos videos by Bob Davis, Robert Evans, JVS, Chris MacAskill, The Bebbs and The Bui Brothers, as well as the NEWEST video from Vincent Laforet's SmugMug project in Hawaii - Igniting Fusion was a big hit at this year's Collision Conference, hosted by the LA Film School, a few weeks ago. If you are wondering "WTH is Fusion (and why should I care)?" - this is the meeting for you.
Learn how it's done (good, bad and ugly) and how to GET STARTED in this next generation market opportunity. Old Skool is still cool, but the success of the Canon 5D MkII (and excitement around the new 7D), coupled with the exploding consumer demand for vid-media (thanks to Animoto.com and the Apple iPhones and iPods) is driving Fusion photography as the next BIG step up in the world of digital photography. Become a Fusion leader (or find one) at this month's SMUG.
So what the heck is a SMUG? It's a place where you can learn, teach and meet up with other photographers who share your passion. Attendees will get the naked truth straight from the source and preview stuff in the pipeline like new features, bug fixes, and promotions. (Can anyone say PACKAGES and COUPONS!!!!! Hint, hint!) Now you can finally put a face to all those strange usernames on the Dgrin Forum. I'm thenimirra!
Guest speakers will light up the room with their wisdom for shooting great images and making money with photography. Attendees also get to share our opinions about features and potential business deals. It's a bulletproof way to know the SmugMug Gods are actually getting our message, the way we want to be heard, unfiltered and face-to-face. Plus, SMUGs are a great way to connect with other photographers and add a few weapons to your creative arsenal.
After the initial launch meetings, local volunteers will take over as SMUG Leaders. They will organize and announce monthly SMUGs times, locations and topics.
Want to find a SMUG in your area? Check this link.
Want to start a SMUG in your community? Contact Jeff so he can help you get one going.
Or, if you would like to start a SMUG in your community, talk to Jeff, SmugMug's chief marketing dude, about getting one going. Here is his information:
Jeff Jochum: smugs@smugmug.com 310.773.0770 Twitter: MugToMug
Hope to see you there.
Labels:
community,
gathering,
Get Connected,
Jeff Jochum,
Smugmug,
smugmug user groups,
smugs
Get the Goods: Baby steps with Lightroom
I am so glad I finally got the chance to take a Lightroom class! Illuminate Workshops instructor Peter Bryson was a blast and I can't believe how much I learned in just a few hours.
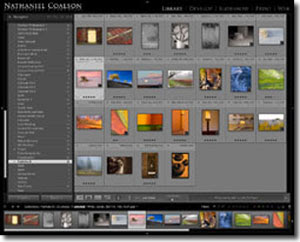
Right now, I'm using Lightroom 2.5 to help me import photos from cards and catalog them. I'm also learning how to create collections, and how to use the star system and the X for "don't want" and the P for "pick" to help me quickly choose between the keepers and the duds. Once I've gotten those chosen, I export them as JPEGS into Photoshop and then the editing process begins. The ease of metadata and keywording is great too since I'm terrible about taking the time to do that.
Right now, I'm still stuck largely in the Library module, as I've only tinkered with the Develop and Print modules. But there are so many instruction videos and free presets available online, it won't take me long before I'm just as crazy about presets as I am about Photoshop actions. I love the fact that Lightroom records every change you make in it's nondestructive format. Once you've reached 20 or so changes in a layer while in Photoshop, everything you were doing before gets erased, so it's harder to go back several steps if you've made a mistake or change your mind.
I've already created some cool presets for printing templates, and Bryson gifted class members with some coveted WOW presets for post processing. I even downloaded the beta version of the new Lightroom 3.0, and I'm having fun playing with it, too. Can't wait to be able to import images that already have watermarks on them instead of using actions in Photoshop to create them.
I doubt I would ever fully give up editing in Photoshop. I love doing it. But if Lightroom can help me stay more organized and make it easier to backup photos, then I'm a believer. I can't wait to take the followup in-depth Lightroom workshop in December.
Labels:
adobe Lightroom,
Get the Goods,
Illuminate Photography Workshops,
Peter Bryson,
photography classes,
photography workshops
Tuesday, October 27, 2009
Get the Goods: Attending a free lighting webinar
I'm excited about "attending" a free tricky lighting webinar with guest speaker John Bentham. It's one of a continued series hosted by the Digital Photo Academy and Panasonic LivingInHD.com. There's still space, so if you want to check it out too then go to this link to register right now. It starts at 8 p.m. EST
LivinginHD.com brings you advice and tips from Digital Photo Academy professional photographers across the country that will help you take better pictures. Learn about color, lighting, motion, landscapes, portraits, pets, digital manipulation, camera settings and more!
I've taken several classes with the DPA; in fact, it's how I met Russ Burden. He was my DPA Denver-based instructor!
© Allen Birnbach
Here's the literature from the webinar:
Have you ever encountered the frutrations of observing a picture perfect setting without the knowledge or tools to recreate it in your photograph? You are not alone and learning to deal with that is a right of passage for every photographer worth his or her salt. The challenging situations and examples of capturing accurate lighting conditions are unending and Webinar Narrator, John Benthem, will draw from the vast experience offered by the 60 Digital Photo Academy Instructors. He will show the captivating images, from around the world and offer insights on how the photographer achieved the effect and provide technique on how you might use the strategies in your own photos as well.
© Vasna Wilson
Hope to "see" you there tonight! If you were unable to view any of the past webinars, check the DPA site out under "Instructor Tips" on the home page to view the archived webinars which are labeled as such in the drop down menu.
Labels:
free webinar,
lighting techniques,
LivinginHD,
Panasonic Digital Photo Academy,
tricky lighting
Monday, October 26, 2009
Instructor's Tip: Selective Focus
Photo by Russ Burden
I hope you enjoy this week's "Instructor's Tip" by one of my favorite instructors, award winning nature photographer Russ Burden. To learn more about how Russ captured the above image, join him on one of his photo tours. Visit Russ Burden Photography to get more information.
REMINDER: There will be no Instructor's Tip next Monday as Russ will be in Bryce and Zion National Parks leading his photo tour. If you really want to learn a ton about composition, depth of field, how to read the light, and so much more about the art of making great images, I strongly urge you to sign up for one of his photo tours. With over 30 years of teaching experience and his passion for photography, I ensure you'll come home a much better photographer in addition to bringing home lifetime memories.
Selective Focus
Lens manufacturers continuously pour large chunks of research and development money into creating faster and sharper lenses. Zoom lenses are now the standard where at one time, if you wanted a sharp image, they were considered amateurish at best. The sharp zooms of today combined with precise autofocus technology allow tack sharp images to be made fairly easily. Ironically, the out of focus areas in a photograph are equally as important as sharp ones if the picture is to be successful. Herein lies the concept of selective focus.
Selective focus images have very little depth of field. The technique is often used in situations where the background would be distracting if it was sharp. Some of the ways to render an out of focus background are to use wide open apertures, long lenses, get the main subject away from the background, move closer to the subject, and change your image making angle. The purpose is to render a sharp subject or section of a subject immersed in a wash of background color. It allows the subject to pop off the page so the viewer zeros in on the area that’s sharp.
Take a class with Russ or a fellow Digital Photo Academy instructor in your area, check out the Digital Photo Academy. I took Russ' intermediate and advanced courses last year, and he continues to be a strong source of knowledge and encouragement as I progress in my photography.
Sunday, October 25, 2009
Get Inspired: Energizer Ultimate Photo Contest Winner
When I saw the above image, I knew I just had to show it on my blog as a source of inspiration to both you and me. It's always a good idea to study another photographer's work so that you can use similar ideas, techniques, editing or compositional elements to craft your own images. Congratulations Bernardo Medina. What an imazing, storytelling image...the kind I strive to capture.
ST. LOUIS, MO--(Marketwire - October 22, 2009) - From among 12,500 entries, Bernardo Medina's incredible photo was selected as the Grand Prize Winner in the 2009 "Energizer Ultimate Photo Contest" (NYSE: ENR) with National Geographic. Medina will now receive the "ultimate" grand prize: a trip of a lifetime for two to the Galápagos Islands and seeing his photo grace the pages of National Geographic magazine in an ad for Energizer® Ultimate Lithium batteries.
Last spring, Medina, an architect by trade, submitted his photo -- Peddling Bicycle in Wind -- in the Inspiration/Keep Going® category. In August, his photo was named a Category Finalist by Jim Richardson, a National Geographic photographer and the judge for the "Energizer Ultimate Photo Contest." Then America was asked to go online to nationalgeographic.com/lithium to vote for a favorite in each of the six categories: animals/wildlife, nature, travel, people and cultures, weather and inspiration/Keep Going®. After four weeks of voting, Medina's photo advanced to become a Category Winner. Richardson went back and reviewed all of the Category Winners, and in the end, he selected Medina's photo as the "ultimate" best and named the Houston photographer the Grand Prize Winner.
"Each and every finalist in the 'Energizer Ultimate Photo Contest' would have been a worthy winner, but one photo so captured the essence of its category that I ultimately chose it as the Grand Prize Winner," said Richardson. "I have no idea what sort of storm this rider faced, but the photographer drew on every creative tool available to produce an image that truly captured the heart of the theme: Inspiration/Keep Going®. Congratulations to one and all!"
Energizer, the company known for innovative solutions to power people's lives, partnered with the world-famous magazine National Geographic for the second annual "Energizer Ultimate Photo Contest" to highlight Energizer® Ultimate Lithium batteries, which last up to 8x times longer* in digital cameras.
Medina will now begin planning his once-in-a-lifetime adventure to the Galápagos Islands, and his photo will be featured in the December issue of National Geographic magazine in an ad for Energizer® Ultimate Lithium batteries. Medina will also receive a prize pack of a 2.0 USB scanner, an assortment of Energizer® Ultimate Lithium batteries, two National Geographic books: Organize Your Digital Life and National Geographic: The Photographs, and a framed and signed 16x20 print from Richardson's photography gallery.
For more information on the "Energizer Ultimate Photo Contest" and to see Medina's photo and the other five Category Winners, go to www.nationalgeographic.com/lithium.
Labels:
Bernardo Medina,
Energizer,
Get Inspired,
Jim Richardson,
National Geographic,
photo contests
Saturday, October 24, 2009
This Weekend: A little bit of editing
Unedited proof from Galen's senior portrait session
This weekend, I'm looking forward to taking it easy. I've got no photography sessions to shoot and just a little bit of editing to do. And it's a good thing too because things have been so busy that I've run out of clean clothes and my dirty dishes piled up in the sink are threatening to kill themselves unless I clean them soon.
One of my photography buddies is having a surprise birthday party, so I'm looking forward to making it to that. I so rarely get to just hang out with my colleagues, and I think it's important to be able to get together, have fun and try our damnedest NOT to talk about work or photography. Fat chance, I'm sure!
I've got just one senior portrait to edit from a recent session I had with Galen. His photo is due to his school by the end of the month, so we spent some time in studio getting that shot. Then we will take part two of his session outdoors.
Wanna get a sneak peak of Galen's studio session? Check out his unedited proofs in this gallery. The password is "Prairie View" Galen wants number 48 for his senior pic while his mother prefers number 51. It's kinda funny how the act of choosing a senior portrait often becomes a push for independence among high school seniors who want to have control over how they are portrayed in their class yearbook. Galen's mother gave in and told me to edit number 48, but I will definitely edit number 51 just for her.
Here's Galen's pick: Number 48
Here's his mom's pick: Number 51
In the proofing process, I don't do much more than sharpen, fix white balance issues and cull for keepers. So these images are pretty much right out of camera save for a few that I just couldn't help but do some quickie edits like these favorites from Galen's session:
As part of a special discount I'm running on senior portraits, I'm offering a quickie session that nets clients a one hour photo session, two 8x10s, four 5x7s and a sheet of wallets for just $150. The senior photo session is pretty much over since photos are often due to the yearbook staff by Oct. 31. But if you've got more time to get your photos turned in and need to hirer a photog, take advantage of this discounted session by booking me today!
Saturday Morning Cartoons
Here is my favorite "What the Duck" comic from this week. Rock on Aaron! "What the Duck" is an online comic strip created by Aaron Johnson. I just love how Aaron's wry sense of humor reflects the current state of the photography industry. But what really freaks me out sometimes when I read his strip is how much they reflect whatever situation I'm currently experiencing too...whether it's working with clients or desperately trying to stay on top of technology like Facebook or Twitter or a host of other things that all add up to being a professional photographer.
The genius of his strip is the way viewers can interact with Aaron and his comic character. Folks are welcome to link, post, copy/paste, or save the strips to their own sites, blogs, forums, newsletters, etc. Aaron also allows viewers to suggest titles for his individual strips, and post photos of their own plushy and stuffed W.T. Duck working or hanging out.
Labels:
Aaron Johnson,
comic strips,
comics,
online comic strip,
photography comics,
photography humor,
Saturday Morning Cartoons,
What the Duck
Friday, October 23, 2009
Facebook Fan winners choose their free 8x10 digital downloads!
Alexa and Ian have chosen their free 8x10 digital downloads! Those two lucky fans of the Picture Your World Photography Facebook Page were randomly selected to pick one favorite image from my Cityscapes, Landscapes and Flora and Fauna website galleries. Garnering 200 Facebook fans triggered the drawing. The next free giveaway will happen once I reach 300 fans!
Ian's pick of this cute little chick I found nesting in a bush in front of my house really took me back. This was one of the first images I ever took with my then brand new 75-300 Canon lens two years ago. Studying this photo again after all that time has helped me see just how far I've come. Back then, I wasn't even really sure how I got that image because I was still trying to figure out basic photo concepts including shallow depth of field, isolating a subject and framing, not to mention how the heck that lens worked anyway. Since then, I've not only grown technically as a photographer, but I've focused my business on what I do best -- shooting portraiture and special events. This little feathered guy hasn't seen much action among viewers. So it was fun to have Ian chose this one.
Meanwhile, Alexa's pick is one of my personal favs. This shot of the Platte River in downtown Denver was one of my first captures ever taken at night. I and several others were attending a free night shootout coordinated by Efrain Cruz's Illuminate Workshops. I remember the evening well because it was also one of the first times I had to force myself to use my tripod to steady long exposures. My friend Tiffany Trott and others were laughing at me because I didn't even know how to attach my camera to the tripod, and spent most of the night fearing the camera would fall off, crashing to the ground. Yep, fun times!
It's good to know I've progressed, and I'm proud to be sharing these images with two studio supporters. Become one of my Facebook fans today to be eligible for future giveaways, photography session discounts and fans-only specials.
Labels:
cityscapes,
Efrain Cruz,
Facebook,
Facebook fan page,
facebook fans,
Facebook freebies,
facebook giveaways,
flora and fauna,
Illuminate Photography Workshops,
landscapes
Wednesday, October 21, 2009
Breaking News: And the winners are...
Photo by Kim Shuman
Picture Your World Photography has reached a new milestone. The studio now has 200 Facebook fans (actually now 205 since this morning!) To thank all my new supporters and potential clients, I promised to do a random drawing to give one lucky fan their choice of an 8x10 digital download print from my landscapes, cityscapes or flora and fauna galleries on my website.
SURPRISE! Since I've gotten 200 fans, I thought I would give out TWO downloads. And when I reach 300 fans, THREE downloads, etc. etc.
Each fan has been assigned a number based on when they joined starting with Tiffany Trott as No. 1 to Kristi Crosson, fan No. 204. If the random drawing lands on me, I will redo it. So here goes. Drum roll please....
Using this random number generator and plugging in the numbers from 1 to 205....the first winner is Ian Saunders, Fan No. 79 and the second winner is Alexa Livingston, Fan No. 117.
Congrats Ian and Alexa! Please choose one image from either of these photo galleries:
Cityscapes, Landscapes and Flora and Fauna galleries.
Labels:
Breaking News,
Facebook freebies,
free 8x10 digital download,
random number generator,
winners
Monday, October 19, 2009
Instructor's Tip: Wildlife Photography
Photo by Russ Burden
I hope you enjoy this week's "Instructor's Tip" by one of my favorite instructors, award winning nature photographer Russ Burden. To learn more about how Russ captured the above image, join him on one of his photo tours. Visit Russ Burden Photography to get more information.
Wildlife Portraits
Besides running nature photo tours to some of the most glorious scenic and wildlife rich locations in our country, another aspect of my business is portraiture. Whether it’s a portrait of just one person or a huge extended family, I persevere to capture the image in the best light, with the best composition, with the best background, with the optimum lens, and with the best expression. Well what does this have to do with wildlife portraits? Many of my nature photographer friends ask a similar question regarding why I get involved with people portraiture and weddings when I have a strong love for nature photography. My response is always the same. First off, I’m behind the camera which makes me happy regardless what I shoot. But mostly, if you really think about, one helps the other. What difference does it make if I’m trying to capture a great head shot of a mountain goat on Mt. Evans vs. a pleasing portrait of Aunt Sally? For both, I’m taking into consideration all the aspects I referenced at the top of this paragraph. My goal will always be to capture the essence of the animal / person I photograph. Besides, each has a big plus - I can always direct the people I photograph to smile or move to a better location and the animals I photograph never complain that I photographed them from their bad side!
As with a large majority of nature images, the best are made when the sun is low on the horizon close to sunrise and sunset. Mid day light is too harsh with severe contrast issues of dark shadows under the nose and chin in addition to eye sockets that often reveal no detail. Early and late light is soft and warm in tone and provides a much more pleasant image. I try to front light my animal portraits as much as possible especially when bathed in the warm glow of first or last light. Sidelight works, but one side of the face may go too dark depending on the color of the animal and if there's anything bouncing light back onto the shadow side of the face. Here’s the bonus - portraits look fantastic shot in overcast light which can’t be said for most scenics.
Take a class with Russ or a fellow Digital Photo Academy instructor in your area, check out the Digital Photo Academy. I took Russ' intermediate and advanced courses last year, and he continues to be a strong source of knowledge and encouragement as I progress in my photography.
Thursday, October 15, 2009
Get the Goods: Just 9 Fans away from another freebie 8x10!
Sometime over the evening, I gained several Facebook fans bringing the number to 191 people all supporting Picture Your World Photography.
That means we are just 9 people away from reaching 200 -- the number that will trigger another giveaway of an 8x10 digital download.
When I reached 100 fans, I chose my highest print seller, "Teri's Rose" as a freebie.
This time, the winner gets to choose one image from my Cityscapes, Landscapes and Flora and Fauna galleries.
Labels:
cityscapes,
Facebook freebies,
flora and fauna,
free 8x10 digital download,
Get the Goods,
landscapes
Wednesday, October 14, 2009
Get the Goods: Amy-Rose King Photography selling her personal workflow Photoshop actions!
"Taste the Rainbow action plus Eye Pop."
The secret is out! Amazing portrait photography Amy-Rose King is selling her coveted work flow actions as a set! They'll be on sale through October for $100 then going up to the regular price of $125 after that.
Click on her product page here or visit her home page for more information.
Just press "play" and have access too the following actions:
Taste the Rainbow - color pop
Make it Lovely - skin softening
Make 'em Shine - eye sharpening
Make it Clear - sharpening
Select the focus - blur
Make some Romance - blur
Feel no pain dodging and burning
Make it look good on the web - color profile
Black and White
Black and White with a touch of Chocolate
Web size image wide (4x6 print size)
Web size image tall (4x6 print size)
Quick border
Make some style 1 - portrait contrast
Make some style 2 - portrait contrast
Reminds me of the good ol' days
If ya like it like that - lomo
Just a dab'll do ya - skin softening
Lens blur
White softening
Grapevine
Blueberry Patch
Pot of Gold
After the Rain
Sneaky Leprechaun
Earth
Sky
For some examples click here: tastetherainbowactions.blogspot.com/
My blog readers know I've been drooling....er, I mean, admiring Amy-Rose's work for a long time now, as I receive email updates from her blog showcases wonderful work she's done for clients as well as lovely photos she takes of her own children and family. ZIn July 2008, I wrote a blogpost about how refreshing her transparency was as a professional photographer as well as her willingness to share techniques to newbies like me who are still developing our own style of imagery storytelling. This set of actions is yet another example of how Amy-Rose's can help you be a better photographer too! Get your hands on these goods, for sure!
Amy, if you are reading this post, I would love to see what you would come up with to enhance this photo using some of your actions:
Growing Pains: How Should You Price Your Photography
While reading some information on photographer's Rod Evan's Facebook page, I came upon this link to an amazing article about how portrait photographer Jodie Otte of Black Horse Studio answers the question: "How should I price my photography?" Otte was a guest blogger on the MCP Actions Blog. I found the ideas both right on and also worrisome because if her model is correct, then I am a long way from ever being able to be a full-time professional photographer. I'm definitely one of those kind of people who worry about charging too much and making sure people can afford me, especially when I - along with everyone else - is reeling from the economic downturn. But Otte carves away emotion and gets back to the practicality of what is essential for having a successful business....and that means you've got to set your prices to make a profit!
Here is Otte's advice:
As a general observation, I am shocked at the low prices of a lot of photographers - especially new photogs, and I hope this isn’t offensive to anyone, but what is more important than your photography, is your business skills when running a business. This industry is completely saturated with underpriced photographers - many talented. Think of this — the stats are something like 95% of all photography businesses fail. What makes you feel that you should be in that 5% that does not fail?
Business sense, that’s what. Have you marveled at a local photog who does really boring work, yet they are always busy and their prices are more than yours? Why is that person a success and you can barely bring people in even though you are always hearing how everyone loves your work… It’s because he/she knows how to run a business.
Everyone asks - how should I price? so and so has $25 8×10s, so I can’t go higher than that. Okay, so research all the local photogs and find out what they are charging. Use that as a guide, but understand, many photogs do not have their pricing on their site, and there is a reason for that. You need to price yourself for profit. If you are new and still portfolio building, something that is great to do is set your prices based on turning a profit (as I will describe below), then sure, discount your prices and be CLEAR that you are portfolio building. That way, when you are done PBing, you can return to your already advertised REAL prices, and you won’t make your previous customers angry because they knew at some point you would move on to them. The problem with starting too low is when you start realizing you aren’t turning a profit, and you start to raise them, you are going to be without business because people will get angry with you for raising them. So be honest and upfront and clear about what exactly is going on, and you will continue to have clients who have built a relationship with you and understand what’s going on. Don’t drop a bomb on them, by any means. Once they have invested with you, they are invested, it’s a relationship, maintain it.
Another thing - if you do not need the money right now because your spouse is the breadwinner, now is a GREAT TIME to build an exclusiveness about your business. You don’t need the money, so why not price yourself to make it well worth it. So you get a few sessions a month. You are PAID WELL for your time away from your family, and then as word of mouth builds, you are viewed as a higher priced, more exclusive photog - and that can be quite desiring for many crowds.
The thing about running a business - you have to take emotions out of it. By emotions, I mean “I want people to still be able to afford me” “I don’t think I am good enough” “I’ve never done this before” “I can’t afford me (I beg to differ - how much did you spend on your living room furniture? $3,000? How much did you spend on that big screen TV with surround sound? I have news for you - pictures last longer and are more important in the longrun. Clients will not value your work, if YOU don’t value it. News Flash: WalMart’s a la carte pricing is $50 for an 8×10. I’m not talking about the coupons. I’m talking about for one of those crappy ugly 8×10 a la carte backdrop pictures of your child with a fake Christmas tree, where you only got 15 minutes to get your child to smile printed on substandard photo paper is $50. You offer WAY better than that to your clients, don’t you?
When I see some charging $200 and that includes all the digital files or even some of the files or even a $100 print credit with $20 8×10s, I cringe because that photographer can be making less than minimum wage and has no idea.
Do you have a reason for pricing the way you do? Do you just toss it out there and hope for the best? Or do you have concrete logical reasoning for why you are pricing the way you are. You need to take your EMOTIONS out of this and think like a business owner. No business owner should be making less than minimum wage. You really need to think about business management (classes would be a great idea).
So how do you price? Work backwards to figure out what clients need to spend. So many people want to skim over this because they are “arteests” and think it’s all about the talent, not about the pricing structure. WRONG! Artists work from emotions, and you better step outside of that for a moment and keep those emotions and business separated, or you will BE a starving artist who will one day look back and say “my kids are grown, where did the time go? I sat in front of that computer for hours for less than minimum wage… I wish I had that time back with my kids….” No one looks back and says “I wish I would have worked more away from my family….”
Ask yourself how much you want to make per year. My personal goal is always well into six figures, but I’ll back this down to a more reasonable goal for newbies.
Okay - let’s say you want $50,000 SALARY for a full time BUSINESS OWNER. When figuring this out - what do you value your family time at? $50 an hour? $100 an hour? $10 an hour (REALLY???? You may regret that one day years in the future - don’t set yourself up for regrets) Don’t laugh - some people do this for $10/hour and then pay a babysitter $5/hour. It boggles my mind.
Work backwards to figure out your pricing structure.
1. Income desired is $50,000. Again, you are a business owner, you don’t need to be working for pennies. Add 35% to that (that’s for your taxes as a sole proprietor). Yes, you need an additional $17,500 to cover your taxes. So now your income has to be $67,500 as you are going to owe Uncle Sam a nice chunk.
2. Add your expenses to your desired income - $67,500 plus $25,000 equals $92,500 -Don’t think $25,000 is a lot for business expenses. That’s not a lot at all. Last year alone, my expenses were $70,000. Expenses means everything - gas money or mileage, office supplies (paper, ink, packaging, file folders, pens, pencils, envelopes, sticky notes, light bulbs, batteries, whatever….etc.), office equipment (computers, software, actions, mouse, keyboard, file cabinets, books, internet etc. etc. etc.), studio supplies and equipment if applicable, portions of gas and electric bills, telephone bills (if working out of home, it’s portions of this vs. full amounts if you have a studio) photography supplies and equipment (cameras, lenses, memory cards, lens cleaning supplies, flash, strobe, softbox, camera bags etc. etc.), packaging supplies (bags, boxes, bows, tape, labels, etc.), postage, props -yes, all those baskets, newborn hats, wraps, backgrounds, chairs, stools, etc., marketing supplies - print samples, business cards, etc. oh and your business insurance. Do you have studio rent? Then think much more than $25,000 as expenses. The figure I am using is based on not having a studio - and I am being nice, most with even part time businesses have higher expenses than $25,000.
3. So you need to bring in $92,500 in sales every year to get your desired income of $50,000. How do we go about that? Okay, ask yourself - how many weeks per year do you want to work? Let’s say 48 weeks per year (don’t forget, you may have your kids home for spring and winter breaks, etc.. $92,500 divided by 48 equals $1,927 per week. You need to have $1,927 per week in sales.
4. How do you want to achieve that? How many clients do you want per week?
If you want 2 clients per week, you will have to have two sales of $963.54 (if you are selling albums/prints, make that $1,163.54).
If you want 4 clients per week, you will have to have four sales of $481.75. (if you are selling albums/prints, make that $681.75)
Umm… okay, why did I add the parentheses? What are your COGS (cost of goods sold). If you sell an album, some prints, and a canvas, you are looking at COGS of being around $200 per customer - factor that in.
A little note, how many hours exactly do you work for your client. Hmmm… An hour in transit, 2 hours in session time, 4 hours proofing/editing, an hour uploading and doing office tasks, 3 hours between phone calls and scheduling and emails and questions from client and client sale finalization, packaging, ordering etc.. So you did 10 hours for that client? (we didn’t include other things like marketing and bookkeeping and in person ordering, but I’ll skip that for now - challenge: log in while you work on a client, EVERYTHING you do related to that client, I bet it will be close to 10 hours or more per client). Well that’s not bad, that’s about $50/hour toward the business for option one, having two clients per week. That’s half of what plumbers make, though… and guess what, your PICTURES LAST LONGER! :laugh: … but option two puts you at about $25/hour toward the business. Not TOO bad either - but you SHOULD be making at LEAST $50/hour as a BUSINESS OWNER (although myself and others would tell you as a business owner, you should actually be making more like $100/hour because you don’t want to forget having retirement, college funds for your kids, etc. and as a business owner, you should accept nothing less in my personal opinion or you may as well just work a job for someone else that is less stressful than dealing with the public). I challenge you to plug in lower numbers in this equation as well - let’s say you only want to make $20,000 per year - I’ll touch on that at the end. Although don’t forget, life happens, and you may find yourself in a pinch one day to where you may actually need an income to support your family on your own…. which begs to go back to - what do you value your time away from family at? One customer takes you away from your family for 10 or more hours. Is that only worth $250 to you? Not to me personally…. but to each his own.
5. Back to what do you price? I personally like to work by worst case scenario so I figure at the very least, I know I will have 2 clients per week, even during slow time, so that means I would want to guarantee two sales per week at $1,164. So therefore I would price my work so that every client would spend at LEAST $1,164 which means my lowest print package should be $1,164 (or $682 if going to take on 4 clients per week).
Personally, this is just my opinion, but I don’t think a business owner should be making less than $50,000, but that’s just me. You should network with some other local BUSINESS OWNERS (not photogs, but business owners) and see what they are making. Want to work with lower figures? “Oh I just want to do this part time for fun… $20,000 is plenty for me to have part time…”
Okay, let’s work with lower numbers.
Goal: $20,000 Add 35% to that for taxes equals $27,000
Expenses: Add all your expenses up - I’ll be nice and pretend you aren’t spending on all those group buys, trendy items, and you don’t have any SUPER expensive equipment, so let’s say your expenses are $15,000 per year (do you REALLY think that is high? I don’t - not at all - see above list and I challenge you to REALLY evaluate what you are spending every year - most photogs are spending at LEAST $20,000 per year in expenses if not much much more. So $27,000 plus $15,000 equals $42,000
So for you to make $20,000 per year, you need to have sales of at least $42,000
$42,000 divided by 48 weeks per year of steady work equals $875/week in sales without cost of goods sold factored in. You need $1075 (including COGS) per week in sales to have an income of $20,000 per year - so if you are only taking 2 clients per week, you need sales of around $640 for each client. Just keep that in mind…
Also keep in mind, if you are taking on 4 clients per week so that your sales need to be much less HOWEVER when taking on FOUR clients per week - you are working 40 hours per week - that’s FULL TIME for $20,000 per year… umm… That means that you are working a full time job for $10/hour - your time away from your kids is valued at $10/hour? You are missing 40 hours per week of your kids’ lives for $10/hour as a BUSINESS OWNER. Makes you think, doesn’t it?
I just challenge all new business owners to really look at their figures and use these simple concrete ways to project your income, to define your income, to price yourself out, and actually structure your business as a real business, and operate as a business owner who knows basic business management 101 now. Work your business proactively with good reasoning behind it. Remember, IF WE DON’T VALUE THIS INDUSTRY, NO ONE WILL.
Labels:
Black Horse Studios,
business strategies,
Growing Pains,
Jodie Otte,
MCP Actions blog,
pricing,
profitability
Tuesday, October 13, 2009
Get the Goods: Free webinar -- Halloween Photo Tips
I'm so bummed that I'm going to have to miss this free webinar. But I wanted my readers to get the information in case your schedules permit you time to watch and learn!
© Frank Siteman
Join Digital Photo Academy Advanced Instructor John Bentham, for a FREE HALLOWEEN AND PUMPKIN PICKING webinar. John will be speaking about his images, and a selection of photos submitted by the 60 DPA instructors from around the country. The themes will vary from indoor party shots, (kids as well as adults), to landscapes of Halloween activities and pumpkin picking as well as close-ups of costumes in various lighting conditions. Get behind the scenes anecdotes as well as tips to inspire you with your own photography. Register in advance to view the program at no cost and view it on your own monitor at the convenience of your home or office. You may also submit questions live and John will answer as many as possible during the webinar.
If you'd like to submit some of your own images for consideration, please send them to INFO@DIGITALPHOTOACADEMY.COM. Include your name and email address. It is doubtful that we can include all entries, but we will try! File restrictions: 200 dpi, 1MB & 10 inches on the longest side.
Webinar Info: Tuesday, October 13th, from 8:00 PM to 9:00 PM, EST.
Sign up in advance to log on. You do not need a webcam to attend this event.
SIGN UP HERE
SPONSORED BY The Digital Photo Academy and Panasonic LivinginHD
Labels:
free webinar,
Get the Goods,
halloween photography tips,
John Bentham,
LivinginHD,
Panasonic Digital Photo Academy
Get the Goods: Finally taking a Lightroom class!
On Saturday, I will finally be taking a Lightroom class with Illuminate Photography Workshops. Thank you Efrain! I know, I know. I can hear many of my photog buddies saying "It's about damn time!" Lightroom 101: Introduction is running from 10 am to 5 pm. I really love the intensive and quick hit one day formats, and I've heard great things about instructor Peter Bryson.
I guess I never saw a need for Lightroom before since I really did feel like I was barely scratching the surface with what can be achieved in Photoshop. Maybe, I've been resistant to learning Lightroom because it took me so long to become comfortable with Photoshop. I can remember that fear I felt when I opened the program for the first time years ago. I just KNEW I would NEVER be able to learn this huge program. But as with anything, step by step, class by class and tip by tip, I've gotten a strong handle on Photoshop. Post processing photos is now one of favorite parts of the capture system since I shoot almost exclusively in RAW. I'm a self-proclaimed "Actions Junkie." And it seems like everyday, I learn a new PS technique that I can't wait to make a permanent part of my workflow. Learning Photoshop has been a huge achievement for me, especially now when I hear people say they like editing I've done to a photo.
But I think it's time for me to move on now, gain some new skills and stop being resistant to change. With all of the cool presets available for Lightroom users and the increased speed everyone tells me they have with Lightroom, I'm sure I will be able to find the best way to make it gel with my own workflow process. Plus, this will be the first class I've taken in a while in a formal setting that wasn't a webinar. I'm looking forward to interacting with the instructor and other students. A lot of my buddies have said they could teach me how to use this program in a snap, but over the years, I've discovered that I really do learn well initially in a classroom setting and then get backup support and tips from friends later.
Here's what I will be learning:
Learn the basics of managing your image library and making your photos look their best in Lightroom.
Overview of The Lightroom Interface
Inside the Lightroom Catalog
Importing and Exporting
Metadata Essentials
Develop Module Basics
Visualizing the Complete Workflow
Presentation Options in Lightroom
After taking ALR 101 a student will be able to import, sort, name and retrieve files using keywords and metadata. In addition, the student will learn how to use the Develop module that allows total manipulation of an image, all in a non-destructive manner. The student will have a firm knowledge of the Histogram and Curves, and how one would use those tools.
Next, I will be signing up for an indepth Lightroom 2 workshop where I will be learning how to locally adjust areas within the image, making it less likely that one would need to use Adobe Photoshop. I have a hard time believing that, but I'm glad the instructor will be emphasizing how to seamlessly move from one program to the other and back again. Plus, we get to learn how to present images, and create web-ready galleries.
If you need to brush up on your Lightroom skills and live in the Denver Metro Area, consider taking a Lightroom course with Illuminate Workshops.
Labels:
adobe Lightroom,
education,
Get the Goods,
Illuminate Photography Workshops,
photography classes,
Photoshop
Monday, October 12, 2009
Breaking News: Google Listing, Portfolio Diversity Lands a Client
I just got a phone call from a client needing senior portrait photos for her son. But here's the kicker: when I asked her how she contacted my photography business, she said she found it on Google's local business results by typing in "80022 Denver photographers."
The client said she was initially overwhelmed with her search results, but the deciding factors for her final choice was the fact that my business is located near her home in Reunion and that my portfolio included ethnically diverse clients.
Her son is African American, and she said it was important for her to find a photographer who had experience appropriately lighting and shooting the tones of darker-skinned individuals, such as in this senior portrait of Jordan.
We have scheduled a portrait session for Wednesday and will be signing the contract tomorrow evening.
Instructor's Tip: How to Shoot Rainbows
PHOTO BY RUSS BURDEN
I hope you enjoy this week's "Instructor's Tip" by one of my favorite instructors, award winning nature photographer Russ Burden. To learn more about how Russ captured the above image, join him on one of his photo tours. Visit Russ Burden Photography to get more information.
How To Shoot Rainbows
There’s nothing like dramatic light to take a scenic that’s been shot thousands of times to a new level. Impending storms, shafts of sun spotlighting key compositional elements, fire engine red clouds, all qualify but what rides highest on many landscape photographer’s list of most dramatic are rainbows. They have it all - prismatic color, a stormy sky lit by the sun, early morning or late afternoon light, and if you believe in folk tales, maybe a pot of gold. They’re adrenaline pumping phenomenons that rev up many photographer’s juices.
Finding a rainbow requires a number of natural events to occur. First off, the horizon by the setting or rising sun must be clear and the sun needs to be lower than forty two degrees in the sky. With your back to where it rises or sets, turn so your shadow falls directly in front of you so you’re positioned one hundred and eighty degrees from the sun. The point at which you now face is known as the antisolar point. This is where the arc of the rainbow will appear providing there is moisture in the sky. When all factors come together, a rainbow materializes. Understandably, they’re not an every day occurrence.
When you’re out in the field and it’s rainy, look toward the horizon of the setting or rising sun. If you see an opening in the clouds, look for a foreground in the direction of the antisolar point that has character or interest and wait. Shoot it vertically, horizontally, with a wide angle to take it all in, and with a telephoto to sample portions with the most dramatic color. Use a polarizer to enhance its color but be careful because as you rotate it, you can also eliminate it.
To learn more about this subject, join me on one of my photo tours. Please visit www.russburdenphotography.com to get more information.
Take a class with Russ or a fellow Digital Photo Academy instructor in your area, check out the Digital Photo Academy. I took Russ' intermediate and advanced courses last year, and he continues to be a strong source of knowledge and encouragement as I progress in my photography.
Sunday, October 11, 2009
Growing Pains: Marketing Strategy Tips from Sarah Petty
I have been collecting daily marketing tips from boutique studio photographer Sarah Petty since her company, "The Joy of Marketing," hosted the Master Photographers' Telesummit Marketing series last month. I thought I would pass them along to my followers and reread them myself to help the knowledge sink in. Here's your first tip. And look for more every Sunday here on my blog until we reach number 10!
1) CREATE A STRONG IDENTITY: One of the main reasons that small businesses, specifically photography businesses, aren't growing is that their identity lacks focus. Every successful business starts with a great logo and identity. If you're using more than one logo, it's counterproductive! You can't build a brand if you don't have a strong identity. And a strong identity starts with a great logo.
Listen to 5 tips for creating a great logo here.
Labels:
business identity; business management,
business logo,
business management,
marketing tips,
Sarah Petty,
The Joy of Marketing
Saturday, October 10, 2009
Saturday Morning Cartoons
Here is my favorite "What the Duck" comic from this week. Rock on Aaron! "What the Duck" is an online comic strip created by Aaron Johnson. I just love how Aaron's wry sense of humor reflects the current state of photography.
But the genius of his strip is the way viewers can interact with Aaron and his comic character. Folks are welcome to link, post, copy/paste, or save the strips to their own sites, blogs, forums, newsletters, etc. Aaron also allows viewers to suggest titles for his individual strips, and post photos of their own plushy and stuffed W.T. Duck working or hanging out.
Labels:
Aaron Johnson,
comic strips,
comics,
online comic strip,
photography comics,
photography humor,
Saturday Morning Cartoons,
What the Duck
Monday, October 5, 2009
Get Connected: Facebook fans can win another free 8x10!
I am just 19 folks away from a new Facebook benchmark: 200 fans!
When I reach this number, I will give away another 8x10 print, winner's choice from among my favorite landscape, cityscapes, flora and fauna galleries. A winner will be chosen by a randomly selected number generator.
Check out the photos from these selected galleries to see what you could win when you become a fan of Picture Your World Photography! Click this link to join today!
LANDSCAPES
CITYSCAPES
FLORA-FAUNA
Labels:
cityscapes,
Facebook freebies,
flora and fauna,
free 8x10,
freebies,
friends and fans,
Get Connected,
landscapes,
Picture Your World Photography Facebook fan page
Instructor's Tip
Photo by Russ Burden
I hope you enjoy this week's "Instructor's Tip" by one of my favorite instructors, award winning nature photographer Russ Burden. To learn more about how Russ captured the above image, join him on one of his photo tours. Visit Russ Burden Photography to get more information.
Special note from Russ: I just returned from my 10 day nature photo tour to Grand Teton and Yellowstone National Parks. I wish you could have been one of the participants in that we all shot myriads of images despite the ever imposing smoke from the fires. We had two highlights that may never be repeated - a bull moose in a pond under the Grand Teton and an absolutely amazing final morning with fresh snow on Mount Moran with mist and early morning fog accompanied by a clear sunrise to the east - it still gives me goose bumps thinking about both sessions. Join me on a tour and be one of the lucky ones to return with these kinds of images - I'll put you in the right place at the right time! I intimately know every location in each park to which I lead a tour - you can't place a price tag on knowledge and my enthusiasm.
FESTIVALS and PARADES
Parades and festivals offer wonderful opportunities to capture great images of people in costume, photo journalistic events, and decisive moments of expressions. Whether you aim your lens at the participants or toward people in the crowd, you won’t find yourself running short of subject matter. A small town parade or festival can provide more opportunities than a grand scale one such as the Macy’s Thanksgiving parade in that the restrictions to gain access to the participants aren’t as rigid. Check the events sections of your local paper to see when one is scheduled and give it a whirl.
People Shots: Knowing how to work with people is equally as important as knowing how to work the camera. If you see an interesting face, don’t be afraid to approach that person and ask if he or she wouldn’t mind being photographed. More often than not you’ll get a positive response. When you begin to make your photographs, direct the person as to where to look or place their hands. If the background is cluttered or distracting, take a look around the area to find a better shooting location and ask if he or she wouldn’t mind moving. Be friendly while you're engaged in your image making by simply talking about the event. Look for that special moment of emotion that completes the time spent with your subject. Don’t be discouraged if the first time you try this it doesn’t pan out. The more you make the attempt, the more natural it feels.
Take a class with Russ or a fellow Digital Photo Academy instructor in your area, check out the Digital Photo Academy. I took Russ' intermediate and advanced courses last year, and he continues to be a strong source of knowledge and encouragement as I progress in my photography.
Saturday, October 3, 2009
Saturday Morning Cartoons
Here is my favorite "What the Duck" comic from this week. Rock on Aaron! "What the Duck" is an online comic strip created by Aaron Johnson. I just love how Aaron's wry sense of humor reflects the current state of photography.
But the genius of his strip is the way viewers can interact with Aaron and his comic character. Folks are welcome to link, post, copy/paste, or save the strips to their own sites, blogs, forums, newsletters, etc. Aaron also allows viewers to suggest titles for his individual strips, and post photos of their own plushy and stuffed W.T. Duck working or hanging out.
Labels:
Aaron Johnson,
comic strips,
comics,
online comic strip,
photography comics,
photography humor,
Saturday Morning Cartoons,
What the Duck
Friday, October 2, 2009
Get the Goods: Last chance to get audio of marketing summit
Sarah Petty assures me that today is the LAST CHANCE to purchase the Master Photographers' Marketing Series Telesummit 16 hour recording and pdf outlines. After midnight tonight (central time October 2nd), this event will be gone.
I just got mine, and I can't wait to listen to all of it!
For just $99 you'll learn:
The dos and don't of social marketing and what not to waste your time on
How to run a successful event from soup to nuts
How to avoid the 4 marketing disconnects that result in business failure
The single relationship builder you can't afford not to do
The one product that will make or break your studio
Buy it now and you'll immediately get a link to a download of an audio mp3 of all 16 hours of the recording.
And don't forget, the telesummit speaker specials also expire after midnight central tonight. So if you're in need of templates, brushes, props, actions, education and more, you can't beat these specials. And you can't buy them at these prices anywhere else!
Could you use $200? Sarah wants to hear what everybody thought about the Telesummit. Just answer this quick survey and you can win a $200 American Express gift card.
Subscribe to:
Posts (Atom)