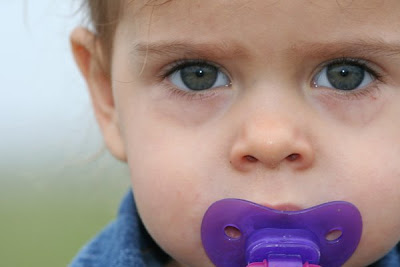
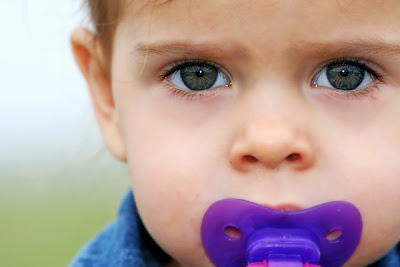
Here is an example of the jewels inside King's blog:
"Photoshopping EYES:
My favorite secret that photographers hate to tell!
Take the above image you are working on (if it is a portrait and you like the color) and compress it using ctl+shift+E. Now ctl+J to copy the layer once.
Go up to the Filters and scroll down to Sharpen. Go to smart sharpen and click. Increase the slider to your desired level looking only at the eyes on the portrait. Once they appear bright click OK. Now you need to cover this layer with a mask by pressing alt+the mask button (next to the adjustment layer button ... at the bottom of the layers box). This should cover the layer with a black mask making the visibility of the sharpen gone. Now go to your brushes and click. Adjust the size of your brush and zoom into your picture around the eyes. Color with white on the adjustment layer and you should start seeing the sharpened eyes come through. Only do this to the iris of the eyes as it will look funny around the rest of it by possibly adding noise to your picture... just color within the lines! Or it can make the eye look red too if you stray into the white of the eye. When you have it like you like it you're done with this! The eyes should be brighter already. If you don't think they're quite sharp enough press ctl+J and see if that looks better. Adjust the opacity of this layer if too much."
Now for a romantic blur...
Compress this layer when you have it like you like it by pressing ctl+shift+E again. Now ctl+J to copy it.
Go to the top and select filters and go down to blur and then choose gaussian blur. Increase the strength until you have a nice blur, but not too terribly much. Click ok. Now decrease the opacity of that layer to about 30%. This should give it that romantic blur seen in the old movies. I like to bring out some of the sharpness now of the layer underneath. We're going to do the same method as before by except we're going to cover this layer with white and paint with black. To do this hit the mask button by itself (the circle within a rectangle at the bottom of the layers box next to the adjustment layer button). Now get your brush and paint with black over the eyes, lips, fingers, etc. However you like it. Play with it and see what you think."
She also includes valuable information about using adjustment layers and masks to do selective and global edits, something I am only recently learning and practicing myself after attending a Photoshop class with Armando Martinez of Illuminate Workshops.
Check out before and afters of King's images:
BEFORE

AFTER


1 comment:
Those are two on my favorite and most used Photoshop tricks! Honestly, they have saved some images that just weren't working and made them very good rints for clients.
You can create actions to do a lot of the work of both of those to save some time too.
Post a Comment